Wireless has always had a different vibe than traditional networking.
With wired networking, most engineers feel grounded. You can see the cable. You can understand the port. You can trace the path. It feels deterministic. Wireless, on the other hand, often feels invisible, unpredictable, and just a little bit magical.
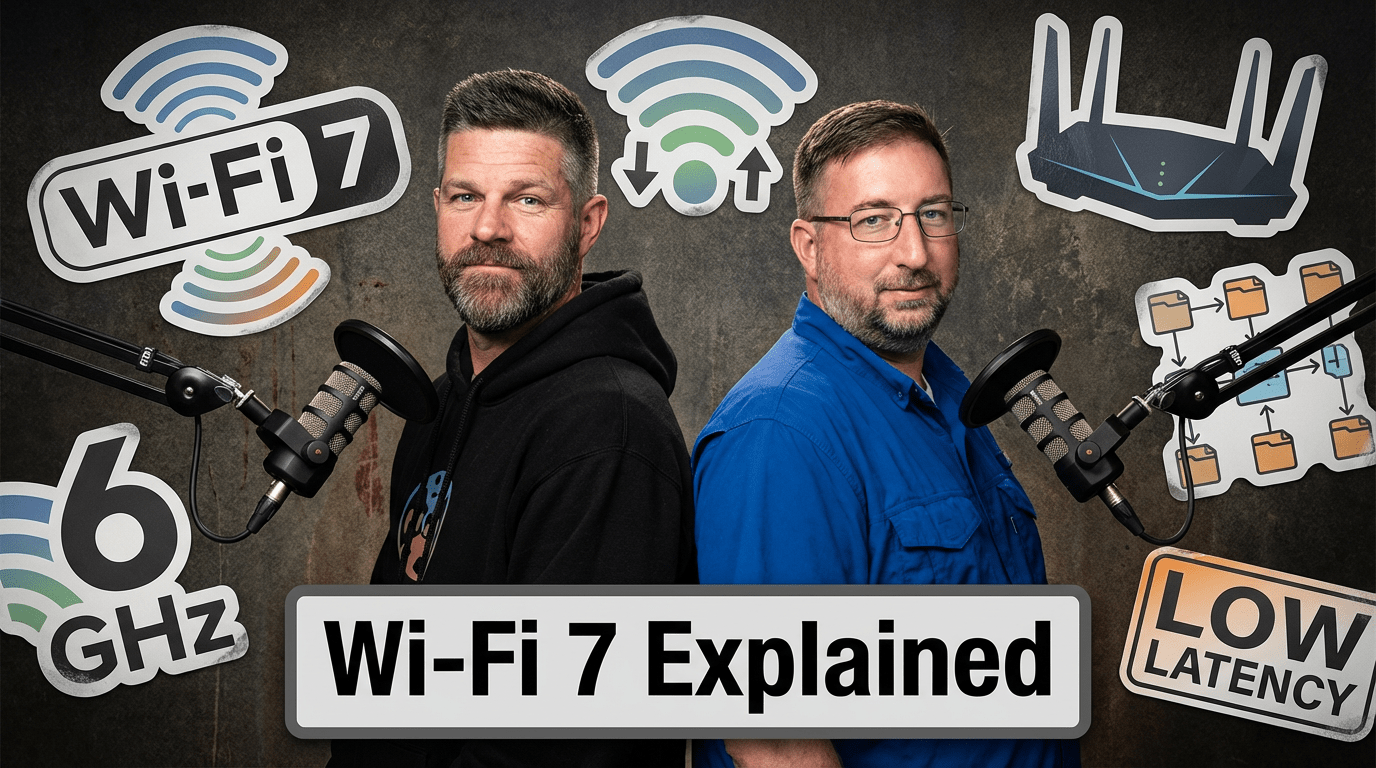
Andy Lapteff 🛠️💬 sat down with Greg Grimes to talk through Wi-Fi 7, not from the perspective of marketing hype, but from the perspective of engineers trying to understand what actually changed, what problems it solves, and whether it matters in the real world.
Wireless has always been its own specialty
One of the most relatable parts of this conversation was the acknowledgment that wireless often feels like its own lane inside networking.
A lot of engineers come up through route/switch, spending years learning VLANs, OSPF, BGP, optics, and cabling. Wireless is usually adjacent to that world, but not always central to it. It can feel like a sub-specialty with its own language, tools, design principles, and troubleshooting methods.
Instead of assuming deep wireless expertise, the episode translates wireless concepts into terms that more traditional network engineers already understand: contention, collisions, bandwidth, segmentation, and efficiency.
A quick history of how we got here
The episode starts with a quick look at the evolution of Wi-Fi, from the early 802.11 days through Wi-Fi 5, Wi-Fi 6, and now Wi-Fi 7.
One of the key takeaways is that wireless innovation hasn’t just been about raw speed. It has also been about making better use of the air.
As devices multiplied and use cases became more demanding, the problem stopped being “can we do wireless?” and became “can we do wireless well when hundreds of devices are competing for airtime at once?”
That’s where newer wireless standards really start to matter.
The real challenge in wireless: shared airtime
A huge part of understanding wireless is understanding that it is a shared medium.
Unlike a modern switched wired network, where traffic is segmented and predictable, wireless devices are all trying to use the same airspace. That means performance is shaped not just by throughput, but by timing, coordination, interference, and contention.
More bandwidth is helpful, but the real win comes from using that bandwidth more efficiently so devices can transmit faster, spend less time occupying the air, and reduce contention for everyone else.
That idea becomes the foundation for understanding OFDMA, resource units, and eventually Wi-Fi 7.
What makes Wi-Fi 7 different?
The headline feature in the discussion is Multi-Link Operation (MLO).
In simple terms, MLO allows devices to use multiple wireless links or bands together as a single logical connection. That means traffic can be coordinated across different channels in ways that improve performance, flexibility, and airtime efficiency.
Instead of thinking about wireless as one device fighting for one lane at one time, Wi-Fi 7 introduces a much smarter approach to how the lane is used. Combined with wider channels and more advanced scheduling, Wi-Fi 7 pushes wireless toward something engineers don’t usually associate with Wi-Fi: deterministic behavior.
That doesn’t mean wireless suddenly becomes identical to wired networking. It doesn’t. But it does mean the system gets much better at coordinating access and reducing chaos.
For engineers who’ve always viewed wireless as “best effort at best,” that’s a pretty big shift.
Who actually needs Wi-Fi 7?
Not every new standard is an automatic must-buy, and Greg makes that clear. For the average home user, the difference between Wi-Fi 5, 6, and 7 may not be dramatic in day-to-day use. Streaming, browsing, and casual gaming may not justify a major upgrade on their own.
But enterprise environments are a different story.
Wi-Fi 7 starts to make a compelling case in places where density, performance, and future demand matter:
Large classrooms
Auditoriums
Stadiums
Medical training environments
AR/VR-heavy use cases
Organizations planning for high-bandwidth wireless applications
That’s where the business case gets interesting. It’s not just about theoretical speed. It’s about supporting more demanding experiences more reliably, especially in environments where cabling every endpoint isn’t realistic.
The bigger lesson: use case always wins
If an organization recently invested in Wi-Fi 6 or 6E, there may be no urgent reason to rip and replace. But if they’re running aging infrastructure, facing end-of-support issues, or preparing for bandwidth-intensive wireless applications, Wi-Fi 7 may be the right strategic move.
That kind of nuance matters. It’s easy to get swept up in specs, peak throughput numbers, and shiny new hardware. But good engineering decisions happen when you connect technical capability to actual business need.
More than wireless: a reminder about community
Greg wrapped the episode by describing what the Art of Network Engineering community has meant to him over the years, and why the people in this space matter just as much as the technology. It’s a great reminder that networking isn’t only about protocols, platforms, and performance. It’s also about finding your people, learning together, and helping each other grow.
Final thoughts
If wireless has ever felt like a black box, this episode is a solid entry point into understanding what Wi-Fi 7 really brings to the table.
It doesn’t pretend to be an ultra-deep wireless masterclass. It does something more useful: it makes the topic approachable for engineers who want practical understanding, real-world context, and a better grasp of where wireless is headed next.
Wi-Fi 7 isn’t just about going faster. It’s about making wireless work better, especially where scale, density, and modern application demands push traditional designs to their limits.
And that’s something every network engineer should at least have on their radar.
We’ve lived through enough buzzword cycles to know the pattern: new label, new slide deck, same operational pain. So when “AI” shows up on everything from toilets to pens to enterprise platforms, the default response in most network circles is the same: the eye-roll.
But there’s a shift this episode discusses in a pragmatic way.
AI is finally crossing from “interesting” to “operational,” and the difference isn’t the hype. It’s the plumbing.
In our latest episode, we sat down with John Capobianco and Michael Bushong to talk about what network engineers can do with AI, without turning it into another “you’re behind” guilt trip.
We called it TheABCs of AI, but what we really built was an on-ramp.
The real problem: we’re still stuck at “automation adoption”
John referenced the Network Automation Forum survey showing a familiar, and disappointing, pattern: a large portion of networks still aren’t meaningfully automated.
And it’s not because network engineers are lazy.
John framed it as a three-way split:
Tooling friction (NETCONF/RESTCONF/templating/DSLs/YANG flavors… pick your poison)
Cultural resistance (“I became a network engineer, not a software developer”)
Enterprise incentives and governance (stability over innovation, air-gapped constraints, change control, etc.)
Mike added an uncomfortable truth: in many environments, networks are fragile because we rarely change them. And when you combine fragile systems with fear-based change control, you get what many of us have lived through:
blackout windows that stretch for months
draconian approval processes
“temporary” exceptions that become permanent snowflakes
So if you’re waiting for the perfect tool to fix fragile operations, you may be waiting forever.
The narrative that backfires: “automate or die”
One of the biggest blockers isn’t technical. It’s psychological.
Our industry has spent years telling engineers: “Please build the system that replaces you.”
Then we act surprised when adoption is slow.
AI isn’t inherently a job-destruction machine. It’s a force-multiplier. The risk isn’t “AI replaces people.” The risk is: people using AI displace people who aren’t.
That’s not doom. It’s a choice.
And it’s also why this moment is more opportunity than threat, if you jump on now.
The “Hello World” isn’t coding. It’s connecting.
Most people’s AI experience looks like this:
open ChatGPT
type a question like it’s Google
get a decent answer
move on
That’s not where the real value is.
John’s point was simple: LLMs are powerful, but they’re still “closed book.” They have a knowledge cutoff. They hallucinate. They don’t know your environment.
So the breakthrough isn’t better prompting. It’s connecting the model to trustworthy, real data and real tools.
That’s where four terms matter.
Four terms you actually need to know
If you take nothing else from this episode, take these:
1) LLM (Large Language Model) The “brain” that generates text (and can reason + call tools). ChatGPT, Claude, Gemini, etc.
2) RAG (Retrieval-Augmented Generation) A way to ground the model in your documents/data by retrieving relevant context before it answers.
3) Agentic AI Instead of one-off answers, an “agent” can take a goal and execute steps: retrieve data, run a tool, analyze results, produce output.
4) MCP (Model Context Protocol) The connective tissue. John described MCP as a protocol moment, like HTTP for the web or SMTP for email, because it standardizes how AI clients call tools and access context.
This is the piece that turns AI from a clever chat window into an operational workflow engine.
The real “Hello World” for network engineers: NetBox / Nautobot + MCP
Here’s the most practical part of the episode.
If you’re a network engineer and you want a non-scary, high-value first step, don’t start with “push config.” Start with your source of truth.
John recommended using NetBox or Nautobot (in a sandbox/demo environment) and connecting it via MCP to an AI client.
Why this is the perfect “Hello World”:
It’s relevant to your daily work
It’s bounded (read-only to start)
It eliminates spreadsheet scavenger hunts
It unlocks natural language access to your own system of record
The moment we heard John say: “What circuits do we have in Atlanta?” or “What IPs are available in this subnet?”
…our brains recalled the hours lost hunting through SharePoint, spreadsheets, jump boxes, and stale docs just to answer basic operational questions.
That’s not “AI magic.” That’s workflow relief.
Safety: start read-only, then earn trust
A major theme was avoiding the “bad vibes” version of AI: dumping code you don’t understand into a terminal and getting gaslit by a chatbot telling you “we’re so close.”
The safe path John laid out:
Start human-in-the-loop
Start read-only (logs, show commands, diffs, compliance)
This is how network engineers adopt tools: prove it safely, then expand.
Why this matters now: the train is still in sight
John made a point I think a lot of people need to hear: MCP is basically a year old. You’re not “too late.”
But you don’t want to wait until this becomes table stakes.
His “lottery ticket” framing stuck with us:
Early adopters get outsized leverage and opportunity
Late adopters find the keg empty
Not because they’re less smart, but because momentum compounds.
What’s next: we’re building the Hello World episode
At the end of the episode, we made a commitment: we’re going to record a practical “Hello World of AI” walkthrough, connecting an AI client to a source of truth, in a safe environment, and showing that this is possible without being a full-time software developer.
No hype. No shame. Just a clear on-ramp.
If you’ve been rolling your eyes at “AI,” keep rolling them, but bring curiosity too.
When most people think about networking, they think about uptime, latency, and maybe the occasional late-night maintenance window.
When networking teams think about mission-critical infrastructure, it often means protecting revenue.
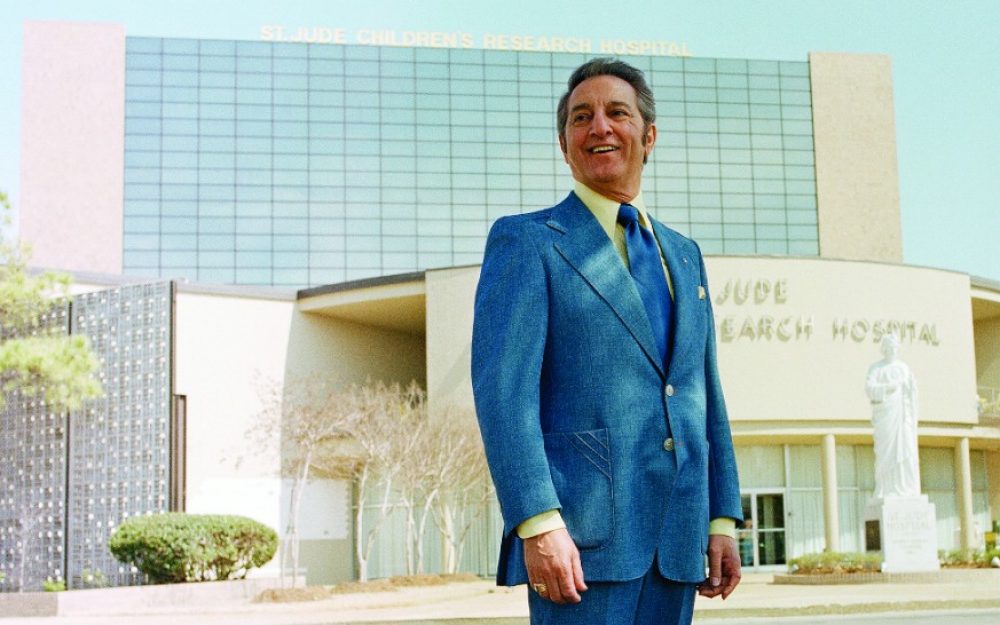
But at St. Jude Children’s Research Hospital, “mission-critical” is viewed through a different lens. Their network supports run-of-the-mill business operations, but it also supports patient care, life-saving research, and the global fight against pediatric catastrophic disease.
We sat down with Remington Loose and Josh Morris to explore what it really means to design and run a mission-critical network in an environment where the stakes are profoundly human.
A Mission That Reframes the Work
St. Jude’s mission is simple and powerful:
Advance cures and means of prevention for pediatric catastrophic diseases through research and treatment.
Families never receive a bill for treatment, travel, housing, or food. That mission shapes every operational decision across the organization, including IT.
For their network engineers, that creates a different kind of motivation.
Instead of optimizing for profit or productivity metrics alone, the work directly supports clinicians, researchers, and ultimately children fighting life-threatening diseases.
As Remington put it, working at St. Jude means you never lose sight of why the work matters. Patients, families, and staff share the same campus, reinforcing the human impact behind every system and service.
A Campus Network Unlike Any Other
St. Jude operates as a large, highly interconnected campus environment rather than a sprawling WAN of hospitals.
But don’t let “single campus” fool you.
Within that footprint exists one of the most technically diverse access networks you’ll find anywhere:
Clinical care environments
Research laboratories
Imaging facilities
Education and global collaboration programs
Hospitality services for families
Each domain brings radically different technical requirements and risk profiles.
Research Data at Massive Scale
Supporting research at St. Jude isn’t just an IT function; it’s a high-performance networking challenge at enormous scale.
Consider just one workflow:
High-speed microscopes capture cellular imagery from multiple angles
Systems identify cells of interest in real time
Selected samples are sequenced genetically
Resulting datasets are recombined for multi-omic analysis
The data volumes involved?
Multiple terabytes per dataset, sometimes more.
And the infrastructure supporting it includes:
Custom-built scientific instruments
Prototype research systems with no documentation
High-performance workstations
Specialized storage and sequencing platforms
In some cases, researchers build the instruments themselves, leaving IT to figure out connectivity, throughput, and security from scratch.
As Remington described it:
“We ask what ports it needs and the answer is, ‘We don’t know yet.’”
That’s networking on the bleeding edge of science.
When Downtime Has Scientific Consequences
In most enterprises, downtime means lost productivity or revenue.
In research environments, the impact can be far more severe.
Josh shared an example:
A research job had been running for seven days using rare patient samples. A network disruption caused the job to fail, forcing researchers to restart the entire process and obtain new samples.
That introduces:
Financial cost
Research delays
Patient inconvenience
Potentially lost scientific progress
It’s a powerful reminder that uptime in research networks isn’t just operational, it’s mission-critical.
Designing Wi-Fi for Patients
One of the most human moments in the episode came from an unexpected place: guest Wi-Fi.
Josh recounted helping a young patient connect a new Xbox game that wasn’t working due to firewall restrictions. After fixing the issue, he stayed and played for hours with the child.
That experience reshaped how he viewed guest networking.
St. Jude ultimately deployed fully open guest Wi-Fi (with appropriate segmentation and controls), recognizing that connectivity isn’t a luxury for patients and families.
It’s a lifeline to:
Entertainment
Education
Social connection
Emotional relief
Guest Wi-Fi became a critical service, not an afterthought.
The network name?
HopeNet.
Security Without Slowing the Mission
Healthcare and research environments introduce layered security requirements:
HIPAA compliance
Clinical system protection
Research data governance
Global data-sharing regulations
PCI environments (retail, cafeteria, etc.)
St. Jude’s journey mirrors many enterprises, evolving through stages:
Perimeter + distributive firewalls
VRF segmentation and centralized firewalls
NAC and dynamic access controls
Toward zero trust and identity-driven policy
But the twist is scale and diversity.
Security controls must protect:
Managed endpoints
BYOD patient devices
Research instruments
Legacy clinical systems
Global collaborators
All without breaking critical workflows.
Automation: From Helpful to Necessary
Campus growth is accelerating rapidly:
~30% network growth multiple times in recent years
New buildings
Expanding research demands
Headcount hasn’t scaled at the same rate.
Automation moved from “nice to have” to essential.
Current initiatives include:
Configuration compliance via Ansible
Infrastructure deployment with Terraform
Automated software image management (SWIM)
One major win:
Switch upgrades that once took 3–4 months can now be completed in 3–4 weeks.
That’s operational transformation, not just efficiency.
AI, HPC, and the Infrastructure Behind Discovery
AI isn’t hype in research hospitals.
It’s being applied to:
Medical imaging analysis
Pediatric-specific model training
Pattern detection in small datasets
Interestingly, the infrastructure built for AI, high-performance fabrics, massive throughput, and distributed compute, also solves long-standing research networking challenges.
Even without AI workloads, the architecture is valuable.
Quantum: Preparing for What’s Next
St. Jude is also exploring quantum computing partnerships, particularly around medicine discovery.
Quantum excels at solving molecular interaction problems, such as:
Protein binding
Drug design
Molecular geometry optimization
For pediatric diseases with limited sample sizes, quantum simulation could accelerate discovery dramatically.
From a networking standpoint, that introduces entirely new questions:
How do quantum systems interconnect?
Can different qubit technologies communicate?
What does a “quantum network” even look like?
It’s early, but preparation matters.
Technology in Service of Humanity
If there was one theme that stood out across the entire conversation, it was this:
Technology is most meaningful when it serves something bigger than itself.
At St. Jude:
Networks enable research breakthroughs
Security protects patient trust
Automation scales life-saving operations
Connectivity brings comfort to families
Mission-critical takes on a deeper meaning when the mission is human life.
Listen to the Full Episode
If you want to hear the full conversation, including deep dives into research networking, security evolution, automation strategy, and quantum exploration, check out the episode:
If you’re a network engineer who’s tried to learn Python and struggled, you’re not alone.
Erika Dietrick returns to share Level 1 of a free course she created that is a missing link for a lot of fellow “CLI lifers” out there.
Network engineering used to be a job you could do with route/switch fundamentals and strong operational instincts. That was enough to build a great career.
Now? Programming fundamentals are showing up everywhere, even for roles that aren’t “software jobs.” And if you’re not building that foundation, you’re quietly putting yourself at risk in a market that has zero sympathy for “it’s not fair.”
Erika’s Secret Sauce
Erika’s Level 1 course is basically exposure therapy for your brain: learning how to think programmatically, how to reason through problems like a developer, and how to build enough context that you’re not just memorizing syntax.
And that matters, because coding feels weird to network engineers.
Not because network engineers aren’t smart, but because it’s genuinely a different mental model. You’re learning new abstractions, new patterns, and new ways of debugging problems, while still being the person responsible for uptime, escalations, and “why is the app slow?”
That’s a brutal paper route.
Vibe Coding = Outsourcing Competence
A developer using AI as an accelerator knows what “good” code looks like. A beginner using AI as a replacement for understanding foundational concepts is copy/paste roulette.
Here’s a real-world example. The day before we recorded this episode, Andy Lapteff 🛠️💬 tried to pull transcripts from Erika’s YouTube course using a Python script generated by AI.
What should’ve been simple turned into 45 minutes of back-and-forth: broken libraries, outdated APIs, version issues, and the classic AI loop:
“Ah, yes, I see the problem. Now it will work.”
Iterating through code Andy didn’t understand.
It didn’t work.
Repeatedly.
Round and round in an AI gaslighting loop.
That experience made something painfully clear: if you don’t understand the basics, you become dependent on the tool to debug the tool. And that’s not empowerment, it’s outsourcing your competence.
Erika’s stance was blunt: vibe coding isn’t the move for most network engineers, at least not until you have enough foundation to know what you’re looking at.
So where does AI fit in?
Erika isn’t anti-AI. She’s anti-delusion.
Her plan for the free course is a three-level progression:
Level 1: Programmatic thinking + fundamentals – Not a “memorize everything” approach, but more like learning how to reason.
Level 2: Use AI to learn faster (with structure) – This is where she becomes the guide: what to learn, in what order, and how to use AI to fill gaps without getting lost.
Level 3: Generate code responsibly – Use AI for the tedious parts, but keep your brain engaged so you can validate, troubleshoot, and improve what you’re shipping.
And crucially: Level 2 gets more “network engineer practical.”
Because it’s hard to apply coding to networking when you know almost nothing. Once you understand concepts like libraries, data structures, and functions, you can start learning network-focused libraries faster- Netmiko, NAPALM, Nornir, pyATS, vendor SDKs, API patterns, gNMI tooling, and more, without needing a semester-long detour.
“Nobody Cares About Your Feelings”
One of the most honest moments in the conversation was this:
A lot of us want to believe the industry will accommodate us.
That we should be able to keep doing the job the way we’ve always done it, and still be rewarded, even as expectations change.
But the market doesn’t care.
Businesses want efficiency. They want repeatability. They want automation. They want people who can work across layers, not just configure one.
That doesn’t mean you need to become a software engineer. But it does mean you need enough literacy to:
understand what automation is doing
collaborate with devs and platform teams
build (or at least maintain) tools that reduce manual work.
Erika said it best: developers aren’t magical, but the culture around software often acts like coding is reserved for the “gifted.”
She’s trying to burn that down..
Erika’s creator journey (and why “free” still works)
We pivoted to her move from big-corporate life into full-time content creation, and how “free content” isn’t the same as “no business.”
Her content is a funnel:
people learn from her work
they trust her expertise
and that leads to sponsored posts, freelance development, partnerships, and (eventually) paid offerings.
But she’s adamant that beginner education should be accessible. If the goal is to get more people into the skills, the onramp can’t be gated by high-priced courses.
If you’ve worked on enough networking projects, you’ve probably lived some version of this story:
A project kicks off with a big goal. Big budget. Big expectations. A timeline appears out of thin air. Weekly status calls begin. Green… green… green… and then suddenly… yellow. And once it’s yellow, you can feel it: the tension, the pressure, the fear of being “the reason” things slip.
Engineers don’t hate projects because we hate structure.
We hate projects when the structure turns into theater.
In this episode (Part 2 of our “Learn the Business” series), we sat down with Eyvonne Sharp and Michael Bushong to talk about the real reasons projects derail, and what to do when you’re the one holding the keyboard while the organization holds the stopwatch.
Here’s the punchline:
Most projects don’t fail because the technology is too hard. They fail because the people system breaks.
1) The project isn’t failing, the alignment is
Eyvonne shared something that should make every technical lead pause:
80–90% of project failures aren’t technical.
When things blow up, it’s usually not because someone forgot how BGP works. It’s because we never got the human fundamentals right:
Do we have executive alignment?
Do we have the right executive sponsor (someone who can actually help when we get stuck)?
Do we have a shared definition of success: what we’re partnering to achieve?
Do we know the scope, the requirements, and where the work stops?
Do we know what “unstuck” looks like when the project hits reality?
One of our favorite moments from Eyvonne’s #AutoCon4 talk was her story about a peer creating a single slide with one question at the top:
“What are we partnering to achieve?”
Just a paragraph. A guiding statement. Something to point at when the project starts drifting.
That one move does more for scope control than a hundred Jira tickets.
Because most of the time, we don’t drift from the plan. We drift from the shared understanding of why we’re doing the plan at all.
2) Why timelines feel fake (and why that’s still a problem)
Andy Lapteff 🛠️💬 admitted something a lot of engineers may feel but don’t always say out loud:
Some project timelines feel like “make pretend calendars.”
We guess. We commit. And then we get punished when reality shows up.
Mike framed this in a way that clicked instantly:
Information asymmetry.
If you don’t know why a date matters, you’ll experience it as arbitrary.
But “arbitrary” doesn’t always mean “pointless.”
Sometimes the date is connected to:
fiscal boundaries and reporting cycles
downstream dependencies and staffing plans
capex/opex timing and budgeting
customer commitments, contracts, or product milestones
Here’s the problem:
When leadership doesn’t explain the why, the team fills the gap with cynicism. And cynicism kills ownership.
So if you’re leading projects, this is a straightforward upgrade:
Don’t start with “Here’s the date.” Start with “Here’s why the date matters.”
That one habit reduces resistance, improves buy-in, and makes constraints visible before they become a crisis.
3) Escalation isn’t “going over someone’s head”
Andy confessed something else:
When I hear “escalation,” I think: “You’re going over my head, to my boss.”
Mike and Eyvonne reframed escalation as something totally different:
Escalation isn’t “me vs you.”
Healthy escalation is: “me and you vs the problem.”
You don’t escalate opinions. You escalate aligned facts + clear options.
Mike’s approach is simple and brutal (in the best way):
Write down the facts, bullet by bullet
Confirm what’s true and what’s assumption/opinion
Clarify what each team is optimizing for
Surface constraints
Narrow to 2–3 viable options
Escalate only when the team shares the factual picture but needs a tie-breaker decision
This is how escalation stops being a courtroom and becomes a decision mechanism.
A great example: resource contention.
Two projects need the same constrained expert (poor Zach). Without escalation, Zach solves it the worst possible way: by working 80 hours to make everyone stop yelling.
Escalation exists so leaders can see where constraints truly are, and make a tradeoff decision the team can’t make alone.
4) How to deliver bad news to leaders
This might be the most practical section of the entire conversation.
Andy asked: If I have to tell you we’re behind, how do I do it without making everything worse?
Mike’s answer was perfect:
Use the smallest number of words possible.
Because what engineers often do in high-stakes moments is dump an avalanche of context as a defense mechanism:
to prove credibility
to soften the blow
to preempt blame
to punish ourselves before someone else does
Leaders don’t need the novel first. They need the headline.
A strong update sounds like:
We’re tracking three weeks behind.
Here’s the short reason why.
Here’s what we’re doing next.
Here’s what we need from you (if anything).
Eyvonne added the part that changes how the message lands:
Stay calm. Avoid blame. Stick to facts. Bring an ask.
Mike added:
Panic never made a situation better.
If you need to lose it, lose it later. In the moment, your job is clarity.
5) The leadership move that instantly drains the tension
Mike shared a story about a mentor named Spencer that hit home.
When something went wrong, even if Spencer didn’t cause it, he’d put his hands up and say:
“That’s my fault.”
Not as a confession. As a reset.
Because blame is gasoline. And when blame disappears, the room can go back to solving the problem.
That story reminds us that a lot of “communication problems” aren’t communication problems.
They’re nervous-system problems.
If people are in fight-or-flight, they don’t communicate well. They perform. They defend. They hide. They freeze.
Remove blame, and you remove the threat. Remove the threat, and you get your team’s brain back.
6) Cheesecake, security incidents, and the power of informal networks
Eyvonne closed with a great story.
Major security incident. CISO on the call. Everything on fire.
The fastest fix didn’t come from hierarchy. It came from relationships.
Eyvonne texted a few trusted people who weren’t on call, the ones she knew could solve it fast. They joined, jumped in, and the incident was resolved in 30 minutes.
Why did they show up?
Because she invested in people before she needed them.
Her secret weapon: Cheesecake Day.
For every birthday on her team, she brought in homemade cheesecake (with raspberry topping and chocolate drizzle). Not as a manipulation tactic, but as a real human signal:
“I see you. I care.”
Those moments build informal networks that move faster than org charts ever will.
And in the moments that matter most, outages, incidents, urgent projects, that network becomes a force multiplier.
The takeaway
If you want to “learn the business,” this is part of it:
The business isn’t only about numbers, markets, and strategy. It’s also how humans coordinate under pressure.
If you can:
create alignment early
communicate clearly when reality changes
escalate without drama
deliver bad news with calm + brevity + a plan
remove blame so the room can solve
invest in relationships before you need favors
…you become the kind of engineer who doesn’t just execute.
You become the kind of engineer who makes projects succeed.
Technical skills will get you in the room. Communication skills determine whether your ideas survive once you’re there.
In this episode, Colin Doyle and Andy Lapteff 🛠️💬 dig into a truth many engineers discover the hard way: being technically correct isn’t enough. Whether you’re preparing for a conference talk, presenting an idea to leadership, or explaining a design decision to peers, communication is the skill that determines impact.
They pull apart how engineers communicate, why it often breaks down under pressure, and what actually works, especially in high-stakes situations like conference talks and executive conversations.
Below are the core lessons, and why they matter.
1. Why stage speaking feels harder than podcasting (even for experienced engineers)
Many engineers are comfortable explaining ideas in familiar settings: team meetings, whiteboards, or podcasts. Put that same engineer on a stage, and suddenly everything feels different.
Why?
Because stakes change behavior.
On stage:
You feel time pressure
You feel judged
You feel responsible for “getting it right”
That pressure often pushes engineers toward memorization, rigid scripts, and rushed delivery, all of which make communication worse, not better.
One key takeaway from the episode:
Comfort doesn’t come from scripting; it comes from familiarity and repetition.
Practicing in a familiar setup, focusing on ideas instead of exact wording, and accepting pauses as normal are what make communication feel natural again.
2. Slowing down is not a weakness, it’s a communication skill
Engineers tend to speak faster when they’re nervous. Faster feels safer. Silence feels like failure.
But effective communicators do the opposite.
They:
Slow their cadence
Use pauses intentionally
Allow space for ideas to land
A critical insight from the episode is that silence feels far longer to the speaker than it does to the audience. What feels like “dead air” is often exactly what listeners need to process complex ideas.
If your audience can’t repeat your message after you leave the room, speed is usually part of the problem.
3. Attention spans reset; plan for it
Most technical talks fail not because the content is wrong, but because the delivery ignores how people actually listen.
Human attention naturally dips every few minutes. Skilled communicators account for this by:
Reinforcing key points repeatedly
Re-centering the message instead of adding new complexity
Designing talks around remembered takeaways, not exhaustive detail
A strong technical presentation doesn’t try to say everything. It makes a few ideas stick.
4. Lead with the takeaway, not the “big reveal”
Many engineers believe good storytelling means saving the point for the end. In technical communication, that approach often backfires.
This episode introduces a simple but powerful concept: “Show them the E.”
Just like teaching someone how to write a letter, people need to see the outcome before they can understand the steps. Leading with the value gives the audience an anchor, something their brain can organize the rest of the information around.
Instead of:
“Let me walk you through all this context…”
Start with:
“By the end of this, you’ll understand why this matters, and how to apply it.”
That shift alone dramatically improves comprehension and retention.
5. Tell the audience’s story, not your own
One of the most important communication lessons in the episode is this:
Your audience isn’t here for your story. They’re here for theirs.
Effective engineers frame their experiences in a way that helps others:
See themselves in the problem
Recognize familiar constraints
Apply lessons to their own work
Your story becomes a tool, not the centerpiece.
When engineers communicate this way, trust builds faster, resistance drops, and ideas travel further.
Why this matters more than ever
As engineering roles evolve, communication is no longer optional.
Engineers present to leadership
Engineers justify architectural decisions
Engineers influence without formal authority
Engineers explain risk, tradeoffs, and impact
Technical excellence without communication limits your reach.
This episode isn’t about becoming a motivational speaker. It’s about becoming a clear, credible, effective engineer; on stage, in meetings, and across your career.
As long as packets flow from point A to point B, does it matter how they got to their destination? RIP, EIGRP, OSPF, BGP: they all “work.”
In a recent episode of The Art of Network Engineering, Andy Lapteff 🛠️💬 sat down with Russ White, Ph.D. and Michael Bushong to talk about IS-IS, a routing protocol most network engineers never learn, rarely see in vendor training, and often dismiss outright. What started as a mildly provocative “change my mind” conversation turned into something deeper: a discussion about architecture, operational reality, and how our industry slowly traded understanding for familiarity.
BGP: Powerful, Familiar… and Doing Too Much
Let’s be clear: BGP is incredible at what it was designed to do.
It’s policy-rich. It scales. It’s intentional. It converges slowly on purpose. That makes it perfect for inter-domain routing on the internet.
The problem isn’t BGP itself, it’s how we use it.
In many modern data centers, BGP has become the universal solution: underlay, overlay, policy distribution, failure handling, traffic engineering, all rolled into one protocol. To make that work, we bolt on mechanisms like BFD, tweak timers, auto-peer neighbors, and effectively reshape BGP into something it was never meant to be.
At some point, you have to ask: If we’re turning BGP into “fancy RIP,” why are we doing this at all?
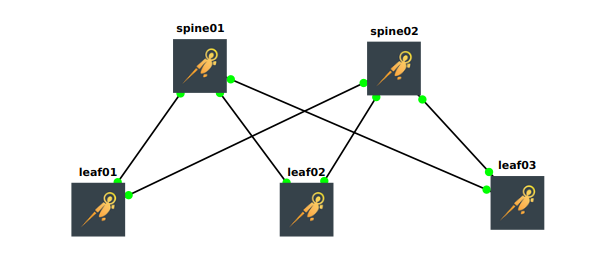
The Case for Separating Underlay and Overlay
One of the strongest themes in this conversation was separation of concerns.
Historically, large networks separated infrastructure routing (IGP) from workload routing (EGP). That separation constrains failure domains, reduces attack surface, and simplifies troubleshooting. When everything lives in one massive routing table, failures don’t stay local, they cascade.
This is where IS-IS shines.
As an underlay protocol, IS-IS is fast, simple, and largely fire-and-forget. It floods link-state information efficiently, converges quickly, and, because it isn’t IP-based, significantly reduces attack surface. You don’t run multi-hop IS-IS. You don’t expose it beyond the fabric. It just does its job.
And then you let BGP do what it’s good at: overlay signaling, policy, and control.
Why IS-IS Feels “Scary” (But Isn’t)
Ask most engineers why they avoid IS-IS and you’ll hear things like:
“The NET address is weird”
“It’s a Layer 2 protocol… somehow?”
“Nobody in the NOC knows it”
“We’ve always used OSPF or BGP”
What’s ironic is that, functionally, IS-IS is simpler than OSPF.
Its TLV-based design makes it flexible and extensible. IPv6 didn’t require a protocol rewrite. New capabilities didn’t require bolting on complexity. And operationally, the configuration is almost boring:
Define a NET address
Enable ISIS on interfaces
Exclude workload ports
Done
Compared to the sprawling configurations many of us proudly built with BGP, route maps, prefix lists, redistribution rules, BFD timers , IS-IS can feel… humbling.
And maybe that’s part of the problem.
Familiarity vs Good Design
One of the most honest moments in the episode came when we acknowledged the real reason many designs persist:
“The NOC only knows BGP.”
That’s not a technical argument, it’s an organizational one.
And it highlights a deeper issue in our industry: we’ve optimized for operational familiarity at the expense of architectural clarity. Vendor training reinforces what’s popular, not what’s appropriate. Over time, that creates feedback loops where entire protocols quietly disappear from collective knowledge.
IS-IS didn’t lose because it was bad. It lost because it wasn’t marketed.
What About RIFT?
We also touched on RIFT, a newer protocol designed for extreme scale in fat-tree topologies. It solves real problems, especially around minimizing routing state on top-of-rack switches.
But even here, context matters.
If your fabric has thousands of routers in a single flooding domain, RIFT might be the right tool. For most networks? IS-IS already solves the problem cleanly, if you design correctly and keep workload routes out of the underlay.
New protocols shouldn’t replace understanding. They should extend it.
Why This Conversation Matters
This episode wasn’t really about IS-IS.
It was about curiosity. About not treating networking as magic plumbing. About recognizing that most catastrophic failures don’t come from protocol bugs, they come from interactions, complexity, and blind trust in abstraction.
Just like a car’s transmission doesn’t matter… until it does.
If you’ve never labbed IS-IS, this is your nudge. If you’ve always defaulted to BGP everywhere, this is your invitation to question why. And if you care about the future of network engineering, this is a reminder that understanding still matters.
Because once the people who really understand these systems are gone, there’s no vendor slide deck that can replace them.
Andy Lapteff 🛠️💬 and Kevin Myers were lucky enough to record an in-person AONE podcast episode recently while attending Tech Field Day NFD39. What started as a discussion about navigating relationships with networking vendors morphed into a masterclass on how to build the right network for the right reason, and why too many engineers still start with the wrong question.
“Don’t ask, ‘What gear should I buy?’ Ask, ‘What problem am I solving?’”
That was one of Kevin’s early mic-drop moments, and it sets the tone for the whole conversation.
Kevin breaks down the reality that far too many networks are built backwards: starting with vendor relationships, gear availability, or budget cycles instead of business goals, technical requirements, and operational reality. He urges engineers to flip the script:
“Start with a blank sheet of paper. Design the network first. Then ask which vendor can support that design.”
This mindset shift is especially important in today’s networking landscape, where SDN, cloud, whitebox, and overlay technologies have dramatically expanded the design palette.
The Multi-Vendor Balancing Act
Kevin doesn’t shy away from complexity. In fact, he argues that multi-vendor architectures are sometimes necessary. But they come with a cost.
“Every vendor you bring in adds a tax: on your time, your processes, your tooling, and your people.”
The tax might be worth it if you gain critical features, licensing flexibility, or supply chain agility. But if you don’t have automation in place, a multi-vendor environment can become an operational nightmare. Kevin and Andy discuss real-world ways to abstract that complexity using APIs, open standards, and tools like Ansible or Nornir.
They also get into the cultural challenge of moving an ops team from “pet switch” mentalities to cattle-style management, and how that transition is as much about psychology as it is about tooling.
Whitebox: Buzzword or Business Advantage?
This episode is also a crash course in whitebox networking, but from someone who’s built production whitebox deployments at scale.
Kevin talks about:
Why whitebox isn’t just “cheap gear,” but a strategic architectural choice
How decoupling hardware from the NOS creates flexibility and leverage
What types of organizations (like ISPs, MSPs, and large enterprises) benefit most
Why whitebox isn’t for everyone, and the signs your org might not be ready
He even walks through the real math behind whitebox ROI: from perpetual licensing savings to hardware lifecycle control. This isn’t theoretical, it’s field-tested experience.
Designing with Intent, Not Tradition
The most powerful takeaway? Good engineering doesn’t mean defaulting to what you know. It means pausing, asking the hard questions, and being willing to not buy gear that doesn’t serve the actual network design.
“The best engineers I know can explain not just what they did, but why they didn’t do something else.”
This episode is for any engineer who’s:
Building or rearchitecting networks
Facing vendor lock-in or support frustrations
Exploring whitebox or SDN
Trying to bridge business goals with technical decisions
🎧 Whether you’re on your commute, racking gear, or sipping coffee on a quiet Monday morning, this episode will challenge your assumptions and sharpen your design mindset.
Resiliency myths, public speaking wins, and why MCP matters for NetOps
Public cloud is amazing. It’s also not magic.
When US-East-1 hiccups, the internet feels it. And if you’ve ever spent a night on a data center floor or shipped a change at 2 a.m., you know outages are brutal; on-prem or in the cloud. In this episode, William Collins and Andy Lapteff 🛠️💬 broke down three things every builder should keep in their toolkit: how to think about cloud resiliency, how to use public speaking to accelerate your career, and how Model Context Protocol (MCP) can turn LLM hype into real NetOps workflows.
1) Cloud ≠ resiliency by default
There’s a persistent myth that moving to cloud automatically buys you uptime. In reality, cloud gives you the potential for resiliency if you architect for it.
Key takeaways
Blast radius is real. Some global/legacy control-plane dependencies still pass through heavily used regions. When those regions wobble, the effects look global even if your workloads aren’t there.
Hidden dependencies bite. Teams swear they’re “multi-region,” then discover a quiet API call that still phones home to US-East-1.
Resiliency is engineered, not procured. You don’t buy four nines; you design toward them and maintain them.
Active/active vs. DR is a budget decision. Active/active improves RTO/RPO, but it can double (or triple) your bill. DR is cheaper, but slower to recover.
Compound SLAs matter. Your real uptime is the product of multiple SLAs: DNS, database, queueing, Direct Connect, auth, etc. Do the math.
If you’re starting fresh
Treat “single region” as an exception, not a default.
Inventory your control-plane and data-plane dependencies; look for “US-East-1 by default” assumptions in SDKs, pipelines, and vendor tools.
Run failure-mode game days: kill region-scoped control plane access; watch what still works.
Decide, consciously, where you need active/active vs. DR. Tie the choice to business impact, not hope.
You don’t buy resiliency. You build it, and then you keep building it.
2) Public speaking will level up your engineering career
You don’t need to be the world’s foremost expert to get on stage. You need a useful story and one or two clear takeaways. Speaking forces clarity. Clarity earns trust. Trust moves careers.
What’s worked for us
Lead with story, not slide dumps. The brain remembers narratives, not catalogs. Open with a moment, a tension, a decision.
One or two big ideas. If they remember just a single sentence on the drive home, what should it be?
Don’t live-demo your fate. If the venue Wi-Fi dies, your demo dies. Record a short screencast as backup, or design a “demo via screenshots” flow you can narrate.
Q&A is gold. The questions expose what landed, and what didn’t. Capture them. They’re your roadmap for the next talk.
Understand, don’t memorize. If nerves make you drop a line, deep understanding lets you improvise back to your message.
How to start
Turn a blog post into a 10-minute lightning talk at a local meetup.
Submit a CFP with a strong “so what” and one story that proves it.
Practice out loud. Time it. Trim jargon. Replace bullets with diagrams.
Afterward, write the “one-page takeaway” and share it with the audience.
Do hard things. Confidence compounds. So does clarity.
3) MCP – what it is and why NetOps should care
If LLMs are going to help with real operational work, they need standardized, safe access to tools and data. That’s what Model Context Protocol (MCP) gives you.
The short version: Before MCP, every AI integration looked like bespoke glue; one-off API wiring between your model, your tools, and your data. MCP standardizes that integration layer so an LLM client can reliably discover and use capabilities exposed by many different tools (think: NetBox, ticketing, search, config engines, reporting) without reinventing the wheel each time.
Why that matters in NetOps
Fewer snowflake integrations. If a vendor exposes an MCP server, your AI host knows how to talk to it.
Richer workflows. A model can chain multiple tools: gather router facts → correlate with inventory → update ServiceNow → format an executive email.
Separation of concerns. Keep private data/tools in your environment; grant just the capabilities the AI needs through MCP.
Deterministic guardrails. You choose which tools are exposed and how they’re described. The model gets context it can actually use.
A practical example: From a chat window, you ask:
“Audit BGP session health on these 20 routers, summarize deltas from last week, attach the diff to INC-12345, and email the exec summary.”
Behind the scenes, the AI uses MCP-exposed tools to:
Fetch device lists from inventory,
Run read-only checks,
Generate a report via your saved template,
Update the ticket,
Send a formatted summary.
No custom point-to-point glue. No data copy-paste sprawl. Standard parts, standard contract.
The meta-lesson: size ⇒ complexity; progress ⇒ discomfort
Hyperscalers aren’t infallible; neither are we. Scale breeds complexity. The answer isn’t finger-pointing, it’s designing for failure, communicating clearly, and standardizing the way we connect intelligence to action.
Top Tips:
Architect with blast radius in mind.
Tell better stories about the systems you build.
Learn the new plumbing (like MCP) that turns AI from chatty helper into an operational teammate.
Join the community, grab the merch, stay in the loop
If you don’t have a community, get one. Ours is It’s All About the Journey on Discord, free, supportive, and packed with study groups, happy hours, and folks at every stage (from “just heard about networking” to triple-CCIE). We also finally refreshed the AONE merch: pint glass, water bottles, polos, the works.
Subscribe in your favorite podcatcher so you don’t miss new episodes. If today’s topics hit home, share this post with a teammate who’s wrestling with resiliency, sweating a first talk, or trying to make sense of MCP.
If you’ve worked in networking long enough, you’ve probably had this thought during a company all-hands:
“This isn’t for me. Bunch of Kool Aid. Just let me get back to doing my job.”
But that attitude WILL hurt your career. Not because leadership needs your applause, but because those meetings tell you what the business cares about right now. And if you can’t map your work, automation, networking, operations, data center, to their priorities, your best ideas die in the hallway.
In this episode, we uncover all of the ways in which engineering types can self-sabotage their careers.
Every company really has only two jobs
Michael Bushong said it plainly: inside most companies, you are either:
Building something (product, platform, infrastructure), or
If you’re not doing one of those two things, you’re helping someone who is.
Networking and operations people often get stuck in a third bucket in their heads: “keeping the lights on.” That’s where resentment shows up. Because “keeping the lights on” sounds like cost, not value.
So the mindset shift is this:
If the network is part of the product (ISP, cloud, service provider, large DC fabrics, AI backends), then uptime, performance, and automation are revenue protection. Outage = money stops.
If the network is an enabler (enterprise IT, internal apps), leadership will look for efficiency, reliability, and lower operational drag. Outage = productivity stops.
In both cases the work is important, but the business value is framed differently. If you don’t know which world you’re in, you can’t make a compelling case for your ideas.
Why corporate all-hands feel useless
The episode called out a big disconnect:
Execs often reuse material meant for analysts and investors.
That material is about stock performance, growth narratives, and market confidence.
Employees, especially technical employees, don’t care about narrative, they care about: What do you want me to do differently?
So when leadership leads with “shareholder value,” engineers hear: “So… I’m supposed to care that you make more money?”
Mike’s fix was simple and usable: good corporate communication should tell people two things:
What situation we are in (market slowing, AI exploding, cost pressure, new product push)
Why we operate the way we do in that situation
If people understand the why and the conditions, they can make good, aligned decisions on their own, the same way athletes on the field react in sync without being told what to do.
That’s the real point of leadership communication: distributed, aligned autonomy. Not cheerleading.
Why engineers get stuck: wrong language, right idea
A theme in the episode:
“Most engineers have good ideas. They just don’t package them in the language that gets them funded.”
Here’s how this usually goes:
Engineer: “We need to automate VLAN provisioning; it’s too slow.”
Leadership hears: “Cool tech project, optional.”
What leadership needed to hear: “Right now, app teams wait 6 weeks for a change. If we automate this, we can launch revenue-producing services in hours. That improves time-to-revenue and reduces rework.”
Same work. Different framing. Different outcome.
Mike’s line that’s worth repeating:
“Everyone is in sales. Some people just don’t know it.”
That doesn’t mean you become a political, manage-up, PowerPoint-only person. It means if you want your work to matter, you have to express it in the terms of the people who can say yes. Often that’s not even your boss, it’s your boss’s boss’s boss.
So… what is business value for networking?
From the conversation, business value for infrastructure and operations usually shows up as one or more of these:
Faster time to delivery
Lower operational cost
Reduced risk / higher reliability
Support for new growth areas
If you describe your work in those four buckets, you are speaking business.
Follow the money: AI networking is a durable wave
Toward the end, the conversation hit an important career point: AI is creating the first real networking “pull” we’ve seen in years.
Why?
Training and inference clusters are distributed; the network matters again.
Lossless Ethernet, RoCEv2, UEC, and new transport work are real, hard, and valuable.
If a GPU cluster goes down, that’s not “productivity loss,” that’s “we just stopped a multi-million-dollar pipeline.”
Scott Robohn said it well: networking got invisible for a while, but “the people who care, really care.” AI is making more people care.
Translation for your career: Keep your automation and cloud skills, but start layering in AI data center networking, fabric reliability, and data engineering for AI. That’s where spend is going. That’s where exec attention is. That’s what will get funded.
What to do after listening
Here’s a simple, practical playbook pulled from the episode.
Stop skipping internal updates Listen for signals: are we growing, cutting, entering AI, pushing customer experience, consolidating vendors? That tells you what to propose.
Map your work to their words Take your current project and rewrite it in one of the four business value buckets above.
Pitch at the right altitude Don’t just make it make sense to your manager. Make it make sense to the person who answers to the CFO.
Show speed Execs love speed. If you can demo “3 hours to 30 seconds,” lead with that.
Keep an eye on AI infrastructure If you want to future-proof your networking career, learn the networking side of AI now, not later.
Final thought
The whole episode was basically one big encouragement to technical people:
“Your work matters — but it won’t be rewarded if people can’t understand it.”
You don’t have to become a marketer. You don’t have to love corporate speak. But you do need to connect your technical excellence to business intent. That’s how you get budget, influence, and better work.
If you want to hear the full conversation with all the stories, the “million-dollar muffins” line, and the bit about why some exec talks fail before they start, listen to the episode on The Art of Network Engineering and then share it with the most cynical engineer on your team.
This week on The Art of Network Engineering podcast, Andy Lapteff 🛠️💬sat down with friend and frequent instigator of “weird lab stuff,” Lexie Cooper. We covered space stuff, learning in public, why messy home labs are a feature (not a bug), and the pressure engineers feel to look perfect when the value is often in the struggle.
Learning in Public: Why Vulnerability Wins
We’ve been streaming Andy’s journey learning Python. It’s messy. Sometimes it’s reading from a textbook. Sometimes it’ not-so-quietly yelling at a for-loop. And yes, Jeff Clark jumped on one episode and told us to “just code” with AI’s help. (Love you, Jeff.)
Here’s the real talk:
The gap is real. Most network jobs now include automation in the requirements.
The iceberg effect is real. Polished YouTube tutorials hide the grind. You don’t see the 40 minutes of “why won’t you run” edits.
The audience needs the messy middle. Seeing someone struggle, in a competent, curious, honest way, helps more people start.
Lexie’s take: “we’ve created an aesthetic around perfect labs, perfect racks, perfect code. But the most useful thing to share is the process, including the failures and fumbles.”
“There’s magic in vulnerability. If I can learn in public and be lost, maybe it pulls someone else along.” – Andy
Weird Lab Stuff™ (And Why It Matters)
Lexie thrives in what she calls weird lab stuff. That’s not resume bullet points. It’s curiosity with a camera rolling.
Recent experiments:
Cutting cables on purpose. Take two auto-negotiating NICs, snip the blue/brown pairs, and connect only the orange/green. Outcome? Auto-neg downgrades to 100 Mbps (because you need all eight conductors for gigabit). It’s obvious in hindsight—but feeling the negotiation happen teaches layer-1/2 intuition you can’t skim from a doc.
Oscilloscope on the wire. Turning off features that should stop certain link pulses…and watching pulses anyway. The kicker? Behaviors vary by PHY—the physical transceiver silicon that bridges the ASIC to the medium and houses Ethernet MAC-layer logic. (No, not your MAC table—that typically lives in the switching ASIC. Different “MAC,” same layer, different role.)
If that last paragraph felt new: same. Most cert tracks barely touch PHYs, reconciliation sublayers, or PMD specifics. You don’t need EE depth to be great at networking, but peeking under the hood sharpens your instincts when the “impossible” happens on a wire.
“People think perfect cable management equals ‘real.’ In a learning lab, perfect often means ‘unused.’ The messy stuff is where the learning is.” Lexie
TikTok vs. Twitch vs. YouTube (and How to Actually Stream)
Quick streamer notes from the trenches:
Twitch: best for multi-scene, multi-camera, polished OBS setups.
TikTok Live: unmatched for “flip phone open and go.” Great for reach, perfect for spontaneous lab vibes.
YouTube: we stream our episodes via Riverside to YT; it’s already wired into our workflow. We’re still figuring out multi-platform streaming without summoning a gremlin.
Pro tip we learned the hard way: load your “Starting Soon” bumper inside OBS as a scene, not as a screen-share of a looping MP4. Your future self will thank you.
Career Talk: Networks, Automation, and Being “Allowed” to Be Wrong
We went somewhere a lot of us avoid: the pressure to be infallible, especially when you move from operator to vendor.
The persona tax. As your platform grows, it can feel like you’re “not allowed” to ask dumb questions. But the industry doesn’t need more invulnerable experts; it needs more honest ones.
Automation anxiety is universal. Many network pros don’t want to become programmers, and many don’t have to. But some fluency in Python, Git, and toolchains is increasingly part of the job. AI helps, but basic programmatic thinking still pays dividends: data types, control flow, “how do I think like code.”
There’s still a human in the loop. Automation isn’t a panacea. When the unexpected happens, it’s comforting, and often critical, to have a person to reason through it. Especially when the stakes look like…space.
Space Dreams: How Far Would You Go?
We also let ourselves dream. Would you go?
Mars? Hard pass for both of us (for now). Months in a tin can = existential nope.
The Moon? Lexie: yes—if it’s autonomous. (Same.)
Pilotless planes & pilotless rockets. The automation bar moves. Comfort follows capability. But for the edge cases, the “what now?” moments, we still want humans nearby.
“I trust automation. I also trust having a person when something weird happens.” —Lexie
Hiring, Mentorship, and What’s Next
Lexie’s team is hiring to backfill her as she shifts to a related project (yes, it’s very cool). On-site work is part of the gig, which narrows the field, but the interview panels have been strong.
Lessons she’s absorbing on the other side of the table:
The req is a wishlist, not a gate.
Fit and curiosity often matter as much as checkbox tech.
You learn a ton watching senior engineers probe, guide, and evaluate.
Why This Conversation Matters
Because the industry is changing, and we’re all renegotiating our identities:
From CLI lifers to automation-aware engineers.
From polished outputs to visible process.
From lone wolves to community learners.
If you’ve been waiting to start your lab, your stream, your learning path, this is your permission slip. Start ugly. Hit “Go Live.” Snip a cable (safely). Break something you can fix. And let people see you learn.
Watch, Hang, Build With Us
Subscribe to The Art of Network Engineering on your favorite podcatcher.
Thanks for listening, reading, tinkering, and learning out loud with us. See you in the lab, and hopefully someday on a beach with a perfect line of sight to LC-36.
Learning Python as a network engineer isn’t easy. It’s frustrating. It’s humbling. And sometimes… It’s downright boring.
But it’s also necessary.
In this episode of The Art of Network Engineering, Jeff Clark and Andy Lapteff 🛠️💬 continued our “Python Party” experiment; a live, unfiltered journey through the basics of Python, as seen through the eyes of two networking folks who are learning as we go. If you’ve ever tried to level up your automation skills and felt overwhelmed, this one’s for you.
Why We’re Doing This
The networking world is evolving fast. Job descriptions are packed with terms like Python, Git, Terraform, YAML, and Infrastructure as Code. To stay relevant, we can’t avoid automation; we have to get comfortable with it.
For us, that starts with the basics: learning Python properly. Not vibe-coding our way through random scripts (though that has its place!), but actually understanding variables, strings, and methods so that we can read code with confidence and eventually build our own tools.
Jeff learns by diving straight in and breaking stuff. Andy learns by following the book slowly, line by line, then applying the knowledge in a lab. This mix of styles makes for some great conversations, and plenty of hilarious confusion.
What We Covered This Session
1. Variables & Strings
We revisited the concept of variables, naming something and assigning a value to it, and looked at strings, which are just sequences of characters inside quotes. Simple enough, but the lightbulb moment was seeing how Python executes code line by line and how variables can be reassigned.
2. Methods and .title() Magic
We learned that you can attach “methods” to variables to make them do things. For example, using full_name.title() capitalizes each word in a string. Seeing this in action was satisfying, and it clicked why methods are so powerful for data cleanup and formatting.
3. F-Strings and String Formatting
F-strings (f”Hello {name}”) felt confusing at first, but they’re actually a slick way to combine variables inside a string. It’s a tool you’ll use constantly for automation tasks like building configs or generating emails.
We spent time talking about why extra whitespace matters. A stray space might not look like much to a human, but to Python, “Jeff ” is not the same as “Jeff”. Methods like .strip() and .rstrip() are crucial for cleaning up user input and avoiding subtle bugs in scripts.
5. Learning Styles & Real Talk
We got real about how differently people learn. Jeff’s “just do it” approach works well for him, while Andy needs structure, repetition, and note-taking to make concepts stick. Neither is wrong. What matters is finding a way to keep moving forward, even when it’s uncomfortable.
Why This Matters for Network Engineers
Python basics may seem dry compared to pushing configs or troubleshooting BGP flaps, but these building blocks are exactly what enable us to automate those tasks later.
Understanding variables, strings, and methods isn’t about becoming a full-time developer. It’s about becoming fluent enough to read, modify, and build scripts that solve real networking problems, whether you write them yourself or use AI as your digital coding buddy.
Automation isn’t optional anymore. It’s the path to staying relevant in an industry that’s changing fast.
Final Thoughts
To be honest, halfway through this session, we started to doubt the format. Reading a Python textbook on a livestream isn’t exactly edge-of-your-seat entertainment. But the real value wasn’t in being perfect coders; it was in being honest about the struggle.
If you’ve ever opened a Python book and wanted to slam it shut 10 minutes later, you’re not alone. Keep going. Lab it out. Ask dumb questions. Break things. And keep showing up.
This is a journey worth taking, and we don’t have to trudge it alone.
If you’ve skimmed network engineer job postings lately, you’ve noticed the pattern: automation experience required. Not “nice to have.” Required. Employers expect fluency with APIs, version control, repeatable workflows, and the ability to turn tribal CLI knowledge into code that anyone on the team can run safely.
That’s why we’re launching a new Python Study Session series on The Art of Network Engineering. We’re learning Python from the ground up, and bringing you along for the ride.
We Already Trust Automation Everywhere Else
Look at the parts of your life that quietly “just work” now:
Bill pay & banking: autopay, fraud alerts, round-ups; no more calendar reminders or late fees.
Groceries & deliveries: scheduled orders and curbside pickup; less time in lines, fewer mistakes.
Home & car: thermostats that learn patterns, EVs that precondition batteries, apps that auto-update firmware.
Calendars & travel: smart scheduling, flight rebooking, status notifications; issues handled before you even notice.
Cameras & files: auto-backup, deduplication, search; no more “USB stick roulette.”
Automation moved us from manual busywork to systems that are faster, safer, and more predictable. The lesson is obvious: when repetitive tasks are automated, humans spend time on judgment, design, and improvement.
Now Apply That Mindset to Networks
Networks are perfect candidates for the same shift:
From one-off CLI to repeatable workflows. Use templates and variables to generate consistent configs; no drift, fewer typos.
From manual change windows to tested pipelines. Validate intent with pre-checks, dry runs, and automated rollbacks before touching prod.
From “eyes on glass” to event-driven ops. Stream telemetry, detect anomalies, and trigger safe, idempotent responses automatically.
From tribal knowledge to shared code. Put patterns in Git, review them with peers, and make improvements discoverable and auditable.
From vendor silo to API-first. Talk to controllers and devices through consistent SDKs instead of remembering per-box syntaxes
Why Python Is the Easiest On-Ramp for Non-Coders
If you don’t identify as a “developer,” Python is the friendliest place to start:
Readable syntax: it looks like English. You’ll spend brain cycles on network logic, not curly braces.
Massive ecosystem: libraries like Netmiko, NAPALM, Paramiko, Requests, Jinja2, Pandas, and pytest solve real network problems out of the box.
Cross-vendor reach: most modern platforms expose APIs/SDKs that have Python examples first.
Career leverage: Python fluency maps directly to CI/CD, source control, testing, and infra-as-code skills showing up in net eng job postings.
What We’ll Do in the Series (and Why It Matters)
We’re working through Python Crash Course (3rd Ed.). Episode one gets the basics in place:
Install Python, open the interpreter, and run print(“Hello, Python World”).
Set up VS Code with syntax highlighting and extensions (instant feedback beats guessing).
Learn core concepts; variables first, then build toward lists, dictionaries, loops, and functions with confidence.
Embrace error messages (tracebacks) as our teachers, not punishments.
In future episodes, we’ll connect fundamentals to network-specific wins:
Generate configs from Jinja2 templates and variables (repeatable, human-readable).
Use Netmiko/NAPALM to push changes safely, with pre-/post-checks.
Pull telemetry and API data into simple reports (Pandas) for real visibility.
Add tests (pytest) so changes prove themselves before they touch prod.
Wrap it in a Git workflow so your team collaborates, reviews, and rolls back with confidence.
If You’re New to Automation, Start Here
You don’t need to become a software engineer. You need small, consistent reps that map to daily network tasks:
One command → a function. Take a common CLI step and express it in Python.
One device → a loop. Run the same safe step across a list of devices.
Static text → a template. Turn a config snippet into a Jinja2 template with variables.
Manual verify → assertions. Automate pre-checks and post-checks so success is provable.
Your laptop → a repo. Commit, review, improve. Your future self (and teammates) will thank you.
Participate: Bring your questions, your sticking points, and your “there’s-got-to-be-a-better-way” moments. We’ll solve them together. Subscribe to our YouTube channel and click the notification icon to get notified of our free Python Party Livestreams: https://www.youtube.com/@artofneteng
Automation has already improved the rest of our lives. It’s time our networks catch up. Python is the easiest first step. Let’s take it together.
BGP wins in modern networks because it scales policy, not topology. Use communities to encode intent once and enforce it at the right boundaries; use iBGP with route reflection to distribute reachability cleanly; and reserve local-pref as your go-to knob for deterministic traffic engineering. For overlapping IPs (hello, mergers), communities plus a staged renumber/NAT plan beats endless prefix lists—and IPv6 is your friend for building a unique management plane.
Why BGP, Really?
On the latest AONE episode, Kevin Myers broke it all down for us. BGP succeeded EGP to connect autonomous systems and grew into the Internet’s policy backbone. Unlike IGPs (OSPF/IS-IS/EIGRP) that compute topology with shortest-paths and require consistent LSDBs, BGP doesn’t care how you reach a peer—only that you can, and it gives operators rich levers to prefer, suppress, or steer routes.
That difference is the secret sauce:
IGPs: Everyone in the area learns the same LSDB. Outbound filtering breaks the model.
BGP: Encodes intent as attributes and tags. Inbound/outbound control is expected.
It’s why BGP evolved from “the Internet protocol” into the universal glue for WANs, data centers, and SD-WAN overlays.
The Power Move: BGP Communities
Stop maintaining sprawling, divergent prefix lists. Tag intent at the origin and enforce it at the edges.
Types of Communities
Well-known: e.g., no-export
Standard: ASN:NN (two-byte format)
Large: Four-byte ASN support (ASN:VALUE:VALUE)
Extended: Multi-field tuples, great for SD-WAN signals like SLA state
Pattern
Match prefix → set community at origin.
Enforce policy at WAN/DC borders.
Why it scales
Fewer choke points to edit policy
Safer delegation (junior engineers can apply changes predictably)
Cleaner configs vs. sprawling route-maps
Easy observability: filter the BGP table by community and instantly see what’s left to fix
Real-World Example: Overlapping IPs in a Merger
Two companies both run 10.10.10.0/24. You need connectivity without carnage.
Community-based pattern:
Tag each company’s routes with a company community plus an overlap tag.
Suppress overlapped routes at intercompany borders.
Renumber or NAT gradually, while IPv6 provides a unique management plane going forward.
Benefits:
Safe interim connectivity
Live inventory of overlapped routes (watch the count shrink as you fix them)
No nightly battles with diverging prefix-lists
EBGP vs iBGP: What’s the Difference?
eBGP: Between ASNs; next-hop is rewritten; AS-path visible; own-AS loops dropped (unless explicitly allowed for special cases).
iBGP: Within one ASN; the split-horizon rule means a router won’t re-advertise routes learned from one iBGP peer to another.
Scaling iBGP
Everyone peers with everyone. Works, but explodes in config overhead. Some providers automate this today.
Route reflectors (RRs): Designate a few routers as RRs. Clients peer only to RRs, which “reflect” routes. This is the common enterprise pattern.
The Attributes That Actually Matter
BGP has plenty of nerd knobs, but in daily ops, three stand out:
LOCAL_PREF: Your main lever for deterministic path selection.
AS-PATH / MED / weight: Secondary tools, useful but less commonly relied on.
Keep it simple: reserve local-pref tiers (e.g., 300/200/100) for A/B/C path preferences, then layer on other attributes as needed.
SD-WAN and BGP
Many SD-WAN designs run BGP under the hood. Extended communities often convey SLA state from spokes to hubs (e.g., “in-SLA” vs “out-of-SLA”), enabling policy-driven return-path control without brittle ACL gymnastics.
Why Not Just Redistribute into an IGP?
Legacy designs pushed BGP-learned routes into OSPF or EIGRP. That doesn’t scale in a world of multi-DC, multi-cloud, and overlays.
As path diversity grows, IGPs buckle under policy complexity. BGP is the right tool: keep external reachability in BGP and distribute with iBGP, not by flooding the IGP with external specifics.
Practical Starter Patterns
Community schema: Define a simple, documented map:
Border enforcement: On WAN/DC edge routers, match communities to permit/deny/prefer.
Default knobs: Use local-pref tiers (e.g., 300/200/100) to encode A/B/C path preferences; reserve MED/AS-path tweaks for inter-AS cases.
iBGP design: Two route reflectors per domain; keep configs boring and repeatable.
Ops hygiene: Always verify whether communities pass across peerings; many providers strip or re-mark.
The Perennial Debate: Is BGP a Routing Protocol or an Application?
You’ll hear both takes. What matters operationally: BGP is a policy distribution mechanism for reachability. Treat it as your intent bus—encode context once (communities/attributes), then enforce predictably at the right boundaries.
Key Takeaways
Use communities to encode policy; enforce at few strategic points.
Prefer local-pref as your first-line traffic-engineering control.
Scale iBGP with route reflectors (or automate full-mesh if you’re brave).
Handle overlaps with communities + staged renumber/NAT; adopt IPv6 for a unique management plane.
Expect providers to strip/rewrite communities; design accordingly.
Join the conversation
You can listen to or watch the episode at the links below, and if you love this episode, let us know! Want more deep-dive protocol episodes (BGP in data centers, EVPN, MPLS, IS-IS)? Tell us. We’ll bring Kevin Myers back—with labs.
The evolution of network engineering has been a fascinating journey to witness, and few people have had a better vantage point than Ethan Banks, co-founder of Packet Pushers. In a recent episode of The Art of Network Engineering podcast, Ethan shared stories from his career that reveal just how much our industry has transformed, and where it might be heading next.
From Programming Dreams to Networking Reality
Ethan’s career began in the early 1990s with a computer science degree focused on programming languages like COBOL. But the programming jobs never materialized, and after two years of searching, he made a bold move: refinancing his car to attend Novell School. That leap landed him a junior consulting role during the early days of client–server networks, when Novell NetWare ruled and TCP/IP wasn’t yet king.
In the mid-90s, the networking world was a patchwork of protocols: IPX for Novell, DECnet for minis, AppleTalk for Macs. By the early 2000s, most had consolidated on IP, paving the way for the internet boom.
Packet Pushers: From Side Project to Full-Time
Fast forward to 2010. Podcasting was still new, and there was no dedicated networking show. Ethan and co-founder Greg Ferro decided to change that. Using Skype to record across continents, they launched Packet Pushers with a simple philosophy: “Just hit publish.”
For five years, they juggled full-time jobs with producing the show before going all-in on the business in 2015. The result? One of the most recognized and respected voices in the networking community.
How the Networking Skillset Has Changed
When Ethan started, being a network engineer meant mastering a relatively small set of technologies; mainly routing, switching, and maybe some firewall work. Cisco certifications were the gold standard, with CCIEs regarded as industry deities.
Today, the role demands far more. Modern network engineers need to be comfortable with:
Cloud architectures
Cybersecurity fundamentals
Automation and DevOps principles
Multi-vendor environments
While certifications like the CCNA still provide valuable foundational knowledge, Ethan is candid: vendor certifications are as much marketing tools as they are educational programs. The real value comes from understanding the why behind design decisions, not just the how of a single vendor’s CLI.
Content Creation as a Career Catalyst
Ethan also has a message for aspiring content creators in tech: don’t be intimidated by existing content. Your unique voice and style could be the key to helping someone grasp a concept they’ve struggled with.
Creating content isn’t just about helping others, it’s also one of the best ways to discover gaps in your knowledge. But he cautions: if your goal is to “get rich” from tech content, you’ll likely be disappointed. Instead, focus on learning, building community, and sharing authentic insights.
Advice for the Next Generation of Engineers
As networks grow more complex, Ethan believes adaptability is the most valuable skill. The CLI is no longer the ultimate measure of expertise; what matters is understanding the desired outcome and being able to achieve it across any platform, whether that’s Cisco, Juniper, Nokia, or a cloud-native solution.
His parting wisdom:
“Configuration is just an implementation detail. The real engineering is in knowing the end result you’re trying to achieve, and how to get there regardless of the tools.”
Ever listen to a podcast and think, “They probably just hit record and start talking”?
Not quite.
Creating a successful tech podcast, especially one that’s run for over 170 episodes, requires way more planning, collaboration, and creative problem-solving than most people realize. In this behind-the-scenes look at The Art of Network Engineering, we’re sharing how we make the show, the tools that keep us sane, and why content creation might be the smartest career move you can make in IT today.
Why Create Technical Content in the First Place?
If you’ve ever thought, “Why would anyone want to hear me talk about networking?” you’re not alone. But here’s the reality: content creation isn’t about shouting your résumé into the void, it’s about showing what you know, how you think, and how you can help others solve problems.
As Andy Lapteff 🛠️💬 mentioned on the episode, he wouldn’t have his current role as a senior product marketing manager at a major networking vendor if he didn’t have a body of work that proved he could communicate at a professional level. Technical skills will always matter, but the ability to explain complex concepts clearly is what sets him apart.
The industry is full of brilliant engineers who struggle to communicate. If you can bridge that gap, doors open.
Planning: Where the Episodes Begin
Most people assume we just fire up Zoom, chat for an hour, and ship the audio. The truth? Each episode begins weeks or months before we ever hit record.
We manage the podcast like a project:
Ideas live in Asana – Everything from random shower thoughts to Discord suggestions get logged and prioritized.
Guests are tracked like gold – We coordinate schedules, prep outlines, and make sure every guest feels set up for success.
AI assists with brainstorming – After 170+ episodes, finding fresh takes is hard. We use AI to analyze past topics and suggest angles we may have missed.
This structure keeps us organized, especially since everyone on the team has demanding full-time jobs outside the podcast.
Recording: Why Quality Matters (and How We Achieve It)
Bad audio will sink even the most insightful content. That’s why we record on Riverside.fm, which captures local, high-quality files for each participant. Even if someone’s internet glitches, the final product still sounds crisp.
We’ve also invested in decent microphones, audio interfaces, and lighting for video, because yes, people do judge content by its presentation. The good news? You can start with budget gear (or even free tools) and upgrade as you grow.
Editing: The Hidden Time Sink
Here’s where podcasting gets real: post-production. Editing used to take three hours per episode. Today, with tools like TimeBolt.io (which automatically removes silence), AutoPod Multi Camera Editor, and AdobeEnhance Speech (which polishes audio), we’ve cut that down to about an hour.
For video, we use AdobePremiere Pro, though free tools like DaVinci Resolve work well too. Thumbnails and promo graphics? Canva all day—it’s simple and fast.
This workflow lets us stay consistent without burning out—a must when juggling careers, families, and life.
Promotion: How Episodes Find Their Audience
Recording is only half the job. Distribution and promotion are where the podcast actually reaches people.
We host on Buzzsprout, which pushes episodes to podcatchers like Apple Podcasts, Spotify for Creators, and everywhere else you can listen to podcasts.
Short clips via OpusClip for LinkedIn, TikTok, and YouTube Shorts
Transcripts for SEO and accessibility
Visuals that match the vibe of each episode
This multi-platform strategy ensures we meet our audience wherever they are, whether scrolling TikTok on a break or searching Google for a network automation tutorial.
Advice for Aspiring Creators: Just Start
A question we get is, “How do I start?”
The answer: stop overthinking it and hit record.
Our co-host Jeff Clark got his first IT job thanks to a simple YouTube series he made called Tech Tip Tuesday. The production quality? Pretty rough. But the value was there, and that’s what mattered.
You’ll get better with every episode. You’ll meet people you never thought you’d meet. And you’ll create opportunities for yourself that traditional networking just can’t match.
Final Thoughts
Creating tech content isn’t easy, but it’s incredibly rewarding. Whether you’re trying to grow your career, share what you’re learning, or build a community, there’s never been a better time to start.
If you’re curious what goes into the process, or just want a peek at the messy, human side of podcasting, check out this episode of The Art of Network Engineering. We’re pulling back the curtain on how the show is made, the tools that keep us running, and the lessons we’ve learned along the way.
In the world of network engineering, staying organized isn’t just helpful, it’s essential. Between managing complex projects, documenting troubleshooting steps, and constantly learning new technologies, engineers juggle more digital clutter than ever. That’s why, in our latest episode of The Art of Network Engineering, Andy Lapteff 🛠️💬 and Jeff Clark crack open their personal toolkits to share how they stay organized and productive.
The Reality of Digital Chaos
Andy kicked things off by sharing a relatable truth: even after years of refining workflows, organization nirvana often feels just out of reach. Engineers everywhere suffer from a common challenge: important information scattered across post-its, notebooks, OneNote tabs, and dozens of browser tabs. What’s the fix? Tools that bring order to the chaos without becoming a burden themselves.
Kanban for Engineers: Asana in Action
Enter Asana. Andy gave us a peek behind the scenes at how he uses it to manage podcast production. Inspired by Agile and Dev workflows, Asana’s Kanban-style boards help visualize each episode’s journey from “idea” to “complete.” By organizing tasks into swimlanes (like Show Ideas → Recorded → Editing → Completed), nothing gets lost in the shuffle. Bonus: subtasks, links, bios, and due dates live right inside each card.
Beyond Proprietary: Markdown & Obsidian
Jeff brought a fresh take with Markdown-based notetaking. Frustrated by the limitations of OneNote (especially when switching jobs), he migrated to Obsidian, a lightweight, local-first tool that works with plain-text Markdown files. Why? Portability, flexibility, and the ability to keep notes searchable, shareable, and usable in any editor. For engineers tired of vendor lock-in, this shift could be a game-changer.
Visual Thinking: Mind Mapping Tools
Some engineers think in bullet points, others in branching diagrams. Andy showcased how mind maps help him clarify everything from marketing strategies at work to navigating YouTube’s convoluted channel transfer process. These tools are ideal for seeing how ideas interconnect and are perfect for visualizing complex systems or workflows.
Taming the Task List: Microsoft To Do
What good is a great idea if you forget to act on it? Andy’s solution: a “Brain Dump” list and a “Top 3” daily priority list using Microsoft To Do. This minimalist approach prevents overwhelm and keeps focus tight. Rather than juggling five different task systems, everything funnels into one place, with just three must-do items highlighted each day.
The Unsung Heroes: Deskpad & Rectangle
Screen real estate is another overlooked frontier. With an ultra-wide monitor, Andy relies on Deskpad and Rectangle to carve up his screen into zones, keeping comms, notes, and work in their respective places. Clean layout = clear mind.
Takeaway: Productivity Is Personal
There’s no one-size-fits-all system. Some engineers thrive in task boards, others in bullet journals or Markdown files. The key is to experiment until you find a setup that aligns with your workflow and thinking style.
🎧 Missed the episode? Catch “Tech Tidying: Sanity Saving Apps” on your favorite podcast platform or watch the visual breakdown on YouTube. Want to share your favorite productivity tool? Hit us up on Discord—we’re always looking for new tricks to try.
When most people picture a cruise ship, they imagine endless buffets, sun-soaked decks, and bustling entertainment venues, not a high-tech nerve center humming below deck. But behind the scenes, modern cruise ships are marvels of both hospitality and IT engineering. The technology infrastructure running a cruise ship is every bit as sophisticated as many land-based enterprises.
More Than Just Wi-Fi at Sea
Every major cruise ship is, in effect, a floating data center. We’re not talking about a single closet with a couple of switches; some of the largest vessels boast 10-15 full racks. Within these racks is a complete suite of enterprise gear: powerful servers, robust storage arrays, mission-critical networking equipment, and dedicated security appliances.
All the services that keep a cruise running, from guest Wi-Fi and mobile apps to point-of-sale systems and access controls, run locally. Because internet connections at sea are expensive and prone to high latency, cruise lines can’t rely on cloud-based solutions for critical functions. When ships switched from physical menus to QR code ordering, for example, they didn’t host those apps in the cloud. Everything, menu data, order processing, even the authentication system, had to live onboard, ensuring reliability even when the ship was far from shore.
The Connectivity Challenge: A Balancing Act
Delivering connectivity in the middle of the ocean is a challenge. Modern ships are equipped with a mix of satellite systems: traditional high-orbit satellites and the latest Starlink low-orbit antennas. A single vessel may juggle up to 15 different connections at once; typically, three geostationary satellites and twelve Starlink terminals.
All these connections must be aggregated and handed off to SD-WAN gear that manages bandwidth, quality of service, and failover. While high-orbit satellites come with about 500ms of latency (enough to make Zoom calls painful), Starlink’s low-orbit connections have slashed that to 150 – 250ms; still not perfect, but a game changer for passengers and crew alike.
There’s even nuance in the setup: Starlink’s maritime solution requires a specific balance of uplink and downlink antennas (usually 8 uplinks to 4 downlinks in a 12-terminal setup), to deal with the directionality and demand patterns of a moving ship.
Wi-Fi on Water: Signal Battles Steel
If you’ve ever cursed the Wi-Fi in a concrete hotel, imagine running wireless in a literal maze of steel. Cruise ships are built with metal bulkheads, not drywall, which means Wi-Fi signals are constantly being blocked or absorbed. To compensate, ships are saturated with thousands of access points, including “hospitality” APs tucked into every cabin.
Making matters even more complicated, certain wireless frequencies (specifically, DFS channels in the 5GHz range) must be disabled at sea to avoid interfering with the ship’s navigation radar. This further shrinks the usable wireless spectrum and demands creative planning to ensure strong coverage in every crowded lounge and cabin corridor.
And it’s not just about signal strength; traffic from guests, crew, and operational systems all needs to be securely segmented. Devices constantly move between zones, creating a complex choreography of handoffs, authentication, and prioritization.
Security: Don’t Put All Your Switches in One Basket
Security at sea isn’t just about firewalls and passwords; it’s about risk management on a fleet-wide scale. Many cruise lines deliberately mix up their vendor ecosystems from ship to ship: one might run on Cisco, another on Juniper, another on Aruba. This “vendor diversity” means a vulnerability in one platform won’t compromise the entire fleet.
Critical operational systems, like engine controls or navigation, are firewalled off with extra protections, including strict traffic policing, rate limiting, and robust device authentication. Zero trust is the name of the game: only pre-approved devices with proper certificates ever touch sensitive systems.
The Ultimate Dynamic Environment
The ocean is always moving, and so are cruise ships and the satellites they connect to. The weather can impact signal quality. And when a vessel docks, it might tap into high-speed fiber on shore for a welcome connectivity boost.
Major network changes and upgrades are rarely made on the fly. Instead, they’re scheduled for port calls or specialized maintenance periods called “dry docks,” when the ship is out of service and engineers can safely upgrade the hardware.
Cruise ship networking is a masterclass in adaptability, innovation, and resilience. Next time you’re streaming a show on the open sea or scanning a QR code for your next meal, remember the floating data center working tirelessly beneath your feet, and the engineers who make it all possible.
The convergence of traditional network engineering and software development is reshaping the networking industry. This transformation was front and center in our latest The Art of Network Engineering podcast episode, where we spoke with Munachimso (Munachi/Muna) Nwaiwu, a Network Automation Engineer at Google, whose journey from Nigeria to one of the world’s biggest tech companies offers both inspiration and insight for the future of our field.
The Unconventional Path into Networking
Muna’s path didn’t begin with a passion for coding—it began with curiosity. After moving from Nigeria to the U.S. in 2018, he pursued a degree in Computer Networking and IT at Alcorn State University. While most of his peers were drawn to software development, Muna was captivated by a bigger question: How is the internet built?
That question led him to networking. But what set Muna apart early on was his recognition that the industry was shifting. Even while in school, he noticed that most internship postings—even for networking roles—required coding skills. Rather than ignore the trend, Muna leaned into it, learning Python, taking on network automation side projects, and investing in himself through certifications like CompTIA A+ and Network+.
“I liked networking, but I knew I needed to code. So I asked my computer science friends for help—I started learning Python and took a Google-backed course on automation. That changed everything.”
Bridging the Divide: Coding Meets Network Engineering
This episode tackled a major challenge in the industry: the widening gap between traditional network engineers and those embracing automation. Muna emphasized how companies are now building bridges across this divide:
Upskilling Incentives: Some organizations are offering bonuses to network engineers who gain coding proficiency.
Cross-functional Pairing: Others are pairing software developers with network engineers to facilitate knowledge sharing—creating teams where, ideally, you can’t tell who started in which discipline.
Muna’s own experience proves how powerful this blend can be. He’s worked in QA, helped translate network requirements into automated deployments, and now codes full-time in Go, managing networking at hyperscale.
“I came into Google with Python, but now it’s mostly Go. It’s faster and more efficient at scale. But I’m glad I started with Python—it made Go easier to learn.”
The Power of Programs: Google’s Network Residency
Muna got his start at Google through the company’s Network Residency Program—a two-year rotational program aimed at developing the next generation of networking talent. These kinds of programs are becoming critical for the industry, especially as fewer college students are exposed to networking or consider it a desirable career.
“Most of my peers wanted to be software engineers. Networking wasn’t seen as exciting or glamorous. I think I just found the right intersection—something I loved and something the industry needed.”
This insight is especially powerful when you consider how rare it is to find professionals who are fluent in both networking and coding. Muna’s hybrid skill set has made him a standout.
Automation at Scale and the Rise of Systems Thinking
One of the most thought-provoking parts of our conversation centered on the evolution of what it means to be a network engineer. According to Muna, the value of memorizing commands or configuration syntax is decreasing. What matters more now is systems thinking—the ability to understand, design, and optimize complex distributed systems.
“You won’t need to type the ‘neighbor BGP’ command anymore. You might not even write the code. What matters is that you understand the system and how to solve problems at scale.”
This shift aligns with the demands of AI-driven infrastructure and massive hyperscale networks. Engineers like Muna aren’t just configuring devices—they’re building the frameworks that operate thousands (or millions) of them reliably and efficiently.
Advice for Aspiring Engineers
For those breaking into networking today, Muna’s advice is practical and clear:
Embrace coding – Start with Python, but be open to learning Go or other languages as needed.
Understand the fundamentals – Protocols like OSPF and BGP may feel outdated, but they build mental models that help in system design.
Think at scale – Always ask yourself, how would I do this for 100,000 devices?
Be curious and adaptable – The tools will change. Your ability to think, learn, and adapt is what will carry you forward.
“AI won’t replace you if you know how to solve complex problems. But you still need to be in the driver’s seat.”
Muna’s story is a glimpse into the future of network engineering—one where hybrid talent, curiosity, and systems thinking are the real differentiators. He’s not just learning how the internet works. He’s helping build the next generation of it.
In the latest episode of The Art of Network Engineering, we pulled back the curtain on a role that many in the industry admire—but few truly understand: the Consulting Engineer (CE). Joined by Nokia’s Principal Consulting Engineer Colin Doyle and CE Jared Cordova, we explored the nuances of this unique position that blends deep technical expertise with real-world customer impact.
What Is a Consulting Engineer?
Think of a Consulting Engineer as a bridge—between sales and delivery, between technical depth and business context, and between what a product can do and what the customer needs it to do. While Sales Engineers (SEs) are broad in their knowledge, covering full portfolios and use cases, CEs go deep. Their superpower? Specialization.
As Jared put it:
“When an SE asks deeper questions like ‘how do I talk to the customer about segment routing vs RSVP-TE?” That’s when we typically get pulled into the customer conversations.”
CEs aren’t just there to pitch gear. They help design real-world solutions, provide implementation guidance, and often become the trusted voice between the customer and the product teams.
Evolution of a Technical Career
Both Colin and Jared touched on how the CE role often represents a turning point in a technical career. It’s not entry-level, and it’s not traditional IT operations. Instead, it’s for professionals who have already established a solid foundation and are ready to level up into strategic, high-impact work.
As a CE, you influence architectures at scale, guide product evolution, and help shape customer strategy. It’s a role for people who want their technical skills to matter—on a bigger stage.
Diverse Paths to the Same Destination
One of the most refreshing insights from this episode was the diversity of backgrounds in the CE world. Jared entered the field not through the traditional networking ladder but via Nokia’s NIFTY program—a post-college rotational experience for aspiring technical talent.
His background in computer science had little networking exposure, a reality he pointed out with some concern:
“In my CS degree, we learned a ton about Python, web development, AI/ML… but almost nothing about networking.”
This disconnect between computer science curricula and the realities of networking is a gap the industry must address—and programs like NIFTY are helping bridge it.
The Best of Both Worlds
For many, the CE role is the ideal career sweet spot: it offers technical complexity, autonomy, continuous learning, and constant human interaction. You’re not stuck behind a desk all day, nor are you stuck in back-to-back Zoom calls pitching slide decks. You’re solving real problems, building relationships, and shaping the future of technology deployments.
Why It Matters
The CE role is more than a job—it’s a strategic function that sits at the heart of product adoption, customer success, and innovation feedback loops. If you’re a network engineer thinking about what’s next, or a CS student wondering how to break into infrastructure, this episode is a must-listen.
It’s a reminder that career growth isn’t always linear, and that some of the most rewarding roles are the ones that let you be both the expert and the trusted advisor.
In a recent episode of The Art of Network Engineering podcast, hosts Andy Lapteff and Jeff Clark welcomed Erika Dietrick—known online as “Erika the Dev”—to tackle a long-standing cultural and technical divide in IT: the disconnect between network engineers and software developers.
Erika, a former Developer Advocate at Cisco with roots in both software development and networking support, brought a rare and valuable perspective to the discussion. What followed was a refreshingly honest, often humorous, and deeply insightful conversation about why these two disciplines so often clash—and how they might finally find common ground.
The Blame Game: “It’s the Network!”
Andy opened the conversation with a familiar story for anyone in networking: the 2AM call blaming the network for a mysterious outage. After hours—or even days—of investigation, the root cause often turned out to be something unrelated, like an expired SSL certificate. These incidents, he noted, stem not from malice but from a fundamental misunderstanding: developers often don’t know how networks work, and network engineers often have no visibility into the applications.
Erika confirmed that, from the developer side, that gap is real. “We learn to code—period,” she said. Most developers aren’t taught about ports, DNS, firewalls, or even how applications get deployed. That missing context creates a friction point during troubleshooting—and, all too often, leads to finger-pointing.
Cultural Barriers and Technical Silos
Beyond the technical knowledge gap, the team dove deep into cultural issues. Developers, often seen as revenue generators, are treated like royalty at many companies, while network teams operate under intense pressure, often out of sight and out of mind until something breaks.
Erika acknowledged that ego can run rampant in developer circles. “There’s this ‘10x engineer’ myth and a constant pressure to prove you’re not a fraud,” she said. “It starts in college and just gets worse in the workplace.” Meanwhile, network engineers are often overworked, underappreciated, and now expected to become coders on top of everything else, with little to no guidance on how to get there.
Automation: Threat or Opportunity?
The discussion shifted toward automation—a perceived threat for some, a lifeline for others. Andy shared a pivotal moment when a teammate automated a change across hundreds of devices using Python, saving months of manual work. It was a lightbulb moment. “I used to be afraid of automation replacing us,” he said. “Now I see it as a way to do more with fewer people.”
Jeff echoed this, arguing that automation isn’t about replacing engineers—it’s about amplifying what they can accomplish. Erika agreed, adding that companies need to do a better job building tools that help network engineers automate without needing to become full-time developers. “Why should you need to be both a network expert and a dev?”
Learning to Think Like a Developer
Perhaps the most powerful part of the conversation came when Erika introduced an idea that resonated deeply with Andy: “It’s not about learning to code—it’s about learning to think like a developer.” That mindset shift, she said, is often the missing piece in developer education, especially for networking professionals.
Andy opened up about his struggles with traditional Python courses, explaining how he’d quit multiple times out of frustration. Erika acknowledged that developer education often fails people like him, not because they lack intelligence, but because the material isn’t designed with their context in mind.
To fix this, Erika is launching a free course specifically for network engineers who want to learn coding with the help of AI. The course is designed around levels of learning: foundational concepts, prompt engineering, and AI-assisted development. It’s less about syntax drills and more about changing how you think and problem-solve.
DevOps: A Common Ground
As the episode wrapped, Erika suggested DevOps as a natural convergence point. DevOps roles often require both networking knowledge and automation skills, making them an ideal space for collaboration. It’s a world where understanding routers, switches, firewalls, APIs, CI/CD pipelines, and version control intersect—and one that might finally help break down the silos.
Final Thoughts: Empathy, Curiosity, and a Bit of Grit
The key takeaway from the episode wasn’t about tools or certifications—it was about empathy and curiosity. As Erika put it, “Real technologists are curious about adjacent fields.” The best engineers—regardless of their specialty—don’t hide behind silos. They reach across them.
If you’re a network engineer struggling to learn Python or a developer frustrated by infrastructure issues, this episode is a must-listen. Not only does it break down the divide, it offers a path forward.
🔗 Check out Erika’s free course on coding for network engineers at her YouTube channel
Git has revolutionized software development over the past two decades, but many network engineers still view it as a tool exclusively for developers. This mindset creates an artificial barrier between networking professionals and powerful tools that could dramatically improve their workflows and productivity. As we explored in our recent episode of The Art of Network Engineering, this resistance often stems from a fundamental misunderstanding about what Git actually is and how it can benefit network operations.
A Tool is Just a Tool—Until It Isn’t
As Andy Lapteff 🛠️💬 points out in the episode, tradespeople like carpenters and plumbers don’t refuse to use tools simply because they weren’t “meant” for their trade. So why do network engineers draw such rigid lines when it comes to tools like Git?
“I’ve worked as a plumber’s helper, a carpenter’s helper… and you never say, ‘That tool’s not for me.’ But I’ve totally said that about software tools—‘That’s not networking,’” Andy admitted. This kind of thinking, while common, limits our ability to evolve and solve problems more efficiently.
Git’s Origins and Why It Matters
William Collins helped contextualize Git by tying it back to its origin story. Git was created by Linus Torvalds—the same person behind Linux—to manage the growing complexity of the Linux kernel project. It was never about source code alone; it was about collaboration, change tracking, and distributed workflows.
That’s where the magic lies for network engineers: Git gives you the ability to track changes in configuration files, collaborate across teams, and maintain a clear, auditable history of who changed what and when.
As Colin Doyle noted, “Git is simply a link in the chain of maintaining continuity of information… It formalizes storage and collaborative workflows we’ve always needed.”
Git for Network Engineers: Real Use Cases
Imagine a Git-based workflow for something as simple (and familiar) as prefix-list changes. Instead of emailing config snippets back and forth for peer reviews or trying to figure out which “_v2_FINAL_REALFINAL” file is the latest, you could:
Create a branch from a main config repository.
Make your changes (e.g., adding a prefix to a list).
Submit a pull request for peer review.
Have it approved and merged, with a clear audit trail and rollback capability.
This process doesn’t replace your CLI skills or your knowledge of devices—it complements them. Git becomes the foundation for better collaboration, more consistent change management, and easier troubleshooting.
Familiar Territory in Disguise
Git’s distributed nature might sound complex at first, but William drew a helpful comparison: it’s not unlike BGP or OSPF. “Each node keeps its own state. Updates are distributed. Eventually, everyone converges on a common view,” he explained.
When you think of Git as a network of repositories, syncing and merging updates just like routing tables do, it becomes far less foreign. It’s distributed state management, just applied to file systems instead of packets.
It Doesn’t Have to Be All or Nothing
One of the biggest takeaways from the episode was the idea that you don’t need to be a Git wizard to get started. Colin emphasized that you can start small—use Git as a backup tool, store configurations, or track spreadsheet versions. The core commands you need—clone, commit, push, pull, and branch—are easy to learn and can offer immediate value.
William put it best: “There’s not a more powerful tool to underpin the principles of uptime, complexity management, and change control in 2025 than Git.”
Final Thoughts
Git isn’t just for coders—it’s for anyone who works with files that change over time and need to be shared, reviewed, and versioned. That includes network engineers.
If you’ve ever been burned by version confusion, config drift, or lack of peer review, Git can be your ally. And no, you don’t have to understand every feature or use it the way a software developer does. Just start using it in a way that helps you—and build from there.
As Andy said in the closing moments of the episode, “The biggest thing I’ve learned is that disqualifying a tool before I even investigate it is a mistake. Git can solve a problem I’m having right now at work.”
For much of our careers, many of us in network engineering have lived comfortably in the lower layers of the OSI model. Layer 2? We speak it fluently. Layer 3? That’s our bread and butter. But what about Layer 7—or even just understanding what’s happening at Layer 4 and beyond in today’s security landscape?
The reality is this: firewalls are no longer optional knowledge for network engineers. They’re central. And they’ve evolved far beyond the basic port-filtering boxes we once knew.
From Ports to Packets: The Legacy Firewall Model
Firewalls were once simple: filter traffic based on IP addresses and port numbers. Application teams would request a port be opened, and the firewall admin—often siloed from the networking team—would grant or deny the request. There was little context and no awareness of what traffic was actually flowing beyond the TCP/UDP headers.
These were the days of stateless and, later, basic stateful inspection firewalls. They did their job—but they did it with blinders on.
Enter DPI and TLS Interception
Fast forward to today, and deep packet inspection (DPI) has changed the game. Modern firewalls can now inspect traffic inside encrypted TLS connections using man-in-the-middle techniques. This means:
The firewall presents its own certificate to the client.
It decrypts the session, inspects the contents, then re-encrypts it for the destination.
This creates tremendous visibility—malware can no longer hide behind HTTPS. But it also introduces new operational complexities: certificate management on endpoints, performance overhead, and privacy concerns.
Application-Aware: Beyond Ports
Modern firewalls are now application-aware. That means they don’t just see traffic as “TCP 443” or “UDP 5000.” They see Facebook, Slack, Zoom, Tor, and more. And they can enforce granular policy:
Allow Slack, but block file uploads.
Permit YouTube, but only in read-only mode.
Detect and block VPN tunnels, even when they’re trying to masquerade as HTTPS.
This shift represents a huge opportunity for network engineers to engage more deeply in security policy—not just implementation.
Identity, Compliance, and Context
Today’s firewall isn’t just packet police. It’s integrated with:
Active Directory or other identity providers to enforce user- and group-based rules.
Endpoint detection and response (EDR) systems to verify device health.
Threat intelligence feeds to detect emerging attack patterns.
It’s a context engine. Decisions aren’t made on IP addresses anymore—they’re made on who, what, where, and how.
Firewalls and Zero Trust
Zero Trust is the new buzzword—but modern firewalls are foundational to making it real. The traditional model was “trust but verify.” Zero Trust flips that: never trust, always verify.
This means:
Constant evaluation of sessions—not just at the initial handshake.
Microsegmentation between internal services, not just north-south inspection.
Policy enforcement everywhere: cloud, on-prem, user edge.
Firewalls are no longer just at the perimeter—they are the perimeter. Wherever you need one.
Why It Matters for Network Engineers
Here’s the punchline: You’re already halfway there.
Network engineers understand traffic flows. You know the difference between east-west and north-south. You’ve troubleshot asymmetric routing at 2 a.m. while juggling ping, traceroute, and coffee.
Security teams bring policy. But network engineers bring operational reality.
Understanding firewalls—really understanding them—means you can:
Partner more effectively with security teams.
Design architectures that enforce security without breaking applications.
Spot blind spots that policies miss.
Final Thoughts
Firewalls have evolved. So should we.
As the line between networking and security continues to blur, network engineers have opportunities to step into more strategic roles. The firewall isn’t just a box anymore—it’s a lens through which we secure modern digital infrastructure.
So go beyond Layer 3. Dive in. The firewalls are smarter now—and they need smart engineers to match.
Network automation has long been heralded as the game-changer that would revolutionize networking. It promises easier management, fewer errors, and more time for strategic, high-value work. Yet, despite these clear advantages, adoption rates remain surprisingly low, with estimates hovering around just 20-30%. Why is this shift, which seems so inevitable, still met with such resistance?
The hesitation to embrace network automation isn’t purely technical—it’s deeply psychological. Many network engineers actively chose this field over programming, yet now find themselves expected to adopt coding and automation skills. This shift triggers a range of anxieties: fear of job loss, concern about losing direct control over networks, and uncertainty about mastering new technical skills. As discussed in a recent episode of The Art of Network Engineering podcast, cognitive biases like loss aversion (where losses feel twice as impactful as equivalent gains) and negativity bias (where negative outcomes seem to outweigh positive ones) significantly shape how engineers perceive automation.
Automation Is Already Here—You Just Don’t Call It That
One of the key insights from the discussion was that network automation isn’t just about writing Python scripts or using Ansible—it’s already present in many engineers’ daily workflows. As Jeff Clark pointed out, even graphical user interfaces (GUIs) are a form of automation, simplifying complex tasks into more manageable steps. These “invisible” automations, such as centralized management tools and wizards, have already become indispensable in modern networking.
Furthermore, learning automation today is easier than ever. AI-powered tools can teach the basics of network automation, dramatically lowering the barrier to entry. In fact, Jeff shared a personal example where, within an hour, he was able to use ChatGPT to guide him through writing an Ansible playbook that automated a task he frequently performed—deploying virtual machines in GNS3. What used to take minutes now happens in seconds.
Small Wins: The Key to Overcoming Resistance
The path to automation adoption isn’t about flipping a switch—it’s about starting small. Rather than tackling massive, organization-wide automation projects, network engineers can begin by automating repetitive tasks that directly impact their own efficiency. Jeff’s experience at Comcast provides a great example: frustrated by a time-consuming ticketing process, he built a simple Excel-based automation that reduced ticket creation time from 15 minutes to just 30 seconds. This not only made his job easier but also led to a broader team-wide adoption of the tool.
The same principle applies today. Whether it’s automating show commands, configuration backups, or simple provisioning tasks, engineers can reclaim time that would otherwise be spent on tedious, repetitive work. As Colin Doyle noted, automation isn’t about replacing jobs—it’s about making work more efficient and freeing up time for higher-value initiatives.
The Future of Network Engineering: From Device Management to Intent-Based Networking
The conversation also highlighted a major shift in networking: the move from managing individual devices to focusing on network-wide service delivery. Tools like Terraform and intent-based networking solutions enable engineers to define desired outcomes rather than manually configuring every node. This evolution represents an inflection point in networking, where automation is no longer just a convenience—it’s a necessity for scaling modern networks.
The fear that automation will replace network engineers is understandable, but history suggests otherwise. The industry has always evolved, and the most successful professionals are those who adapt to new tools and methodologies. Instead of fearing automation, engineers should see it as an opportunity to expand their skill sets, increase efficiency, and gain a deeper understanding of network infrastructure.
Final Thoughts: The Time Factor
Perhaps the most compelling argument for automation isn’t efficiency—it’s time. Engineers who have embraced automation consistently highlight one key benefit: reclaiming hours that would otherwise be spent on mundane tasks. As Daniel Teycheney put it, learning automation means “more time with family, more time for hobbies, more time for life.”
The path forward doesn’t require becoming a programming expert overnight. It starts with small projects that solve real-world problems. Leverage community resources, engage with automation forums, and take advantage of AI-driven learning tools. While resistance is natural, the networking industry is evolving—and those who evolve with it will not only keep their jobs but thrive in a future where automation is a fundamental part of network engineering.
As artificial intelligence (AI) advances at a frantic pace, so do the demands placed on network infrastructure. The age-old debate between Ethernet and InfiniBand is taking center stage once again, particularly as AI workloads push the boundaries of performance, scalability, and efficiency. In our latest podcast episode, industry experts dive into this very topic, exploring how UltraEthernet is emerging as a contender in AI networking.
The Evolution of AI Networking
For years, InfiniBand has been the go-to solution for high-performance computing (HPC) environments, thanks to its ultra-low latency and high bandwidth. However, as AI models grow exponentially in size, requiring more distributed computing power, the limitations of InfiniBand’s scale-up architecture are apparent. Enter Ethernet, historically known for its ubiquity and cost-effectiveness, now evolving to meet the specific needs of AI workloads.
Scale-Up vs. Scale-Out: The Architectural Shift
One of the fundamental shifts discussed in the episode is the move from scale-up to scale-out architectures. Scale-up focuses on maximizing the power of a single GPU, while scale-out interconnects multiple GPUs across a network, enabling parallel computing at an unprecedented scale. AI workloads, particularly large language models and deep learning applications benefit significantly from scale-out architectures, making networking solutions more critical than ever.
UltraEthernet: A New Era for Ethernet
The UltraEthernet Consortium (UEC) is taking on the challenge of redefining Ethernet for AI and HPC environments. With ambitious goals to optimize Ethernet for high-performance workloads, the consortium is working on solutions that address:
Latency Reduction: Ethernet traditionally struggles with higher latencies compared to InfiniBand, but advancements in congestion control and RDMA (Remote Direct Memory Access) are closing the gap.
Scalability: With plans to manage up to a million endpoints, UltraEthernet aims to provide seamless scalability for massive AI clusters.
Interoperability & Cost Efficiency: Unlike InfiniBand, a specialized technology with a premium price tag, Ethernet’s widespread adoption and standardization could make it the more practical choice for AI infrastructures in the long run.
What This Means for the Future of AI Infrastructure
This podcast discussion highlights the collaboration required among data center operators, developers, and networking professionals to optimize networking for AI. The future of AI networking won’t be dictated by a single technology but rather by the ability to adapt and integrate solutions that best meet evolving performance demands.
Will UltraEthernet redefine the networking landscape for AI, or will InfiniBand continue to dominate HPC and AI workloads? The answer remains to be seen, but one thing is clear: the networking industry is on the cusp of a major transformation.
In our latest podcast episode, we listen in on the (PA)NUG podcast panel of William Collins, Andy Lapteff, Ned Bellavance, and Drew Conry-Murray, as they dive deep into the evolving world of network engineering, a field that has undergone transformative changes in recent years. With rapid advancements in technology, especially in cloud computing and automation, the requirements and skills needed for network engineers are shifting significantly. This panel discussion features industry veterans who each share their personal journeys through the profession, illustrating the diverse paths one can take in this dynamic landscape.
One of the primary topics of conversation is the transition from traditional networking roles to more software-oriented positions. Panelists reflect on their experiences as they navigated through varying levels of responsibility, demonstrating how many started as CLI jockeys—configuring equipment through command line interfaces—before adapting to new tools and technologies that emphasize automation. They discuss the necessity of learning scripting languages such as Python and tools like Terraform, which allow for a more efficient and scalable way to manage network services, thereby reducing the need for manual intervention that can often lead to human error.
Another vital point raised during the discussion is the importance of retaining foundational knowledge. Despite the increasing demand for automation skills, experts stress that understanding core networking concepts and protocols remains indispensable. The panelists advocate for building a strong technical foundation, as knowledge of IP addressing, routing, and switching is still essential in a world that increasingly leans on abstraction and high-level management tools. Many express their concern over the growing trend of “ClickOps,” where reliance on user-friendly graphical interfaces may lead to a disconnect from underlying technologies. They argue that while automation is a tool to enhance performance, it is crucial that engineers still appreciate the foundational elements that underpin their work.
The ability to secure a network in tandem with evolving technologies like cloud services has also been emphasized. Panelists share insights on navigating security challenges that accompany the transition to cloud infrastructure and highlight the necessity for network engineers to understand both networking and security fundamentals to effectively manage risks and troubleshoot issues.
The episode speaks to the importance of mentorship and continuous learning in the industry. In this rapidly evolving profession, fostering an environment where newer engineers learn alongside experienced professionals is key. The discussion encapsulates a belief that the future of networking requires not only experts in new technologies but also a willingness to carry forward the historical knowledge that forms the basis of effective networking.
As we look to the future, the experts ponder the imminent integration of artificial intelligence and machine learning in network engineering. Will AI lead to a reduction in the need for human engineers, or will it serve as a tool to enhance their capabilities? The panel ultimately concludes that while technologies will evolve, those who can adapt and learn continuously will thrive in the changing landscape, echoing a sentiment that resonates with anyone in this field.
This episode serves as a deep dive into the changing paradigms in network engineering. Through insights from experienced panelists, listeners gain a rich understanding of the essential skills for success amidst technology’s relentless progress. By prioritizing foundational knowledge while embracing new techniques and practices, network engineers can continue to innovate and lead in their profession.
When setting out to build Meter, one thing was abundantly clear: the industry didn’t need another point solution. Instead, we wanted to build an incredibly performant, reliable, and secure networking solution, with zero upfront costs or licensing fees. This structure ensures our incentives are tightly aligned with our customers’ — because we’re taking on the capital risk, we’re on the hook for providing great products and services that continue to delight our customers and earn their business. We’re not looking to sell a box of hardware at a steep margin. We want to sell great networks that enable networking and IT professionals to uplevel their own workflows, and in turn, the operating capacity of their entire organization.
Why Meter?
As network engineers, we noticed that the networking industry had stagnated—great products were no longer being built. We founded Meter to address this stagnation, streamlining today’s disparate systems, product complexities, and poor user experience. We aimed to build a unified network stack of highly performant hardware, software, and operations for IT and networking teams.
As you all know well, IT teams are tasked with the increasingly difficult job of keeping every system and employee online and productive, and we didn’t feel that the networking products of the last decade were conducive to this growing responsibility. The full-stack architecture that we deliver—from ISP procurement and management, routing, switching, Wi-Fi, Cellular, and the applications and software layered on top—is purpose-built to give them ultimate control over their networks.
Hardware + Software + Operations = Great outcomes
Across our entire stack, we’re building around four core tenants: performance, reliability, scalability, and security. At the heart of it all lies our Network Operating System (NOS), which unifies our entire technical architecture across hardware, software, firmware, APIs, and security. Our latest iteration, NOS 10, allows us to achieve operational efficiency and rapid innovation.
NOS 10 is not just firmware for individual devices and hardware, it’s firmware for your networks, and it’s managed through a single pane of glass. This allows us to continuously deliver new software and purpose-built hardware, gain fast and effective feedback, deploy advanced automation, depreciate older technology, and finally, build powerful new tools like our generative UI, Meter Command. We launched Meter Command last year to enable teams to more efficiently work through routine operations and execute complex tasks, saving them time and resources.
Our vertical integration requires consistent and tightly integrated feedback loops across our hardware, software, and operations, and enables us to deliver great outcomes to our customers. We’re relentlessly focused on delivering a modern networking solution that’s consistent, accessible, and interconnected across the entire stack. We’re certainly not the first networking company, but with continued feedback and alignment from our customers, partners, internal teams, and community, we hope to be the last ever built.
If you have any feedback or thoughts on our products and services, we’d love to hear from you at hello@meter.com. Interested in hearing directly from our team? Watch our latest on-demand videos from our conference, MeterUp.
The latest episode of the Art of Network Engineering podcast dives deep into the intricacies of using VXLAN and EVPN in modern networking. We’re joined by Aninda Chatterjee, a seasoned expert in the data center space who brings invaluable insights from his extensive experience at companies like Nokia, Cisco, and Juniper. The episode begins with a lighthearted discussion about personal lab experiences, highlighting the complexities network engineers often face. Aninda shares a cautionary tale about the importance of making one change at a time—a principle that holds true across all tech endeavors.
As we transition into the main theme of the episode, the spotlight turns to VXLAN. Aninda offers a comprehensive breakdown of what VXLAN is, describing it as a data plane encapsulation method that allows the transport of layer 2 Ethernet frames over a layer 3 network. He explains how VXLAN uses tunnel endpoints (VTEPs) to encapsulate packets, adding necessary headers that facilitate smooth communication between devices. One common question arises: Why complicate matters by adding multiple headers? The answer lies in VXLAN’s ability to solve the challenges of modern data center architecture, which struggles under the weight of legacy designs.
As data centers have evolved, the traditional three-tier architecture has shown limitations, particularly concerning scalability and the ever-increasing demands of virtualized environments. Aninda elaborates on the shift from layer 2 to layer 3 connections, emphasizing how this transition provides predictable routing, efficient load balancing through Equal-Cost Multi-Path (ECMP), and a more resilient architecture. The concept of leaf and spine topologies is introduced, highlighting this modern approach to data center networking that prioritizes horizontal scaling over vertical scaling.
The discussion then transitions to EVPN—Ethernet Virtual Private Network—which plays a crucial role in managing MAC addresses within a VXLAN context. Aninda sheds light on how EVPN facilitates the transportation of layer 2 frames across a layer 3 infrastructure. He clarifies the significant departure from traditional flooding and learning methods toward a control plane based on BGP, allowing for efficient MAC address distribution across the fabric without the associated delays and inefficiencies of older methods.
Listeners gain insight into the complex technical solutions required for today’s networking challenges. Throughout the episode, Aninda shares insights not just about implementations but also about the real-world applications, troubleshooting techniques, and high-stakes situations network engineers face. He emphasizes the importance of maintaining an understanding of the underlying technology, dispelling the myth that advanced automation can render troubleshooting redundant.
As the conversation progresses, both Andy and AJ engage Aninda in a series of banter-filled yet thoughtful inquiries, exploring not just the technical details but also practical applications faced in everyday network management. The episode closes with Aninda discussing his experience as an author of tech-related literature, underscoring the importance of making complex information accessible to the broader network engineering community.
Listeners are left with a wealth of information to digest, equipped with not just theories but actionable insights to take back to their environments. The episode is a must-listen for network engineers seeking to navigate the complexities of modern data centers and effectively leverage the power of VXLAN and EVPN in their infrastructure.
The AONE team recently had the opportunity to attend a KTech Connect event in Knoxville, Tennessee thanks to the Knoxville Technology Council. KTech is an organization in the Knoxville area with the goals of promoting the technology industry in the area and bringing people together. Read more about KTech in our previous blog post. This event spanned over three days and was full of networking and educational events. I was so happy to get to see my friends A.J. Murray, Andy Lapteff, and Dan Richards again. Also, we got to meet Alex Perkins of the Cables 2 Clouds podcast for the first time! We missed Lexie this go around, but there is always next time.
8/16/2023 – Travel Day On Wednesday, A.J., Andy, Dan and I made our way Knoxville. We (mainly I) were lucky to not have any travel issues on the way there. We all made it by mid-afternoon and were ready to get these events started. It is still amazing to me that this podcast has been going on for over three years and we have still only met in-person a few times. I think that is why we always try to make the best out of our time together. After getting settled in to our home for the rest of the week, we headed out on the town. We stopped in to Downtown Grill and Brewery for an excellent meal and conversation.
8/17/2023 – ORNL Tour and KTech CONNECT Networking We definitely started off our week of events with a big day one. The day started off with finding an amazing local spot for breakfast, Scrambled Jake’s, which we ended up going back to the next day as well because it was awesome. Then, we headed out for a tour of the Oak Ridge National Laboratory (ORNL). ORNL has a storied past that started with a mission to race to develop “a terrible weapon based on splitting uranium atoms, which had been demonstrated — in Germany — a few years before World War II broke out.” (More history of ORNL here.) This was better known as the Manhattan Project. Since then, the lab has shifted focus to peacetime projects and the betterment of humankind. An example of this is how ORNL assisted early on in the COVID-19 pandemic with their high performence computing environment. Thanks to Daniel Pelfrey, a senior network engineer with ORNL, and team, we had the opportunity to learn more about high performnace computing and get an up close look at the Frontier and Summit supercomputers! It was amazing to learn about what makes up a supercomputer, and how vital a role the network plays in ensuring it is a functional system.
After the tour at ORNL, we attended the KTech CONNECT Networking event at Printshop Beer Co. This was a great way to cap off the first day and we were all impressed with the turnout. There were many local people from the KTech community who we were able to meet and get to know, as well as AONE fans who traveled from near and far (some folks flew in) to be with us for the week. Our friends of the show will never cease to amaze us. It was great to meet new people and reconnect with those who we do not get to see often. Selfishly, as a side perk, I enjoy these types of events because they get me out in front of people to focus on my communication skills. It definitely helps when you can network with people about networking!
8/18/2023 – Studio Tour / Alex Arrives! / Lunch and AI chat / Top Golf We followed up our eventful day one with another one of excitement for day two. Part of this slate of KTech CONNECT events included a live podcast episode which was happening the next day, so on Friday morning, we were able to go see the JTV studio where the show was to be hosted. We had the opportunity to meet with the broadcast team who graciously gave us a tour of how things look and operate behind the scenes of their operation at JTV. This is something I have not had exposure to before, so it was very cool to see!
After the JTV tour, we headed back to the house, just in time to meet Alex Perkins of the Cables 2 Clouds podcast for the first time! We have been chatting and working with Alex for quite a while now online, so it was great to finally meet him in person!
We then headed out for the next KTech CONNECT event which was the VIP lunch at The Chop House. While we enjoyed a delicious meal, we got to hear an informative presentation from Edmon Begoli, PhD with ORNL on artificial intelligence. This was a beneficial presentation because it started with a very high level picture on what AI really is, then delved into how it can be used and what some of the potential implications are around AI. The presentation ended with an intriguing Q&A discussion on different topics surrounding artificial intelligence.
Later that afternoon, we worked on some content, then headed out for the next KTech Connect event, which was held at Top Golf.
8/19/2023 – Breakfast, Lunch, and Simulcast The day of the main event arrived on Saturday. We started it off on a great note with breakfast at Loco Burro. We once again were able spend some time with the KTech community, enjoy more great food, and partake in some fantastic conversation. Then it was on to a wonderful lunch at Chesapeake’s Seafood House where we had the opportunity to chat more with the sponsors of the KTech CONNECT events. After that it was time to prepare for the live simulcast at the JTV studios. For the live recording, we reconnected with Daniel Pelfrey to have a chat about high performance computing and the supercomputers at ORNL. Prior to these events, I did not have a good idea of what high performance computing really is and what a supercomputer can be used for, so this was very beneficial for me. Hearing about how ORNL empowers its users to succeed was very powerful. One key takeaway for me was that ORNL does not just provide time on a supercomputer, but also offers expertise as well. That is quite the value-add. Being able to record this episode in front of an audience, in this studio was quite the experience. After the show, we had a reception with the sponsors and those who attended the live simulcast.
The Wrap Up We had such an amazing time this week for many reasons. Members of the team got to reunite, meet new people, see new sights, eat great food, and learn new things. We would like to thank the Knoxville Technology Council for organizing this event and bringing us out, Oak Ridge National Laboratory for the tour, and the sponsors of the KTech Connect events (Alkira, JTV, Opengear, Rodefer Moss) for making this all happen.
As summer holidays come to their end, a popular “trend” will start to make the rounds on social media. Over the next few weeks social platforms will be a wash with pictures of children on their way to (and in some instances from) their first day of school. It doesn’t take a lot to see that parents love sharing this kind of information.
“Doesn’t Achilles look amazing in their uniform? First day of school, So EXCITED!”
“I can’t believe Medusa turns 10 today”
“40 weeks seemed to fly by! It was tough but Hera is here.”
“Hercules scored again this week, so proud”
“Athena and her first pet Owl ‘Polias’. “
As adorable as it is to see these new generations conquer countless feats, are we compromising their security later in life?
Blah, blah, nostalgia
As someone born in the late 80’s, personal computing was not a corner stone of my childhood. A single computer in a household was rare, digital cameras were expensive, and the landline was the quickest method of communication.
The internet was popularized in my lifetime. As a teenager, I was there during the early social media wars. Facebook, Bebo, MySpace, and more were all vying to be the main social platform. Regardless of who won, this was a massive step forward in communication and sharing of personal information. Teenagers were predominantly at the helm and we fell hard into sharing more and more about our lives online. These teens are now adults and, quite frankly, use these services in the same way they did all those years ago with little concern for what is being shared.
The reason for this small trip down nostalgia boulevard is to demonstrate that, as a young(ish) adult, it is very difficult to find digital information about me as a before I was a teenager. This is because the digital age just wasn’t prevalent before I was 13. There are no pictures of me in my uniform, or cuddling my first dog, or even a picture of me wrapped in a swaddle in a cute little hat still barely able to open my eyes.
“Cake or Death?”
Because social media just wasn’t a thing when I was born, as an adult I get to chose what information about myself I want to share. I have freedom of choice to share this information if I wish.
“You!!! Cake or Death?”
“… I’ll have the cake please”
“Very well! It’s a popular choice today.”
Younger generations don’t seem to get this option however. The generation before them has made this choice for them. And it has always reminded me of the Eddie (Suzy) Izzard bit…
“How about you?! Cake or Death?”
“I’ll take the cake too please”
“Well were all out of Cake!?
“So my choice is “..or death?””
Sharing pictures of your child removes part of their choice later in life. We all have embarrassing childhood photos, most of which usually make a singular appearance when we achieve a milestone age. But 364 days out of the year they are hidden away somewhere.
There is a whole-nother field of study (that I have no expertise to comment on) surrounding the impact of sharing so much information about our children could have on them mentally.
For me however, I’m concerned about their security. Identity theft and fraud are all too easy when someone voluntarily gives information away. Is that not what we are doing to our children?
The adorable picture of them in their uniform ready for their first day of school.
Hackers will now know the Year they went to school, and most likely what school they went to.
The birthday post you make every year about how much they have grown.
Hackers will now know their Date of Birth
The “Mum and baby both doing well” announcement.
Hackers could figure out what hospital the child was born in
The exceeding at sports/activities posts
Hackers will know what club or activities the child is part of
The cute cuddling their pet picture
Hackers now might know the name of the child’s first pet
Hopefully some of you have spotted the pitfalls already, but if you haven’t these are typically the answers required to be authorized for bank accounts, mobile phone contracts, and credit cards!
Not only are we removing a child’s choice in what they want to share (when at an age deemed appropriate) but we are also just freely giving away every tiny piece of information that adults have to use regularly.
Unfortunately it is security that will be forced to change (if it isn’t already) because sadly there is an entire 2 decades of this information already shared. How have you seen this change? Or have we ruined it for our children already?
It is time to dig into some security on the CCNA Series! In the post, we will be covering Network Fundamentals > Explain the role and function of network components > Next generation firewalls and IPS of the exam topics. Devices implementing security functions are commonplace in organizations, and not just necessarily at the edge of networks. Specifically, when connected to the network, these devices can be used to enforce policy, or act as a passive sensor to alert when configured alarm conditions are met. Network security devices such as firewalls, intrusion detection systems (IDS), and intrusion prevention systems (IPS) can either be deployed in a physical or virtual form factor. What specific security devices are selected, how many are implemented, and where they are placed in the network will depend on the security requirements of the organization. In the rest of this post, we will take a deeper look at next generation firewalls (NGFW) and intrusion prevention systems (IPS).
Next Generation Firewall (NGFW) Before we get into describing a next generation firewall, let’s first cover the concept of a traditional or packet filtering firewall. A traditional, packet filtering firewall is a physical or virtual security appliance that inspects traffic in one direction, typically up to Layer 4 of the OSI model. This means that configured policy and inspection will be able to look at IP addresses and TCP/UDP ports. In this case, ‘one direction’ means that the traditional, packet filtering firewall is stateless. The firewall is not tracking conversations. This means that if traffic is wanted to be allowed between two hosts or networks, separate rules need to be implemented to cover both directions of those conversations. A next generation firewall has the ability to take inspection and policy enforcment all the way through Layer 7 (application layer) of the OSI model. With an NGFW, administrators can set policy based on the type of application, rather than relying strictly on TCP/UDP port numbers. For instance, administrators could write a policy that blocks video streaming applications from all popular entertainment companies except one specific application. Next generation firewalls also understand conversation state. For example, if I want to allow a computer in one network to communicate with a server in another network throught the firewall, I just need to create one rule, and because the firewall understands the state of the flow, it automatically allows the return traffic from the server back to the original computer. Here are two images that compare the concept of a stateful next generation firewall, and a stateless packet filtering firewall.
Stateful firewall traffic flow from computer to server and back.Stateless packet filtering firewall traffic flow from computer to server and back.
Intrusion Prevention System (IPS) The goal of an intrusion prevention system (IPS) is to monitor the network or a specific device for anomalous, malicious activity and take action to stop it from happening. Intrusion preventention systems can be network based (either physical appliance or virtualized) or host based, running in software on an individual client machine, protecting that specific device. A network based IPS will somehow sit inline of network traffic so that it has the ability to take action on that traffic (for instance by dropping it) when necessary. In contrast, a network based intrusion detection system (IDS) will typically not sit inline. It will be fed data by means such as SPAN/mirrored ports. Because it does not sit inline of the network traffic, it is not able to take action on active packets on the network. The goal of an IDS is to monitor and provide alerting when there is an event.
Conclusion Many security devices, such as next generation firewalls (NGFW) and intrusion prevention systems (IPS) are integrated into the network, which means that network administrators and engineers should at least be familiar with them. In fact, because they participate in the network, firewalls will often provide networking functions such as routing (static and dynamic) and network address translation (NAT). So, even if a network administrator or engineer is not involved in the actual rule configuration firewall, there is a good chance they will get involved to support at least some of the network functions of that firewall.
While the Art of Network Engineering is primarily a technology podcast, it is not necessarily the tech that ‘keeps us going’. The podcast was born from a sense of community. It started as a group of like-minded people wanting to work together as a study group toward a common goal. I like to think of the AONE podcast as being a side effect of community involvement. It is definitely much more than just a podcast to us. The co-hosts have become close friends over the years and we are graciously supported by fans of the show and especially by the It’s All About the Journey Discord community. I really believe that the show would not be what it has become without the IAATJ Discord community. It is a constant example of people helping people and being just generally cool. Within that community, there are channels for certification study, job postings, sharing wins and losses, and plenty of non-tech channels as well, just so people can connect online. The IAATJ community helped us meet and get to know many new people, and ultimately gave us the inspiration to put on a live event in 2022, in Asheville, North Carolina. That event was an absolutely incredible experience. Personally, it was so interesting to physically meet so many people for the first time, however it felt like it was just old friends catching up. During the AONE event in Asheville, we held an in-person meetup with a live recording of the show. We had not even left Asheville, and we were already talking about how we could plan the next one. Well, that time has come, and thanks to the Knoxville Technology Council, another live event is happening in August of 2023!
Earlier this year, we were contacted by KTech about working together and attending one of their in-person events. What is a KTech event? Well, let’s start with who the Knoxville Technology Council is and what they do. What better way to do that then to check out their mission statement:
“The mission of the Knoxville Technology Council is to connect, develop, promote, and advocate for the technology industry in the Greater Knoxville region.”
KTech events align well with what we do with the AONE podcast, because community is essential. Individuals can meet, network, and gain benefits that can extend well past the events themselves. Something else that I am excited to hear and learn more about while we are at the upcoming event is KTech’s Women In Technology initiative. We love to see more advocates for women in technology roles as inclusivity helps all. Having different perspectives opens up the opportunity to challenge ideas and start conversations that may not happen otherwise, which benefits everyone involved. Let’s take a look at the Women in Tech mission statement:
“KTech Women in Tech (WIT) exists to revolutionize the experience of women in technology and establish a new standard of inclusion for tech culture & leadership by providing a forum to promote women in technology through networking, education, and community outreach.”
KTech – AONE Event – August 2023 So, what exactly are we doing with KTech, and when? As mentioned earlier, the AONE team has really wanted another community meetup event since we left Asheville in 2022. I am personally looking forward to meeting more community and technology minded people and seeing firsthand how KTech carries out their mission. Here is a list of events planned for our engagement with KTech, from the KTech CONNECT page:
Get ready for a special event featuring some of the brightest minds in network engineering!
Check out KTech and Register for these Events! The AONE team would love to connect with as many people as possible, so if you are in the Knoxville, TN area or can get there, we would love to meet you! Our last in-person community event meant so much to us and we are ready to experience that again. We are incrediby grateful for the KTech team supporting AONE and making this happen. Be sure to visit the KTech CONNECT page to view and register for any or all of the events listed above!
The AONE team recently had the fantastic opportunity to attend the Juniper Networks 2023 Enterprise Analyst and Influencer Summit, held on the beautiful campus of UT Dallas. For this event, Juniper invited many different industry analysts and influencers (including us podcast folks) to showcase where they are now and where they are going in the future, across many of their different platforms and offerings. The goal of this summit was to get industry analysts and influencers up to speed on what Juniper has going on, so that we can assist in educating the community and consumers on our thoughts about what we learned. In just one day on the UT Dallas campus, we were educated on the developments of Juniper’s campus, wireless, data center, AI, and security offerings. There is a common theme across the different Juniper Networks platforms, and that is to drive an Experience-First methodology.
Experience-First Networking The summit on the UT Dallas campus was kicked off with a keynote presentation from Juniper Networks’ CEO Rami Rahim about their unified approach to their products, that they call: Experience-First Networking. This has been a methodology of the company for quite some time, in fact I wrote about it back in 2021, when they presented about it at NFD26. My interpretation of Experience-First Networking is that no matter the technology or system implemented, the customer experience should be at the core of the solution. Rami spoke about having applications and systems that just work, and work well. I appreciate this approach to Juniper’s strategy. In my opinion, you can have all of the cutting-edge, top-of-the-line technology in the world, but if it is difficult to implement and use, there is a problem. Rami also went on to state how important data and analytics are to Juniper by stating that “data is the most precious resource on earth.” He then took it a step further by explaining that in conjunction to having access to data, we have to be able to tap into and operationalize it. To me, this is directly related to the work and investment that Juniper has put into the Mist and Marvis offerings over the last few years. Along with operationalizing the value of data across their different platforms, Juniper is also committed to integrating security into their different solutions. Toward the end of the keynote, Rami stated that “we have transitioned from a hardware company, to a solutions company.” This quote really resonated with me. I will be honest, up until the last couple of years, having minimal knowledge and exposure to the organization, I had seen Juniper Networks as being a data center and service provider switching company. However, I have recently had multiple eye opening experiences to the advancements and effort Juniper is investing into the enterprise campus, data center automation, and AI spaces. To paraphrase Rami; it is not just routers and switches anymore.
Enterprise Strategy and Acceleration
What stood out to me about the Enterprise Strategy and Acceleration session was the concept of the four pillars that Juniper Networks has outlined as a strategic vision for their solutions. Those four pillars include:
Assured user experiences
Cloud-first and cloud ready
This is an interesting play. Being able to manage and operate networks via a SaaS delivered platform is intriguing. It can be a big relief for operations teams to not have to manage on-prem controllers and solutions.
Self driving automation with full programmability
Threat-aware
I get the impression that this pillar speaks to Juniper’s committment to integrating security mechanisms across their platforms. They spoke to how security needs to extend to all points in the connection. I think we can all agree that avoiding blind spots is important.
And then we got to Mist, which is what really stole the show for me. It was alluded to in this presentation that Mist and the AI Driven Enterprise has really been a differentiator for Juniper Networks, and I must say that I agree. The enterprise campus has been near and dear to my heart for quite some time now and Mist really seems to have been the catalyst to bring Juniper into the enterprise campus space. Being able to manage and operate networks from a cloud portal and have to worry less about maintenance tasks like software upgrades on equipment like wireless access points can be a big win for operations teams, and in turn the business as a whole as IT teams can focus more effort on helping the business innovate. I will say, I would love to see this in action so I can better understand how it works. Being a traditional network engineer, I am mildly frightened by networks updating on their own during cloud release cycles, but I will by no means dimiss the thought. There were examples given of customers leveraging this feature successfully in production.
UT Dallas Campus Tour
Brian and Zack from UT Dallas OIT. I promise I’m not angry at Zack, just intently listening!
I am really glad that this campus tour happened. Not only is UT Dallas a beautiful campus, but we had the opportunity to have a walking, in depth Q&A session with the UT Dallas Office of Information Technology (OIT) staff. Brian and Zack did an incredible job giving us the lay of the land and explaining how their solutions support the students, faculty, and staff on campus. This is where I find an incredible amount of value in vendor-led engagments like these. As technologists, we listen to the marketing and sales pitches, but we usually want to see it for ourselves. The UT Dallas OIT team was very open and honest about their experience deploying Juniper Mist wireless throughout campus and how it has helped the university, as well as the challenges they have experienced over the years. When I heard that UT Dallas is able to support wireless across the entire campus with really just one person who specializes in wireless, I was blown away. That has to speak highly to the Juniper Mist solution.
Lexie having a conversation about the UT Dallas TECHKNOWLEDGY Bar
Before we ventured out on the tour we were told that there was a certain stretch of outdoor campus space that was covered with Wi-Fi. During the tour, when we got to the area in question I was intent on figuring out how they handle this feat. I looked up, over, and all around, but could not for the life of me see any access points that would provide the coverage for this outdoor area! Brian and Zack must have seen the look on my face, because they soon explained that the coverage was not coming from up above, but right there on the ground. Brian pointed at a bollard (post) on the ground. I was even more confused. Then, they explained the unique way they deliver wireless coverage by installing access points into these bollards along the path in this area. I had never seen anything quite like it, and wow, was it cool!
The New Juniper Marketing Experience I have not had much experience getting to see behind the scenes of how marketing departments come up with their ideas and campaigns. It was a neat experience to get to hear about it at this summit. As far as marketing, Juniper Networks has taken the stance of wanting to combine humor with how IT teams actually feel when it comes to building, operating, and maintaining enterprise networks. They have also been investing more into a vertical-based approach and gaining visibility at industry conferences. Here is one of their commercials that better explains what I am writing about here.
Apstra and the Cloud Ready Data Center During the Juniper Networks Enterprise Analyst and Influencer Summit, we had the opportunity to record a podcast episode with Vinod, Senior Director of Product Management. The focus of this chat was around how Apstra can can be leveraged to automate the build and operations of data center fabrics. We discussed that some of the challenges of modern networks involve manual, reactive processes. Apstra provides an automated, multivendor approach. It allows customers to build and select templates of intent which abstract many of the configuration details away from the customer’s responsibility. Also, because the intent of the network is set, Apstra will provide warnings to the customer if a change is proposed that will ultimately go against the original intended configuration of the network. In reference to this, earlier in the day Vinod had stated that “Apstra makes it hard to make a mistake”. Abstraction and automation are not going anywhere in the networking space, and much like the other product lines, the Cloud Ready Data Center team adopts the Experience-First mindset. Juniper highlights three phases of data center networking and Apstra is leveraged in each phase:
Design and plan
Config and deploy
Operate
This was definitely a whirlwind of a trip and a lot of information to consume, but very beneficial. It was refreshing to see the passion and committment that the Juniper Networks team has for their solutions. I do not think that many people have more energy for their work than Sudheer Matta. The AONE team had a great time learning more about Juniper Networks solutions and getting to meet and network with industry analysts and influencers. Thanks to Juniper for the invite and hospitality. Finally, hey! We got to hang out with a couple of the Packet Pushers! There were definitely some great conversations.
In Episode 110 of the Podcast there was a brief discussion of “telnet” as a troubleshooting tool (starts around 22:00).
The question arose about why telnet is a troubleshooting tool, what it can (and can’t) do – and I thought I would use this opportunity to detail why this works, how far up the OSI ladder you can use it to troubleshoot and what tools will take it even a step further.
Telnet dates back into the late 60’s, when the Internet was just a bunch of universities and research facilities connecting to each other, known as the ARPAnet, interconnected to exchange data.
You might think now: “The 60’s? Didn’t IP and therefore TCP start out in the 70’s?” And you’re right. These early RFCs talking about TELNET and the HOST-HOST-Network connection were written before TCP/IP came to light and do not mention it.
They do however mention the most important characteristic of telnet:
* Is "teletype-like", i.e.:
               - ASCII characters are transmitted;
               - Echoes are generated by the remote HOST;
               - The receiving HOST[s] scan for break characters;
               - The transmission rate is slow (less than 20
               characters/sec).
RFC 15
The host-host connection is meant to be “teletype-like” – meaning like the old telegraphy transmission from the 19th century, and also what got telnet it’s name: TELetype NETwork.
I could make this article a long list of subsequent RFCs, but to sum things up: The goal was to type on a keyboard cross-country from the computer you are working on, instead of having a terminal directly connected to it. This was over the course of years and RFCs standardised to be 7-bit ASCII text and a few control characters.
When TCP/IP gained traction and protocols were defined, telnet was moved over, as – beside from a few terminal control infos – just this plain text over a TCP socket, using Port 23.
As you can see in Wireshark, after the TCP handshake – SYN, SYN/ACK, ACK – the telnet data starts flowing.
There is some data exchanged nowadays about the terminal in use and it’s capabilities, but then you see just plain ASCII going back and forth in the TCP segments.
The “00 00” before the blue highlighted data still belongs to the TCP header, the “0d 0a 0d 0a” are already the first CR-LF before the “User Access Verification” text (55 hex = 85 dec, which is “U” in the ASCII table)
So the answer to the question “What is it about telnet that makes it possible to use it to connect to other services?” is: all telnet does is open a TCP socket, and waiting for either side to send data. Either you start typing, or the server on the other side sends something.
As it is only opening a a connection to a port and waiting for data, there is really nothing from stopping you to connect to other services that talk TCP. Just put a second parameter after the host or IP address as TCP port and off you go. If the TCP handshake is successfully completed, the telnet application either displays the text that the other end sends, or just waits for you to send text. “Text” in this context is meant as data – not necessarily something you can read, depending on the protocol.
% telnet artofnetworkengineering.com 80
Trying 192.0.78.25...
Connected to artofnetworkengineering.com.
Escape character is '^]'.
As we’re connecting on TCP port 80 here, the web server on the other end waits for us to send data, and if we don’t send any, quits the TCP connection after a few seconds.
What have we accomplished with this? We checked a connection up to layer 4, the TCP handshake was successful when we see “Connected to x”. Not getting a timeout here tells us:
Our cable, their cable, and the cables in between are plugged in or wirelessly connected (layer 1)
Data-link is working, whichever is used – probably Ethernet (layer 2)
IP routing works from end to end, maybe with NAT somewhere (layer 3)
TCP on a specific port works (layer 4), and an application is listening
So we can infer that no firewall – on one of the hosts, or between them – is blocking our connection, at least not the typical kind (looking at layers 3 & 4). But we also checked another thing – we use the hostname/FQDN here, not an IP address, which means that DNS resolution is also working. “Unknown host” or similar error messages would point to DNS resolution failing, “Operation timed out” to the host not responding on this port or a firewall blocking.
This works with every TCP protocol. We can connect to ssh – it even gives us some plain text with version info before the ciphers are negotiated:
% telnet 172.17.71.210 22
Trying 172.17.71.210...
Connected to 172.17.71.210.
Escape character is '^]'.
SSH-2.0-OpenSSH_7.5

Connection closed by foreign host.
Or DNS (yes, DNS runs on UDP and TCP) – we won’t see anything, because DNS is a binary protocol, but the TCP connection would be established:
% telnet 172.17.71.1 53
Trying 172.17.71.1...
Connected to 172.17.71.1.
Escape character is '^]'.

Connection closed by foreign host.
If the TCP handshake fails – because nothing is listening, or the connection is blocked – it would lead to a timeout.
% telnet 172.17.71.1 52
Trying 172.17.71.1...
telnet: connect to address 172.17.71.1: Operation timed out
telnet: Unable to connect to remote host
If we are looking at a layer 7 plain text protocol, we can even troubleshoot more. Many of our upper layer protocols came out of the UNIX world, and there were strong proponents to make them plain text protocols – which means there are no complex bit sequences indicating different things, but strings of readable text going back and forth. This has the advantage of relatively easy expansion (your new idea wont fit into the 2 bit value? Too bad. With text, you can just write more), easy to program (just read newlines from the TCP socket), and easy to troubleshoot.
One example of such an plain text protocol is HTTP. Nowadays of course it serves mostly as redirector to HTTPS (which wont work as easy in telnet), but you can check a TCP/IP+HTTP connection that way:
% telnet cisco.com 80
Trying 2001:420:1101:1::185...
Connected to cisco.com.
Escape character is '^]'.
GET / HTTP/1.1
HOST: cisco.com

HTTP/1.1 301 Moved permanently
Location: https://cisco.com/
Connection: close
Cache-Control: no-cache
Pragma: no-cache

Connection closed by foreign host.
The “GET” line is the HTTP request method, and the “HOST” is needed because we have more than one site on one IP nowadays. Press enter two times, and you get an HTTP answer back. You can see that we would be redirected to the HTTPS site, so HTTP is working fine – even with IPv6 if you have noticed. Without any redirect, we would be getting the HTML code of the site after the HTTP header, directly into our telnet window.
More protocols that work great debugging this way are the mail protocols SMTP, POP3 and IMAP, or the chat protocol IRC.
So what can’t telnet do?
It has to be a TCP service, as telnet always opens a TCP socket. If you need to test UDP, have a look at netcat – it can do TCP like telnet too, but you can switch it to UDP. But – as there is no connection establishment with UDP – you won’t know if you are really connected. So you need to control the receiving end too (for example, with netcat running there too), or have a UDP service running sending something back (for example, echo).
If you want to try troubleshooting a layer 7 protocol like above, it has to be unencrypted. A way around that would be stunnel – it handles the SSL/TLS for you, and you can then connect through it with telnet.
If you suspect that some certificate change or mistake is the culprit, the openssl command is great in troubleshooting that. It is not only to create and manage certificates, but you can use it to connect on any TCP or UDP port and get the certificate, chain, and cipher information when an encrypted connection is expected. openssl s_client -connect artofnetworkengineering.com:443 is all you need to see the public server certificate of this website.
These tools – telnet, netcat, stunnel, openssl – are in part already installed on Linux/UNIX distributions (even macos), or easily installed. To get them on Windows, the easiest way for me is always to install WSL, the Windows Subsystem for Linux. That way you’ll have a great shell too.
Of course, for all of this dedicated tools exist – nmap, curl, swaks, to name a few – but nothing beats telnet for a quick check, as it is easy enough and most of the time already installed.
Given that this is the Art of Network Engineering, I thought it appropriate to write about a book I recently finished, around creativity. Big Magic – Creative Living Beyond Fear by Elizabeth Gilbert sheds some light on what it is like to live a creative lifestyle. To me, after going through this book, a creative lifestyle means consciously finding what interests you, both inside an outside of your career, and continuing to explore those interests. In my opinion, it is about finding what “makes you tick” as a person and spending time to do it justice. It might be easy as IT professionals to think that we do not need creativity to function in our careers, or maybe that there is not much room for creativity. There are protocols, standards, and documentation that we need to follow, so we don’t ever have to think outside of the box, right? Well, that just is not true. We constantly need to think of new and creative ways to integrate solutions and make technology fit our requirements. Network design is a great example of this concept. There are often many more ways than just one to design and implement a solution. We must take inputs of our requirements, business goals, scale considerations, and internal staff skill to architect the right solution. There are not always guidelines or tutorials to walk us through this thought and decision process. Believe it or not, we must get creative. I found this book interesting and helpful. It made me take an audit of how I spend my time and what I could do to better leverage and grow my own creativity. I would like to highlight some of the concepts of this book that resonated with me.
Creativity as a Means to an End It seems natural for us to always want to try to get the most out of life. I don’t think there is necessarily an issue with that by itself, however, I think the problem is when we take that a step further. I think the issue here lies with only wanting to pursue creative ventures as a means to monetize or make a career out of the creative act. This can easily put a lot of pressure on you to be successful so that you able to support yourself, which could take some luster off of the creative pursuit. The author writes about examples of people quitting what interests them becuase they have not been financially successful, and how she stuck with writing even when she was not successful because she genuinely enjoyed the craft. In my opinion, she became a successful writer because she wanted to write, not because she had to write. Elizabeth Gilbert sees no shame in having a day job to support the creative lifestyle. In fact, she encourages it. This allows you to truly be creative because you want to, rather than relying on it to make a living.
Passion vs Curiosity I often fall into the potential trap of having an “all or nothing” mentality. What I mean by this is that sometimes if I do not think I can maximize the benefits of trying something new and dedicate tons of time to it, I often will not even try. In other words, I seem to be pressuring myself to find things that I am passionate about, otherwise, what’s the point, right? After going through this book, I now see how that can be an issue. What I am doing is putting up guard rails around what I am willing to spend time on, and not allowing myself to adequately explore new things. Don’t get me wrong, I know there are two sides to this. If all I do is dabble in a million different things, I will probably never focus on anything. As with practically anything, a balance must be struck. What Elizabeth Gilbert suggests is rather than pressuring yourself to find a passion, allow yourself to be curious. Curiosity opens your mind up to new ideas and can even surprise you with what you may end up finding. An example she gave was that at one time she was curious about gardening, ended up starting a garden at home, which led her to research adjacent topics, and ultimately led to an entire book idea. Essentially, what I gathered from this was that we should give ourselves a chance by being curious.
“Perfect is the Enemy of Good“ While I do not think this exact quote was mentioned in the book, the idea was definitely there. It is easy to put a lot of pressure on ourselves to do things right the first time and only be satisfied with something as close to perfection as possible. This mentality can easily lead to us never actually finishing a creation. When I decided to start a blog a few years ago, my initial thought was that “well, I’m not going to publish anything until my site looks good”, whatever that really means. However, I received some solid advice to just create, just get some content out there so I can practice and grow. Looking back, I fear that if I had not taken that advice, I may have never started writing, or at least would not have done as much as I have to this point. The author also gave an example of how she almost missed her first short story being published in a magazine. She had a story accepted, then due to budget constraints was told that she had to either cut out a percentage of the story, or it would not have been able to be publised in the upcoming edition of the magazine. Hopefully, it could have been published in its entirety in the next edition, but it was by no means a guarantee. After consideration, she put the work in to rewrite the story enough so that it could be shortened enough and could get published. Getting a story published at all meant more than waiting and maybe never getting the “perfect” story published. Let’s face it, perfection is an incredibly difficult, lofty, and frankly unattainable goal. What I mean be that is that we will always have room for improvement. Try not to let the goal of perfection keep you from creating something awesome.
This book gave me a lot to ponder. I think my biggest takeway, as you can probably gather from this post, is that I need to relieve the pressure. I put these lofty unwritten requirements on myself that I think keep me from reaching my full potential. I probably need to make more of an effort to get out of my own way. Making a conscious effort to allow myself to be curious and see where it takes me seems to be a good start. If you are looking for ways to approach your own creativity, I definitely recommend this book.
Have you ever wondered of a fairly low effort, fun way to get your kids, friends, or family members into the basics of programming? Or maybe even yourself for that matter? On the surface, this can seem like a daunting task. I mean, when I think coding, I immediately default to command line and start seeing “The Matrix” gloss over my mind’s eye. Having a low barrier to entry method for learning basic programming principles in a fun way would be fantastic. Well, such a platform does exist, and it is called ‘Scratch‘. The Scratch community and program strives to teach and get people involved in coding with a fun, free platform. To get started, all you need to do is go to the website and click “Create” near the top left. This opens up the Scratch editor and you can either just click around and start creating, or you can view some of their many, very informative video tutorials. If you want to be able to save your projects, you can create a free account. With Scratch, you can let your imagination run wild. You can create projects such as animations, stories, and games. Let’s jump right in and create a scene to show some of the possibilities with the Scratch platform.
First, we will select our backdrop for this scene.
Rock and roll! This is a pretty cool backdrop, but something is missing. Let’s add a sprite (AKA a character or object). A sprite can be selected from an available list of sprites, or we can upload something. First, we will upload a sprite to give this scene some extra character.
Now that is what I’m talking about, AONE Live, in concert! Now, it is coding time. We will want to start with the action that will begin our program, then the first steps of our code. One easy way start a program is with a click of the green flag. For this program, we will say that when the green flack is clicked, we will set the backdrop to our concert stage and place the AONE flag where it is shown above. Here is what that will look like in the Scratch GUI. One thing to keep in mind is that as we are building this portion of code, I have the AONE flag sprite selected, and the code is being built around that sprite.
There are many different action groups and options that you can see above and I encourage you to explore them. We are really just scratching the surface here (pun definitely intended). The small snippet of code above is what sets the concert stage scene that was shown earlier. One really nice thing is that as you move a sprite around in the workspace screen on the top right, the “go to” coordinates option in the blue Motion action group automatically update so you can place a sprite where you want, then just click and drag the “go to” option into your code, like I did above. Like eluded to earlier, each sprite requires it’s own code section. Now, we will add a sprite from the available options, similar to the upload that we did earlier, but now we can just click the cat icon to select a sprite from the listing.
Now, we have added a sprite named Devin and the image above shows the flow of the Devin’s code. When the green flag is clicked, Devin goes to the coordinates on the screen listed, appears, waits for two seconds, then gives an introduction. I definitely like the idea of this scene. Maybe we’ll have to take this AONE act on the road sometime in the future!
This tutorial was really just to highlight some of the basics of this platform, there are so many possibilities here. Scratch is a fantastic, fun, and free way to start learning the basics of programming. You can even do some in depth projects as well. By searching the Scratch website you can view and interact with projects that people have built and made public. I definitely recommend checking this out. Happy coding!
Troubleshooting networks can be a very difficult, manual process. Businesses run disaggregated systems and operators often need to jump from one to another when trying to find and fix problems. A large amount of valuable time can be spent investigating different systems and infrastructure while trying to gather data, to then go through a manual correlation process to find what specifically needs to be fixed or adjusted to resolve an issue. What if there was a solution that aggregated all of this “go-to” information, correlated it for us, and then sent us a message pointing us in the right troubleshooting direction? That is the solution that Selector AI is proposing. From their first ever Networking Field Day event (NFD30), below is the problem that Selector AI believes enterprises are facing and what we covered in their presentation.
Introduction to the platform. Specifically, the Selector AI platform is pulling in and aggregating different types of network infrastructure state information. This could be information such as logs, metrics, and events from network devices. Telemetry from the infrastructure can be streamed directly to the Selector platform, or Selector can pull from an existing aggregated source, such as Kafka. The Selector platform can run on-premises or in the cloud. The images below show Selector’s target customers and environments, then some of the available source data types, protocols, and integrations they support today.
So, Selector has the data, now what? It was mentioned earlier that a challenge that network operators have is manually correlating events from different systems to find just what might be the problem. A core competency of the Selector platform is doing just that. Selector AI treats the process of collecting, correlating, and delivery actionable information as a data pipleline.
Once raw data is collected, the platform tags different data types to pull in meaningful information, which makes the platform able to compare and correlate that information to different types of data, for instance, logs and metrics. To put it one way, this is how they compare apples to oranges when it comes to data.
Do Selector AI customers need to go in and set up thresholds for all of these different data types so the platform knows what specifically is good and bad to alert accordingly? Absolutely not, the Selector platform leverages a baselining method to analyze data and automatically determine what is, and is not a problem. The baselining method turns numbers into events and displays what events are good and bad, or more specifically, normal and abnormal.
Event Correlation Result Alright, so the Selector platform is ingesting data, performing baselines, doing the data conversion, and event correlation; now what? In the demo, they showed us how they integrate with platforms such as Slack to be able to deliver meaningful, actionable information to individuals and teams so they are made aware of an issue and immediately pointed in the right direction to go solve it. Users of the Selector platform can even interact with the Slack messages to query the platform to get more information about the specific alert. As part of the event correlation process, multiple events are combined into a single, correlated alert. This way, teams are not inundated with a large number of alerts and can more easily focus on solving the problem in front of them.
In my opinion, Selector AI really seems to have a special product here that can provide a lot of value to large companies. The target audiences that were listed in one of the above images make sense as far as who would benefit from this platform. Having aggregated and correlated intelligence that is automatically delivered to not only alert you about an issue, but to also essentially point you in the right direction for next steps is extremely valuable. As mentioned earler, this was Selector’s first Networking Field Day presentation, but you would not have been able to tell. The team is clearly passionate and excited about their product and where they are going in the future. Click here to watch Selector’s NFD30 presentation so you can see exactly what the delegates saw from them.
Major goals for enterprise campus networks are flexibility, reliability, and security. With legacy networks, it sometimes seems to be difficult to get all three in one solution. For example, to build flexible networks, we would end up spanning VLANs across many switches and potentially compromising reliability. One solution to this is to adopt the underlay/overlay concept of building fabrics. With fabrics, we can build stable and scalable Layer 3 end-to-end underlay networks and then leverage technologies such as LISP and VXLAN (as examples) to build our flexible networks in which users and devices can roam the infrastructure and maintain their Layer 2 and Layer 3 adjacencies as needed. Juniper provides this level of flexibility, reliability, and security through their Campus Fabric solution, managed by Mist AI.
Juniper presented at Networking Field Day 30 (NFD30) and told the story of how they are helping their customers build campus fabrics from the Mist AI cloud platform, with security tagging and enforcement embedded into the infrastructure. This solution is just part of their overall goal to provide “Experience-First Networking“. (***Don’t blame Juniper for the image quality. I took these as screenshots from their NFD30 presentation. Blame me, I deserve it.***)
As stated earlier, campus fabrics provide us some benefits over legacy networks. Juniper presented those benefits as follows:
Next, Juniper understands that customers may be in different stages of their campus network journeys. Due to this, when standing up a campus fabric, they provide you with three topology architecture options. This flexibility allows customers to decide how far they want to take their EVPN-VXLAN fabrics.
One more concept that I want to cover out of Juniper’s Campus Fabric solution is around security; specifically around authentication and authorization. Over the years (like it or not), the network infrastructure has become a natural security sensor and policy enforcement point. There are a few different ways of accomplishing this in enterprise campus networks. One of these methods involves leveraging a Radius solution to determine authentication and authorization actions, then instructing the infrastructure implement that authorization policy via VRFs, VLANs, ACLs, and/or some sort of packet tagging. Juniper’s Campus Fabric solution allows for this method. They implement Group Based Policy so that you can enforce VRF, VLAN, ACL, and tag based segmentation. You can create and set static security tags (which get added into the VXLAN header), but the more common and dynamic method seems to be leveraging a Radius solution to perform dynamic tagging, as mentioned earlier.
One thing that I thought was particularly interesting is that Juniper supports scalable group tag enforcement at either ingress or egress. In having a great chat with Jordan Martin, we discussed that while ingress enforcement seems more efficient from a bandwidth perspective, something to keep in mind is that the entire database of tag policy has to be downloaded to the switch to be able to support that level of enforcement. That has the potential of causing TCAM concerns. Whereas, if you allow the packet to traverse the network to the destination switch, the destination switch only needs to do a lookup to the policy database for the given source and destination to decide whether to permit or deny the packet. In typical campus networks, maybe egress enforcement isn’t a big deal because we may not be worried as much about potential inefficient use of bandwidth.
Campus fabrics, or the concept of underlay/overlay networks can help organizations achieve all three goals of flexibility, reliability, and security. In Juniper’s case, they lean into the cloud based Mist AI platform to perform that fabric management plane function for their customers.
As far as this NFD 30 presentation, I have to give the Juniper team a lot of credit. The delivery was very engaging and flowed very well from presenter to presenter. As questions were asked, each presenter seemed to jump in effortlessly when it was a topic within their expertise. They clearly work very well together. Also, I appreciate that the product management team maintains close relationships with their customers so that are able to operate a strong feedback loop. They truly seem to want to make sure that they are developing products and solutions based off of real customer need and desire. I had a great time participating in this presentation.
About mid-way through 2022 I was looking for the next step in my learning journey. Earlier in the year I had taken on an architecture role and saw it fit to start branching out from purely network infrastructure related concepts. It seemed like a good time to start gaining broader skillsets and knowledge. For me, cloud seemed like the right path to take. To be honest, I would sit in certain meetings and hear phrases and acronyms that would go right over my head. My objective was to gain some base-level knowledge around cloud concepts. Not that there is anything wrong with this, but personally, I didn’t want to jump straight into one of the major cloud vendors learning paths. I wanted that vendor-agnostic approach to get the basics down first. By basics I mean characteristics of cloud computing (what makes something a cloud offering) and hopefully pick up and understand some of this terminology that I was not grasping. That lead me to start looking at some of the CompTIA options. Given the new role I had taken on, I wanted something that gave me a good mix of high level technical and business related concepts. This would hopefully help me “speak the language” when it comes to groups and individuals outside of the IT department. CompTIA has two main options for cloud related studies, the Cloud+ and the Cloud Essentials+ certifications. After a little research, I landed on wanting to prepare for the Cloud Essentials+ (CLO-002) exam.
Reasoning for Cloud Essentials+ Journey A big reason that I went with preparing for the Cloud Essentials+ exam was that it covers that mix of technical and business principles that I was looking for to start building my knowledge around cloud. This really is an entry-level path and my starting cloud knowledge was practially zero, so I felt this was a really good option for me. The curriculum started with the basics which is what I really wanted. Personally, I typically try to make sure I hit and reinforce the basics when I am learning something new so that I do not miss something important which can make learning future concepts more difficult. You definitely do not have the follow what I do, find what is right for you. I will say that my method typically takes longer when it comes to cerfications, but I am alright with it. One of the early topics that was covered was the main cloud characteristics, as defined by NIST. According to NIST, the five characteristics that a cloud service must have are:
1. On-demand self service 2. Broad network access 3. Resource pooling 4. Rapid elasticity 5. Measured service
This is exactly what I wanted to see early on because I wanted that base level understanding of what makes up a clould service and be able to have somewhat intelligent conversations regarding cloud services. Some other topics that I enjoyed covering were:
Cloud Service Models
Software as a Service (SaaS)
Platform as a Service (PaaS)
Infrastructure as a Service (IaaS)
Cloud Deployment Models
Private Cloud
Public Cloud
Hybrid Cloud
Cloud Migration Types
Disaster Recovery Concepts
Recovery Time Objective (RTO)
Recovery Point Objective (RPO)
(The two sub-concepts above are examples of acronyms I would hear out in the wild and not know what they were.)
Preparing for the Cloud Essentials+ Exam To prepare for the Cloud Essentials+ Exam, I used the following materials:
Anki cards throughout the entire journey for review as there are a lot of concepts that you should be able to understand and explain.
How it’s Going I found that preparing for the Cloud Essentials+ exam was just what I was looking for in my intro to cloud concepts journey. I was able to take and pass the exam near the end of 2022. One thing that I have started doing somewhat recently is documenting my learning journey in blog form as I go. I will typically take a concept that I am learning and write up a blog post about it. I find that it not only helps solidify the knowledge, but also allows me to practice writing, which I really enjoy. You can find my Cloud Essentials+ Journey series on my blog site. Happy learning!
As I think it is natural for us to do near the end of a year, I have been doing some reflection. While ups and downs are often the norm, it seems to have been quite the year for many of us. All I have to do is check out the IAATJ Discord winning channel to be reminded. One thing that I find in common with successful people both inside and outside their careers is that they invest in themselves and those around them. What does it mean to invest in yourself? Well, that’s the beautiful part, it can take on many different meanings.
First, I think you need to understand something. You need to understand that you ARE worth the investment. Imposter syndrome is alive and well in our lives, often on a daily basis. Imposter syndrome is that nagging feeling that we inflict on ourselves that tells us that we are not good enough to be where we are, doing what we are doing, and that we do not belong. In small doses, imposter syndrome probably is not a terrible thing. It can cause us to want to continue to better ourselves, because let’s face it, we’re never going to know everything. We cannot, however, let imposter syndrome consume our lives. We need to understand that there is a reason we are in the positions we are currently. For instance, let’s say you are in a new role and feel like you are not skilled enough to be in that role. Well, there is a reason you made it into that role. Someone or a group of people saw something in you to give you that chance. Or let’s say you are making a change in your life and trying something new. Well done for taking that step! You are good enough to be you and share your contributions. Take a chance, bet on yourself. I think you will be surprised what you can accomplish and where your journey can take you.
To me, investing in yourself is a making a conscious effort to continue to better something about your life. I am not just talking about your career either. This is by no means a plea for you to go out and get as many certifications as you can. That is a completely different conversation, I’ll just say that certifications are great and all, but there are other ways to gain experience and confidence in your skills. I am taking a holistic approach here. There are many different facets to our lives and I find that trying to maintain some sort of balance is key. Investing in yourself can take many different forms, and this is by no means an exhaustive list.
Mental Health
Many of us have probably heard a phrase similar to “you cannot fill up the cup of others if your cup is empty”. My translation is that it is very difficult to take care of others and responsibilities without first making sure that you are taking care of yourself. I am by no means even a novice when it comes to mental health, but I will say that you should keep yourself honest. Understand when something does not feel right or when you need a break. And when that happens, seek the assistance of others. You do not need to fight battles on your own or suffer in silence. Remember, you are good enough. You are worth it.
Physical Health
This is an opinion article, so I have no peer reviewed facts, but I feel that physical health can tie directly into mental health. Exercise has been an important part of my life, especially recently. Let me caveat exercise really quick. Anyone who has seen me can probably tell very quickly that I do not do a lot of strength training. However, I make a conscious effort to get my heart rate up and move around most days for a sustained period of time (usually around 25 minutes). Second caveat, much like my lack of mental health expertise, I do not claim to know what I am talking about when it comes to physical health either. But, I do know what seems to work for me, and physical exercise is definitely a piece of that puzzle.
Support System
I mentioned seeking assistance in the mental health section above. Some of us are lucky enough to have people (and I count furry friends here as well) that care deeply about us. It is easy to take things for granted, especially our support system of awesome people. I feel we should invest in our support systems as well. I am not saying you need to continuously buy people lots of cool gifts either. Investing in your support system can be as simple as reaching out. I am a big fan of the check-in. I like to reach out to people over time just to say “hi” and see how they are doing. I know how awesome it feels when people do the same for me, and this is how I invest in my support system.
Career
I think I may have left this one last in the list on purpose (again, not an exhaustive list). I wanted to convey how important I think the other items in the list above are to me. That being stated, I am also very passionate about my career and continual growth within it. Investing in yourself from a career standpoint in IT can mean many different things and a combination of many different things. First, I think it is important to understand what you want out of your career, and it is definitely fine if that changes over time. In fact, I would expect it to change over time. Once you have at least a high level idea of what you want your career to look like, it is time to invest. I mentioned certifications earlier and that is definitely a good method, but not the only one. Other options to invest in your career can be to lab things up to improve knowledge, volunteer to jump into something new and even lead new initiatives, and ask questions. Asking questions and showing that you are curious is a great way to invest in yourself.
This post has all been a bit of a lengthy way for me to state and reiterate that you are good enough. You are good enough to be invested in, starting with yourself. Understand that you are worthy enough to take a chance on yourself, your development, and your happiness. The examples of success are plentiful. Take the AONE team for example. There has been a lot of growth in the co-hosts since the show has started, largely in part to self-investment. Do I even need to mention the rockets? Seriously though, you are good enough, and I cannot wait to see you grow in life. Happy holidays, happy new year, and happy reflecting, from the AONE team.
When it comes to money, I don’t like to spend it. Furthermore, one of the key tenets to writing is ‘write what you know’ or so says a few people anyways. So here we are. There is a lot of training out there so in the following I hope to provide stuff that’s not only free/almost free but stuff that’s actually good content and worth your time. Even if you are not getting any of the following for ‘free’ because you are not in the Air Force, you can at least get a bit of insight into a few learning platforms and what I find valuable in each.
O’Reilly Books
Access to O’Reilly books can be had by any current military member through the MWR library system. MWR libraries has had available subscriptions to O’Reilly for a long time, way back when they were called Safari Books. These days, not only does O’Reilly provide thousands of digital books, they also offer cloud labs and sandboxes to try out code so you can get a bit of hands along with their book offerings. O’Reilly also has a bunch of video on demand courses and most Packt publishing books.
O’Reilly Homepage After Login
If you were to purchase this great service on your own it would run you $49/month or $499/year. If I had just $50 to spend on training this is probably where I’d spend it. The amount of content you get here is just unparalleled. Just getting every book by the Manning and No Starch publishing are worth it on it’s own.
Digital University
DigitalU or DU for short, is a new offering for those in the Air Force. It’s main page tries to get you organized into specific training goals. Once you actually begin a course, skill or goal you are then redirected to one of their many platforms that actually provides the training.
Digital University Homepage After Login
While I currently don’t use Digital University the way it’s intended, as I find it’s UI difficult and non intuitive, it allows access/subscription to some great resources. Namely, DataCamp, Cloud Academy, Udemy and Pluralsight. To get to these websites, you search for a course or skill path within Digital University and then pay attention to who is providing the course, regardless of whether you are interested in that course in general:
Once you click on ‘continue’ or ‘start next’ you will be redirected to the platform I’ve outlined in the rectangular box. Now you can do anything within that particular platform/website, and that’s usually how I navigate and use this resource.
DataCamp
DataCamp has been an absolute joy to use. So far, I’ve completed four courses introducing Python data science concepts. It’s got short explainer videos and then you spend most of your time doing related exercises. Here is the common interface for most of your exercises:
In here you can try stuff out on the iPython Shell before running your script, look at the slides if you need a little help with syntax, get help with a hint if you’re a bit stuck. I just think this is such a great learning tool/environment. I plan to keep using DataCamp to learn some data science skills as I think it’s valuable to get more comfy with Python in general but even more so to wrangle large datasets into something useful no matter where I find myself. If you were to purchase this subscription on your own it would run you $39/month or $300/year. A quick aside, I always prefer the month approach to subscriptions as you never know what sort of projects/interest you maybe in 8 months from now.
Cloud Academy
This is my other favorite platform whose access is provided by Digital University. So far I’ve completed a Docker and Kubernetes learning path. The video instruction is really clear and concise yet their labs are where this platform really shines. Every lab requires you to access a cloud provider and some initial setup no matter if the topic you are covering is strictly cloud or not. To do this they give you a username and password to Azure or AWS for example and you are on your way. The lab guides are also top notch as I’ve found nothing unclear or incorrect which means they are staying up to date with the ongoing changes of each cloud provider to make sure their labs are accurate and on point.
Cloud Academy Welcome Screen After Login
I just started Microsoft Azure Fundamentals today and hope to test on AZ-900 by mid November. More on Microsoft certifications later in this post. The cost of Cloud Academy if you were to purchase this on your own is, at the time of this writing, $39/month or $399/year.
Pluralsight and Udemy
The last two big offerings through Digital University are Pluralsight and Udemy. I’m not the biggest fan of either platform, so I’m not here to tell you how awesome they are. See how that works. Pluralsight in it’s defense, may have the best mobile app out of the bunch. So if you find yourself with a long commute, and enjoy some of the courses, you may find a home with Pluralsight. The best use I’ve got out of Udemy thus far are the practice tests associated with certifications. There are a few courses that are nothing but some very well written practice exams. Cost for both platforms are comparable to DataCamp and Cloud Academy’s pricing.
Splunk
Splunk offers free training to veterans. Once verified with your ID.me you’ll have access to many eLearning courses and eLearning courses with labs. Each class with labs is a $300 value. I first got started with Splunk Training with Splunk 7.x Fundamentals Part 1 (eLearning). It seems they broke apart the Fundamentals training into the smaller eLearning modules. Furthermore, instead of having you install a local instance of Splunk to go through the labs, they have you use a cloud instance. Other than that, the training seems to be about the same and of the same quality.
Splunk Education Catalog After Login
Although I use Elastic for most of my work related tasks, getting acquainted with Splunk, learning how to parse large amounts of data to make useful insights will be great for anyone. While most eLearning training is free from Splunk, you are saving $300 per course with labs and able to get valuable hands on experience.
VetSec
VetSec is probably the coolest program out there for veterans. I’m not currently active but have been in the past yet continue to have a smile on my face whenever Thomas Marsland (VetSec Board Chairmen) posts come across my LinkedIn feed. As I’m interested in training, I’m continually impressed by what they have put together to offer the military community. Furthermore, their slack channel is where the true magic happens. From mentoring to resume help to job posting to special training opportunities there is an abundance of help there for anyone who needs it. If you need more direction/help/community do not hesitate to sign up with VetSec.
Hopefully this post introduced you to a few new ways to save a few dollars and get some quality training, and at the very least make sure you get connected with VetSec.
Free Microsoft Certs
As mentioned above, I just started going through the Microsoft Azure Fundamentals learning path in Cloud Academy. Well one reason for doing so is because Microsoft is currently offering 100% discounted exam vouchers to those in the Air Force. The discount looks to expire 6/30/2023:
To ‘get’ the discount you simply enter your .mil email before heading to checkout:
So I’m giving Azure a try, you can also do the associated learning path through Microsoft as well but I’m going to stick with Cloud Academy and see what happens. I’ll report back.
Manny Pimentel recently wrote a blog post describing his ‘Nurse to CCNA’ journey. It was a great post and very cool to see the man behind the man who is the president of short IT Twitter. This got me reflecting a bit on my own journey. I’m not up for telling the whole story of how I came to 40 years of age, so I’ll stick to just one…
Somewhere between 2006-2008 I found myself drawn to the Bat Cave, 909 Marion St in downtown Seattle. I just got my Associates degree from South Seattle Community college and I was working at a place not far from the Bat Cave, a corporate lunch spot called Mel’s Market tossing salads. As luck would have it, I spotted an ad on craigslist while looking for some sort of bike messenger position, a pedicab driver. I contacted the ad and let them know of my interest.
My First Business
I felt a bit of apprehension as the guy ‘interviewed’ me and let me drive him around the block as he explained to me what it was about to do this sort of work. He let me do a few days, expecting me to fail or realize this work wasn’t for me, but, as it turns out, this work was just my cup of tea, in my own way.
To be a pedicab driver I would have to obtain a business license and then I’d rent the pedicab from this man. I completed the paperwork, I think at this time you could obtain a business license for about $80. Then I’d show up for work at the Bat Cave where all the pedicabs were stored…
Pedicab rental rates varied depending on what was going on that day. I don’t recall exact rates but the were something like:
Mariners Games $35
Football Games $60
Any old day $15 – $25
So I’d show up, do a quick check on my bike and head out, I’d have to payout the rental fee once I was done for the night. That was it, keep anything I made past my rental, all cash.
We had about the same group of riders while I was there. It consisted of about 2-3 old timers and 6-8 young new comers.
A Typical Shift
A Mariners game is a good example of a typical shift. I’d arrive to the Bat Cave at around 2:30 – 3 pm for a typical 5ish first pitch. Back in these days there was usually between 3 – 6 pedicab drivers in total, on any given night. We’d lineup like taxis before the games start at the ferry dock, waiting for would be baseball fans to get off and take them to the gates at Safeco Field.
The price of this service would fluctuate a bit, most of the time I’d quote $12 or $17. I was taught to always use an odd number so that you can expect at least $15 or $20 by the end of the ride. Even so, I’d very rarely have the change needed at this point, especially early in this shift. On a good day, I’d hopefully get 3-4 trips from the ferry to the baseball game. So I’d already be well into making money time having already covered my rental fee.
Once the game starts till it ends is more of an adventure. You can choose to wait at any of the exit gates, the easiest rides being the one closest to the ferry. People tend to trickle out of the game after the 5th or 6th inning with a big rush at the end of the game. After the game people ask to go to all sorts of places, from a pub, a strip club or the Siren tavern. Even a couple hours after the game it’s not hard to pick up a ride in Pioneer Square to make some extra cash. Also, the later it gets the more people are willing to pay. Not sure if this has anything to do with alcohol consumption but could be an indicative variable.
Two rides I remember more than any other. One such ride was giving two girls a ride to a Tavern and they were groping and kissing my back the way whole way there. I did not enter into that tavern nor ever speak to them again, still a story (for another day or another platform??!)…The other was a single rider whom I’d taken from the stadium area all the way to a place in Belltown. This one stands out because it was the longest one way trip I’d ever done on a pedicab. I told her that and also the chance I’d be getting more rides was slim and she paid me more in one trip than I usually made in most nights. Great conversationist that one as well.
And I digress…
At the end of the night, usually around 11 pm I’d venture, we’d all end up back in the Bat Cave counting our money. Back in those days I wore some pretty form fitting pants and I’d just have bills stuffed in my sweaty pockets. I wasn’t even to dare trying to do too much with those bills in my pockets out in public, so I’d get back and begin separating bills and see what I ended up with.
Bat Cave Money Counting…
A good shift to me was anytime I had over $100 profit. These were easy to do for Mariners and Seahawks games and took some REAL work when you’re just going up and down the waterfront or through Pioneer Square.
The People
With any job I always think whether you had fun or enjoyed what you were doing depends on who you are working with and who you are serving. This job was no exception. There were some awesome people pedicabing and some cool stories from customers I’ll take with me for the rest of my life. People like talking and there is no better place to let someone talk as you are trying to catch your breath peddling them up a small incline…
The night usually ended eating some bbq duck and/or drinking a cloudy beer. To end the night I’d bike the 6-8 miles back to my place of residence back then. Good shape I was in (compared to today me).
Unfortunately, a new pedicab driver had a tragic accident and at least one life was lost. This brought up city politics and the person who’d I’d been renting from moved on after this tragedy. This is about the time I also moved on from pedicabbing as well but always hold this time in my life in high regard even though at the time I was too immature to truly appreciate it. I often wonder what would have been of me had I stuck this out or ventured into buying my own cab had things been different?
How Did this Shape Me
I suppose it shaped me in a lot of ways, but sticking strictly to my career it helped me get out of my shell. The reason the guy, at the interview I initially had was so skeptical of me being a pedicab driver was because I was a shy soft-spoken kid. In this line of work you have to put yourself out there, literally. After pedicabbing I went to barista work and a bit of food service on the side. I don’t think I wouldn’t picked these jobs up as fast or been as successful had it not of been for this experience.
Above all, I got to learn about Seattle. I got to meet all of its citizens. From the out-of-towners that came to the games, to the houseless people eating a Food Not Bombs lunch on a Sunday, to the hot dog vendor cart owners outside of the stadiums. I got to meet and hear so many people’s story in a short amount of time.
So in the end the Bat Cave will always hold a prestigious grip on my heart. We are but the experiences that brought us to where we are.
I’ve written maybe 20 posts or so on this here website. Almost all of them have been explainers or reviews. The following will be something different, something personal. It will probably be a bit short, but I’ll work on that, a journal entry so to speak. Incoming.
The timeline has been a bit cluttered with people giving advise, based on their experience, on what they would focus on if they were starting over in tech. For example, one of my favorite follows on twitter John Breth weighs in:
Everyone is posting "If I had to start over in tech" posts the past few days.
Almost all the tech vets have cloud as one of the technologies they said they would focus on.
I couldn't agree more!
So if you want to start…here's 20 cloud vids (AWS/Azure/CCSP) to help you!!!🧵 pic.twitter.com/D7LeVmteFp
— John Breth (JB) | CyberInsight® on YouTube (@JBizzle703) October 4, 2022
Follow John! good content from a good dude 🙂
This got me thinking a bit about my own journey and what it means to ‘start over’ in tech.
The Beginning
I’ve started over, money/job/career wise about 5 ‘major’ times since I turned 18; 40 today. I ‘started over’ in tech in July of 2018, enlisting full-time in the Washington State Air National Guard. The first year and change, when you first dive into the job and associated study, it’s easy. Not necessarily the content/job. What I’m talking about is the motivation.
Everything is seemly made for you. The new person in tech. The books, seminars, lectures, YouTube, study groups are 90% for those who are in the beginning stages of their careers. Or, at least that is what it seems to me. Especially after consuming tons of this content over the last 4 years and change.
The rush of taking your first few certs is pretty bad ass. It rivals that of finals week at the collegiate level in my opinion. Sharing your news with those that helped you along the way and those who you’ve studied with is equally as fun. I’m pretty close online with the connections I’ve made at or around this time. It’s a very special time.
But I don’t really want to talk about the beginning. What comes after that first little rush. When you’re just getting your feet wet but think you’ve come to some standard of knowing something. Right before you realize you barely know anything.
The Hard Part
I’ve been in this hard part for the latter part of the last 3 – 3.5 years. Trying to climb your way out of being a novice and getting to something deeper, unsure of what you can call yourself. To motivate myself I spend a lot of time online. Most of the people I look up to online are some sort of engineer, gave talks at conferences, been doing the thing for at least 15 years or some 18 year old CCIE candidate. There are so many freaking awesome people out there to be inspired by.
All that inspiration you get when you are first starting out, when inevitably comparing yourself to those you are inspired by, begins to weigh on you when you are reaching year 3 and into year 4 and you are diving into yet another new technology and having to learn the fundamentals of something new.
I can tell I’ve made progress when I’m talking to those I work with, or someone who themselves are just starting to learn a certain aspect in tech I’ve spent some time on. I surprise myself by how articulate I can explain something. After the conversation I’ll marvel at how much I actually do know.
But then I’ll do something like go to my first tech conference and meet a bunch of super amazing people again. An inner dialogue begins. Am I good enough? Is this the right career? Do i ‘love’ this? What am I doing with this?
How do I relate what I do to my kids? This question right here weirds me out, as the answer is something close to: I respond to emails, solve puzzles and google stuff for people that are too lazy to read. How is this a rewarding life? I’ve always had trouble selling stuff, myself included. I don’t see it as a bad thing but rather see it as me having a true heart and an understanding of what’s actually important (I have trouble lying…).
The Next Thing
This is what I’ve come to accept as what whatever this tech thing is. It’s continually learning. It’s not knowing (but finding out). It’s not something to master, it’s something to be in awe of, to be curious about.
How do you know tech is right for you? If you see something, tech related, and wonder how that works. How can you make it do something else. How can I get it to do what your friend did. I think this attitude, if you are nodding your head north and south, means you are in the right spot.
I doubt 10 years from now will look a lot like today. So that means nothing but learning ahead. Even though I’ll never be Ivan Pepelnjak, the hope is that I’m able to draw on my experience to pick up things faster. Notice that this new thing is actually this old thing bolted on to this other old thing. Speaking of finding little nuggets. When thinking about ‘if I could start over in tech’ I’m reminded of a cool RFC I was linked to a book I was reading. I find it fun to follow a lot of the links when reading 🙂
1. Introduction
This Request for Comments (RFC) provides information about the fundamental truths underlying all networking. These truths apply to networking in general, and are not limited to TCP/IP, the Internet, or any other subset of the networking community.
2. The Fundamental Truths
(1) It Has To Work.
(2) No matter how hard you push and no matter what the priority, you can’t increase the speed of light.
(2a) (corollary). No matter how hard you try, you can’t make a baby in much less than 9 months. Trying to speed this up *might* make it slower, but it won’t make it happen any quicker.

(3)  With sufficient thrust, pigs fly just fine. However, this is not necessarily a good idea. It is hard to be sure where they are going to land, and it could be dangerous sitting under them as they fly overhead.

(4)  Some things in life can never be fully appreciated nor understood unless experienced firsthand. Some things in networking can never be fully understood by someone who neither builds commercial networking equipment nor runs an operational network.

(5)  It is always possible to aglutenate multiple separate problems into a single complex interdependent solution. In most cases this is a bad idea.

(6)  It is easier to move a problem around (for example, by moving the problem to a different part of the overall network architecture) than it is to solve it.

     (6a) (corollary). It is always possible to add another level of indirection.

(7)  It is always something
     (7a) (corollary). Good, Fast, Cheap: Pick any two (you can’t have all three).

(8)  It is more complicated than you think.

(9)  For all resources, whatever it is, you need more.

    (9a) (corollary) Every networking problem always takes longer to solve than it seems like it should.

(10) One size never fits all.

(11) Every old idea will be proposed again with a different name and a different presentation, regardless of whether it works.

     (11a) (corollary). See rule 6a.

(12) In protocol design, perfection has been reached not when there is nothing left to add, but when there is nothing left to take away.
Request for Comments: 1925 [1 April 1996]
So if I could do it all over I’m not sure I have any better advice to give. Do what you like to do. I’ve heard John Capobianco on more than one occasion ask people what they are interested in, whether it be Pokémon or baseball, and tie those interests or hobbies into a tech project. I think this is great advice, and I’ve tried to share it with others. There are so many ways to tie something tech related to things out there in the world. If you can combine the two you can learn more about both at the same time.
Like I alluded to above, sometimes I don’t feel all that into everything all the time. Sometimes I use this hobby/job/phase of my life to distract myself from other aspects of my life. We all have our lows. I’ve been there. I doubt myself. I wonder what I’m doing.
In the end I’m just a curious dude. I studied philosophy and my favorite word when I was a seven year-old was why. Every profession I’ve taken up I’ve looked into the science, tried to hone my craft with a bit of flare. Perhaps I’m just in this particular game because I enjoy puzzles. This is just another phase in my life. Another chapter. Will the next chapter be tech. Maybe, but I’ll be equally immersed in whatever I’m doing because as I’ve come to find out that’s just the kind of guy I am.
All Good Things Must Come to an End
Like this blog post.
If you feel something in your heart is pulling you, I’d say follow it, and give it your entire heart. This might not be it for you or maybe it isn’t for you ‘right now.’ I’m not super into long term goals. For me, I focus on daily routines. What do I like to do? Spend time with my family? Yes, put it in the routine. Read? Yes, put it in the routine. Run? Yes, put it in the routine. I control each day, as much as one can, and put my effort in things I enjoy. Where will this get me in 10-20 years? I don’t know career wise, but I know I will have been an active parent who attempted to do his best on any given day.
As with journeys, i’ll see you around the bend, until next time. If you see me, say hi.
About eight weeks ago I saw John Capobianco and Tim Bert were holding an online meeting about trying to pull down some NCAA football data using an API. I, myself, finally finished up the last certification exam I’ve had on my plate shortly thereafter. Since then, I’ve taken to doing a little bit of DataCamp and CloudAcademy each day.
DataCamp has a python track that teaches you the basics of python while adding in some packages a data scientist may use along the way, specifically, numpy and pandas. I’m square in the middle of DataCamp’s ‘intermediate python’ course.
Then, like a shower whose water never gets warm, I thought to myself, why not try and do some stuff with NBA data while going through the examples and practice during the course. So here we are 🙂
As the title says, this is going to be ‘basic’ as i’m just beginning and truth be told, i’ll prob do some non best practices going forward in this post. This is what learning in public looks like.
Getting Some Data
If I’m going to parse some data using what I’ve been presented thus far in my training, I need some data. In my current lesson we are doing basic data parsing with pandas series objects and pandas dataframe objects. I took to the googleverse and found an interesting github repo. This python package was created to make it easier to interact with stats.nba.com APIs. To install:
pip install nba_api pandas requests
From here it’s all about figuring out a bit from the documentation found on the github I linked above. Jimmy Butler is my current favorite NBA basketball player so the first thing I need to find out is his PLAYER_ID so I can use it to get further info on him.
From the output, we can see that Jimmy Butler’s ‘id’ is 202710. I’ll use this when making my next call:
>>> from nba_api.stats.endpoints import playercareerstats
>>> Jimmy = playercareerstats.PlayerCareerStats(player_id=202710)
>>> print(type(Jimmy))
<class 'nba_api.stats.endpoints.playercareerstats.PlayerCareerStats'>
So, at this point we are almost there, just a little bit more mangling and we will get to the types of objects I need…I’m going to use the get_data_frames() function included in the nba_api and select the first table in this object with the ‘[0]’ and assign this to the variable ‘jimmy_panda’:
Alright, above it says at the end of the output we have 13 rows x 27 columns. We definitely see the 13 rows but we don’t see anywhere close to 27 columns. Let’s see how we can see what the 27 column headers are, to do this i’m going to dtypes to see the info about each column in the table as shown:
So this table we have is kind of exciting, at least for a first go at this, am I right?! We can now select to print off only certain columns in the output or slice only specific years of Jimmy Butler’s career or both. One way to do this is to use pandas and make sure the object we are dealing with is a DataFrame, allowing us to use all the options assoicated with this object type. Let’s see how we can accomplish this:
>>> pd.DataFrame(data=Jimmy.get_data_frames()[0], columns=['SEASON_ID', 'PTS', 'AST'])
   SEASON_ID   PTS  AST
0    2011-12   109   14
1    2012-13   705  115
2    2013-14   878  175
3    2014-15  1301  212
4    2015-16  1399  321
5    2016-17  1816  417
6    2017-18  1307  288
7    2018-19   213   43
8    2018-19  1002  220
9    2018-19  1215  263
10   2019-20  1157  350
11   2020-21  1116  369
12   2021-22  1219  312

###
Above we basically changed the Jimmy object into the Data
Frame object we want to play with.  It's the same as doing
what's below because we've already assigned 'jimmy_panda' and
made sure it was a Pandas Data Frame
###

>>> pd.DataFrame(data=jimmy_panda, columns=['SEASON_ID', 'PTS', 'AST'])
   SEASON_ID   PTS  AST
0    2011-12   109   14
1    2012-13   705  115
2    2013-14   878  175
3    2014-15  1301  212
4    2015-16  1399  321
5    2016-17  1816  417
6    2017-18  1307  288
7    2018-19   213   43
8    2018-19  1002  220
9    2018-19  1215  263
10   2019-20  1157  350
11   2020-21  1116  369
12   2021-22  1219  312
Or, an even simpler way to select columns, since we know ‘jimmy_panda’ is of the data type we need:
Alright, that was fun, let’s see how we can slice a specific year (row) out of this chart (how did i figure out how to do this you ask, I checked the pandas loc docs):
Now that we’ve seen we can pull out specific columns, rows and the like, we can now decide to do so based on certain thresholds. For example, it maybe useful to know only the years Jimmy Butler shot over 30% from 3-point range.
The first step we need to do is figure out which column we will be using to do our comparison, specifically, which column represents 3 point percentage. We can scroll up and look at the output of our dtypes command or do it again:
Alright, we can see we will be working with the ‘FG3_PCT’ which is the object type float. Next let’s check out the specific values we will be comparing, specifically, we are going to check which years Jimmy Butler shot the 3-ball better than 30%.
Every ‘True’ is when Jimmy shot better than 30% and every false is when he failed to do so. Next, i’ll show a series of commands. First, i’ll assign the variable FG3_is_good to the comparison and then use that variable as an index. Lastly I’ll use the value_counts() function to see how many ‘True’ or ‘False’ in total, so you can see how many years he was better than 30% and how many years he was not.
One funny thing that jumped out at me is that Jimmy has been unable to shoot better than 30% from three after the age of 30. Interesting. Furthermore, we can easily conclude Jimmy has shot better than 30% from 3 61% of the seasons he’s played thus far.
Playoff Jimmy has been said to be a thing. One aspect of this is that he shoots better from three in the playoffs as well. We can use the same format as we did above to quickly figure out his percentage. Jimmy Butler’s playoff stats happen to be [2] index of the original ‘Jimmy’ object we pulled down using the nba_api:
Kind of funny that Butler has a perfect True False pattern throughout his playoff career. Also, as with anything in IT there are at least 25 ways to do the same thing, the more you learn. Above I was able to pull the “FG3_PCT” for each row. Here is another way to do the same thing using a for loop:
Well, if you read this far you realized we didn’t do anything mind bending. I suppose writing this out and doing the same type of practice activities I’m doing in my DataCamp course on some data I pulled down myself helped me learn quite a bit more than simply going only through the course.
I’ve always enjoyed doing data parsing in Linux. I’ve mentioned in previous blog posts how much I’ve enjoyed doing log parsing on the Linux shell using cut, grep, awk, uniq and sort to break down logs. This data science stuff seems to tickle a bit of that same excitement. I’m also excited to continue this project. Specifically, making visualizations should be fun, and i’m sure i’ll check back in here once I make it that far. I’ve seen some people plot shot charts as well, which would be a fun little side quest. I imagine a site like statmuse.com does a lot of what’s shown here behind the scenes when you ask a question.
I was scrolling through twitter.com and saw a post about a new podcast, ‘Sharkbytes‘ hosted by Roland Knall. The first episode is an interview with Betty DuBois and Sasha Mullins-Lassiter. In the interview, Sasha goes over her experience getting into cyber security and attending Sharkfest. This got me reminiscing, Sharkfest was my first ever ‘in-person’ tech conference and I don’t think I could have had a better experience.
Gerald Combs giving Day 1 keynote
Why write a retrospective? Well, I want more people on the fence, thinking about going to perhaps read this while they are researching and end up pulling the trigger. I remember before I attended I saw Denise Fishburne’s ‘review’ of Sharkfest on her YouTube channel Networking with Fish. Now I will never be as charismatic as Ms. Fishburne or on a podcast with Roland so I’ll fill this page with words behind my keyboard 🙂
Pre-Conference Classes
A great way, as it turns out, to lower any pre-conference social anxiety issues is to attend the pre-conference classes. My first class of two classes was titled ‘Introduction to Packets-How to Capture and Analyze with Wireshark’ and I simply couldn’t wait.
Before we even entered the class, we had a catered breakfast just outside of the classroom in a fairly fancy hotel in downtown Kansas City. Upon finishing, making sure to refill on my coffee, I entered the class to be met with one of the nicest people I’ve ever met in tech, my instructor, Betty DuBois. At my desk I had a notebook with sharks on it, Wireshark pens and a place to plug my laptop into. All in all I think we had less than 20 students in this two day ‘get to know’ Wireshark course.
The main point of this course was to try and take everyone, from where ever they are at skillset wise, and set them up for success during the following course and the conference itself. Highlights being a few hands on labs and most importantly all the ways in which to make your pcap sing by creating specific profiles for specific types of traffic within Wireshark.
Each day in these courses we all ate together around big tables, rubbing shoulders with the Wireshark development team as well as fellow students. It being such a small group you can’t help but feel included, no matter how nervous you might be on the inside. As mentioned before, these small groups helped ease the transition as we got a little more crowded in the second pre-conference course I attended ‘Cyber Threat Hunting with Wireshark’ taught by Chris Greer.
This course doubled in size, we had to be getting close to 40 people in the room. Chris had on a microphone and it seemed as though we were gearing up so to speak. The course was great with every lecture leading into a hands on lab. I took away some major advantages of pcapng vs pcap file structure as well as getting some practice using Betty’s profiles to quickly solve some lab challenges. Besides using Wireshark I tried to solve every lab using tshark, the cmd line version of Wireshark, as well.
After this one day course, we had a kickoff dinner. All the food that was catered was very good. I was continually surprised each meal of each day. I’ll discuss finances later, but will mention here that breakfast and lunch were included on pre-conference class days and then lunch and dinner was included on conference days (dinner with an open bar mind you).
The kickoff dinner was the first time you start to see a bigger group. But, in talking to the other attendees this is still a very small conference. I’d guess we had maybe 100 – 150 people at the opening night dinner and talk. Having met people during my two pre-conference classes I felt as though I already made connections and had conference friends. No awkward ‘all these people i don’t know’ feeling ever crept in. Like Sasha mentioned in the SharkBytes podcast, I felt like I belonged.
The Conference
The conference had three options for every time block with each time block consisting of about 90 minutes. So we had two talks before lunch and then two talks after lunch. As an attendee you get to decide which talk interests you the most, or mosey around the snack table, whatever suits you.
One of the main highlights was that I got to meet Tony Efantis. I’d been following him online since he started posting streams about his CCIE journey. Getting to know him a bit online before the conference as I’ve done with quite a few people over the last 3-4 years, Tony was the second person after A.J. Murray whom I got to connect with in person. Come to find out, our jobs are pretty closely aligned as he works on the hardware that the Air Force uses to do Defensive Cyber Operations.
Tony Efantis giving a talk titled “Build your own: Remotely accessible packet-capture drop box for troubleshooting networks <$100”
Besides Tony, if I had to give awards out to my favorite talks they would be Josh Clark’s “Troubleshoot like a doctor” on the first day. The attention to detail on the presentation and its foundational approach both moved me. In summary, this talk gave an illustration on how a doctor goes through training and then quickly makes choices on what to do with a patient and then he seamlessly ties this into how we could do this with IT troubleshooting. Taking into account that doctors have honed their troubleshooting methodology for way longer than IT has been a thing and it’s this experience he believes we can take from and apply to IT troubleshooting.
Another talk that has stayed with me was Mike Kershaw’s talk about software defined radio magic stuff on the last day! My current position in the Air Force deals mainly with different kinds of RADAR data sets and having Mike discuss ADS-B got me all excited. It was only a 90 minute talk but I enjoyed how he went from how to initially capture the traffic from the air to trying to make something meaningful out of it. Wireless technology has always been one of my weakest points but the things Mike is able to do make me want to get better in this field for sure!
The last person I’d give a special speaking award is Hansang Bae. He gave a talk on troubleshooting I believe, I don’t even recall the name of the course. I remember he was using a Remarkable2 for his presentation. Something I’ve been looking at purchasing for a long time and this was my first ever time seeing it in person. Mr. Bae was using it to draw or illustrate his point during his lecture. The way he was able to tell where a specific server was based on the time it took it to respond was the first thing that blew me away. I’ll admit the talk may of been a tad too advanced for me, but seeing him carve a pcap, make quick determinations, I knew I was in the presence of greatness.
Beyond the talks, I was most enthralled in Sake Block’s CTF. I believe this went live the first morning of the conference and ended the morning on the last day. I diligently worked through every challenge. Seemed as though this CTF was made for me difficulty wise. The prompts were difficult but not so difficult I wanted to dispose of my laptop in the nearest trash receptacle. Every break and meal I was following Sake around, probably annoying the shit out of him, looking for ways to accomplish whatever flag I was on and share with him the excitement of previous flags I finally got. I ended up clearing all but one flag by the time the buzzer sounded and placed 4th overall. Staying up to 2 am each night working on flags almost won me a trophy, if it wasn’t for those pesky online attendees, I would’ve been second behind Chris Greer. NEXT TIME!!! 🙂 But in all seriousness, Sake Block was a huge part of this conference for me. At the end of the conference I felt like I jived well with all the people whom trekked over from Europe.
One of the biggest highlights/fun for me personally at #Sharkfest22 was @SYNbit's CTF 🙂
Sharkfest + All Pre-Conference Classes is just shy of $3,000. As mentioned above some food is also included, about 12 meals. In addition to paying for the conference you’ll need to secure air fare and lodging. So a total cost under $4500/person is very reasonable for those living within the US. Looking at the bigger conferences like CiscoLive I think you’ll see this cost is very good for what you end up getting.
Conclusion
I think this is a very good value given the content and atmosphere. From the small size of the conference to it being centered around an open source project, the feeling of inclusion and the lack of a feeling like someone trying to sell me something the entire time can not be overstated. The atmosphere was one of learning, especially the fundamentals as well as inclusion.
It’s been so long since I’ve sat down to write a blog post. I’ve conferred with Aninda Chatterjee on my lack of motivation to write, where did it go and if it would ever come back again numerous times with months in between. To be completely honest, the drive to do tutorial type stuff just isn’t there. I’m planning to embark on some Kube learning soon, so maybe that could spark something. Time will tell…
So what have I been up to in the last, say, 10 months since my last post? Well, a lot! I’m deep into trying to be a cyber analyst at work, perhaps trying to get fully onboard at a Cyber Operations Squadron (Air Force). In sharpening my skills at work I’ve also continued to study and take exams in my free time as noted by the title of this post.
In the following, I plan to take you on a round robin discussion of the courses and exams I’ve taken since I’ve last checked in, let you know what I think and cap it all off with what comes next. Always looking with an eye toward the future 🙂
GIAC Network Forensic Analyst (GNFA)
The GNFA is the exam associated with the SANS FOR572 course. I chose to do the ‘On-Demand’ version taught by Phillip Hagen. I really like the On-Demand format. From the content broken into smaller, easy to consume videos, to the digital book associated with lecture side-by-side, to the easy navigation, to the mobile App. It doesn’t miss and it shouldn’t given the course is now garnering an $8k+ price tag.
Before taking SANS FOR572 I completed SANS SEC503, which I’d recommend as a precursor if you are a bit new to the field. SEC503 spent a good amount of time going through how to use a certain tool whereas FOR572 assumed such knowledge and really hit the ground running using the same tools and spent most of its instruction in the actual analysis of the output. So it felt really good to feel like I was building upon a foundation started from a previous course and ‘advance’ into ‘doing the job’ type scenarios.
Scenarios, that’s one word to describe FOR572. Scenario! Everything you do deals with a specific, elaborate scenario. You are called in to a company, given network maps, logs from certain devices and start logging all your findings a long the way. Hands on learning from a large data set, allowing you to go far beyond what’s outlined in the lecture or in the lab. This is where SANS shines in my opinion. Not to discount the lecture, as I think that’s top quality as well, but the thought that goes into the scenarios, the lab book and how it’s so nicely put together is something I’ve not seen another vendor come close to (I know, I know, it costs $8k+).
I felt fairly confident going in to take the GNFA on exam day. I began studying networking, built upon what I learned in SEC503, I was ready! This exam turned out to be all multiple choice if I’m remembering correctly, no lab questions. Still, all the questions were paragraphs were you are deciphering log information to come up with conclusions about the data set. My brain was on fire at the end of the 3 hours. I passed the exam with an 80%. Lower than I expected but, like mentioned above, most of the course and this exam was not about knowing and using a specific tool, it was about being able to say things about the output.
Talk about leveling up. I feel as though if I were to relate this to my collegiate learning I’d say I learned as much in 4 months studying FOR572 as I did a whole year in college taking a full load. Furthermore, it’s at this point I think my confidence also begins to show through a bit more in the workplace. I’m beginning to share my opinion more in meetings (and I have a bit of experience to base my opinions on…).
CompTIA CySA+
I’m assuming if your reading this, you have an idea of what the Art of Network Engineering community is. If not, they do a podcast but even better, they have a discord. In the discord people talk about coffee, grilling meats and travel (that’s the channels I mostly check). Additionally, there are channels for studying/discussing specific technologies, sharing employment advice and simply lifting each other up.
One day I saw a post from someone offering up a CompTIA exam voucher. I reached out and a few minutes later I was signed up for the CompTIA CySA+ exam. This gentlemen, who I will not mention by name so he doesn’t get swarmed with free voucher requests, supplies CompTIA with exam questions for certain exams as a side hobby. In return, sometimes CompTIA gives him exam vouchers and he was simply passing this one on.
To study for the exam, I looked quickly at what was available on one of my favorite learning sites: O’Reilly. Each module and topic, after a quick skim, looked familiar. It was at this point I moved my exam up and said to myself “I’m already doing the job, let’s just go take the exam.” So, in short, I didn’t study at all.
The exam itself, I called it fair, insofar as I passed. My logic was that I’m doing the job and in my mind I’m ‘doing the job’ at a fairly high level, pat myself on the back. So, passing the exam would simply validate the skills and knowledge needed and since I passed everything seems to have lined up.
I wish I could give a more, if your just starting out is this worth it, type of opinion but I can’t really view this exam from that perspective, since it isn’t mine. I took to learn networking, learn some networking implementation and then some network design and then I got into cyber. The culmination of 4 years of studying on my own made this exam a pretty easy endeavor.
Beyond just passing an exam, this opportunity helped me garner all the required CEUs to renew my required Security+ certification for my current employment with the Air Force. So I wasn’t just out here passing an exam for no reason! 🙂
CompTIA Pentest+
So I quickly conferred with the person that gave me the previous CompTIA voucher my thanks and that I passed the CySA+. He replies back that he has another voucher…
Interesting.
I believe we are now into February 2022. At work, I’m getting ready to start a cyber exercise called Cobra Gold. In this exercise, I was to be a ‘red team’ member and provide cyber effects to teams defending a network and specific devices within their network as if I were an adversary.
This exercise started off with four days of academics, of which, I even taught a 90 minute course on ‘Linux Host Hardening’ but I had very little experience in offensive tools or techniques. So I had a bit to learn in a week to be a good adversary! This backdrop, and receiving another voucher prompted me to study for specific topics covered in the Pentest+ exam while I study, prepare and execute my tasks associated with my part of the Cobra Gold exercise I’m doing for work.
The main things I implemented and used was Metasploit, nmap and all the impacket tools. Not an exhaustive list by any means, but I had two weeks! One week focused simply on learning and another week implementing my attack. Have to start somewhere!
As mentioned in the exam above, I went back to O’Reilly to fill in the gaps on specific exam topics I wasn’t able to tackle during the work exercise. As far as the Pentest+ exam goes, getting the hands on practice with nmap and Metasploit payed off immensely. Knowing all the nmap options might even be a quarter of the exam, ok, maybe not that much but it’s there for sure!
I would call this exam very entry level as well after taking it. I studied for about two weeks and passed very easily. Again, I do have a lot of other types of experience beyond the two weeks I focused on it, so I’m not saying it’s ‘that’ easy. Now that I think of it, and I’m two CompTIA exams into this post, I haven’t really seen much content on exams from the point of view of a mid to advanced career. I mean people do posts on them that are, but I have to give them more credit on being able to empathize with how it relates to people ‘just starting out’ cause that is not as easy it seems.
GIAC Certified Forensic Analyst (GCFA)
Man. This was a tough one. Just looking at that heading I’m taken a back by the amount of work went in to me barely passing this exam. I just passed this exam a couple of weeks ago, which means, I started this course about 4 months ago. The GCFA is associated with the SANS FOR508 course.
For this course I decided to try the ‘Live Online’ format. Quick recap, I don’t like it as much as the On-demand format. One good thing, work allowed me some time away to do the Live-Online format that was not allotted to me when doing the On-demand format. But content wise, not the best for my learning.
First off, the course pace is FAST! I took this course because I’m mostly comfy with networking, including on the cyber side. This course was about learning about host artifacts. Something I knew very little about. By the end of day two my mind had melted and was on the floor. The lecture by day three, while I could hear words coming out of the speakers, they washed over me like a warm shower at the end of a long day. I knew something was happening but my mind was in a completely separate place, unable to make sense of much beyond day 2. I had trouble catching up at night as my dad duties were far too great for the amount of content I needed to grasp before the next day.
The next thing I don’t like in the Live-Online format is how the recordings of your lecture are laid out. They are simply an 8-9 hour video, unedited in your browser, breaks and lunch included. The connection would time out after a couple of hours and I’d have to reload my page and try to skip to were I’d left off. It just wasn’t ideal. I ended up going through the MP3s associated with the course over trying to deal with the recordings of my lecture as they were edited and in smaller more manageable chunks.
The labs, like all previous SANS courses, were off the charts. There were some 60+ specific tools discussed in the course and you had so much data, including full images, forensic images etc. to run them on. So many tools and so many different kinds of artifacts. A crash course unlike anything I’ve ever experienced. Like FOR572, the labs for FOR508 use the same org but you have a completely new set of evidence so that you can learn how to analyze hosts. The labs built off each other as well. You are able to take what you learned from one tool as a starting point as we examine evidence from another tool or data set.
After going through the course, going through the course again with the MP3s, going through the course again by reading all the books, going through all the labs a few times I didn’t think I had any chance of passing the associated exam. I NEEDED TO CREATE A VERY GOOD index if I was to get anywhere close to passing.
On a GIAC exam, you are allowed to take any written notes, books, diagrams etc. in with you when you take your exam. Many people make an index, where they have a list of alphabetized key words associated with which book and page number to find it. So if you get a question about shimcache you can quickly find some relevant pages if you are stuck. I went through all the books again, reading each page, summarizing the page, and then adding any key terms to an index. This took about 2 weeks and I had around 900 entries in my index.
And when you go into the exam, there are about 85 questions and you have 5 books that are between 120-180 pages each. So you can’t really look up ‘every’ question. Even so, questions will often be framed with competing tools, viewpoints or ideas so you have to know more than one thing to get to what the answer should be. This exam also included a practical portion, where you get access to a VM and have to use some tools to come up with the correct answer. I much prefer these questions as they seem more straight forward.
I ended up passing the exam with a 76%, 72% was passing. While not impressive by merely looking at the score, just about everything I learned over the last four months was something I didn’t know or have experience with beforehand. Memory analysis was the most fun, most eye opening module to me. Didn’t know how many things you could find out by dumping someone’s RAM. Remarkable.
eLearnSecurity Certified Digital Forensics Professional (eCDFP)
Getting this exam voucher was akin to how I got my CompTIA ones. It’s not what you know it’s who know they say…Here a friend was not going to be able to use his voucher before the deadline due to commitments at work. So here comes me always willing to try my hand at an exam.
I choose to do the eCDFP over other eLearnSecurity exams due to the overlap with FOR508 and I was coming down to the wire of having to take the exam very soon. I signed up for the 7-day free trial to go through the associated course and I was on my way. Exam in seven days.
To say I had trouble with both the course and the exam would be an understatement. Half the labs for the INE course were ‘under maintenance’ and I wasn’t exactly blown away by having to go through some 1500 slides in seven days. The video lectures were short and didn’t really dive into any additional options with any of the tools discussed, very surface level. To INE and eLearnSecurity’s credit their support team was always there, responding quickly to whenever I needed help, mostly with the exam.
So the exam is a 24 hour timed 30 question test. 15 of the questions are typical multiple choice and 15 questions require you to connect to a lab network, perform tasks, analyze output to come up with the answer. I spent about 6 hours and 3 exam attempts simply trying to get properly connected to the lab environment. To note, I needed to install an OpenVPN client about 3-4 versions old to even connect. Then I had to hope that I was able to connect the the VMs in the exam lab environment. If you couldn’t connect, you’d have to reset the lab environment which took another 30 minutes. Very frustrating.
In any case, come the second restart on my third attempt (I was given another voucher due to my technical difficulties) everything was working perfectly. I correctly answered 28 out of 30 questions in about 4 and a half hours.
While this exam does have a lot of overlap with SANS FOR508, it digs a bit deeper into data acquisition from hard drives. How to decipher a MBR in a Hex editor and be able to make out partition tables/sizes and the like. So this wasn’t as simple to study for as the CompTIA exams mentioned above, I really had to dig in on a few modules. Whats more, even though they were trying to get at the same artifacts discussed in SANS FOR508, they were using completely different tools to achieve it. Feel as though I really became more of a pro with FTK imager in this course.
My main gripe with the exam beyond its lack of proper functionality is that it’s still on version 1. People have passed this exam since at least 2018, the same version. The linux machine was using Security Onion and I was using Wireshark version 1.12 which came out in 2014. I shouldn’t be using 2014 version of Wireshark in 2022…
So this exam, while the content is still ok, could use a bit of a refresh if only to fix what’s broken and bring in some new versions of the tools discussed and used. There’s a lot of additional functionality in even the tools discussed that could be of value. I’d like to see eCDFP version 2 come out before I fully endorse this exam and course.
Planning for the Future 🙂
Well were do I go from here??? I want to gain a deeper understanding and working knowledge of kubernetes so I think that might be the next big course I undertake. No associated exam, just in it to learn.
Beyond that, I just applied for a masters program in cyber defense at Dakota State University. Don’t think I can attend awesome SANS courses forever and they have a ‘technical track’ so I hope to be pushed and learn a lot here.
See you around the bend as we continue on this journey, till next time 🙂
While troubleshooting issues is a fantastic skill to hone and practice, as network admins and engineers, it is not something we want to spend all of our time doing on a daily basis. Rather than constantly working through trouble tickets and “keeping the lights on”, we would like to use as much of our time and energy as possible on more strategic efforts to help the business succeed. One staple of network operations is having some sort of a network monitoring solution. In the most basic form of network monitoring, our requirement is that we need to know when a device or link is down, or if there is some blatantly large problem that we want to make sure we know about. It can be a very rough feeling to have a network device at a site go down over the weekend, and completely miss it because there was no monitoring/alerting, which makes it an instant emergency Monday morning when the first person gets there and has to call in and report the issue. That is a really important function of a network monitoring solution, but should we accept that as being enough? With just satisfying this basic requirement, it still leaves a lot of time and effort on the network admins and engineers to troubleshoot issues that are not as cut-and-dried as a device being in an up or down state. What if a network monitoring solution could be more than just firing on standard alerts which still force staff to spend time manually finding issues and correlating events? What if we could tap into all of the intelligence that is just sitting in our network devices? What if we could leverage our network devices as sensors to feed our monitoring solution with data, and in turn the monitoring solution is able to analyze and correlate all of this information to then not only alert on issues, but give suggested troubleshooting steps so we do not have to do all of that manually? All of these “what ifs” are addressed by PathSolutions in their TotalView product.
What is PathSolutions TotalView?
PathSolutions TotalView is a network monitoring solution, but not just any network monitoring solution. You can think of it as a combined monitoring solution and digital troubleshooting assistant. TotalView can provide not just alerts about problems, but actual recommendations on troubleshooting next steps. Rather than receiving an alert about packets loss, or potentially nothing at all if the issue is around slowness or poor performance, you could receive a message that looks like the following:
That message is very powerful for two reasons. First, a junior or senior engineer has some direction on next steps to resolve an issue before having to log into any device and start information gathering and manually troubleshooting. This is one of those “wins” that was brought up in the introduction. TotalView can assist with initial troubleshooting so you do not have to spend the time and effort manually. Secondly, the message above is powerful because the operations team can receive that alert and implement the recommended fix before an end user even reports the issue. Let’s face it, sometimes people will just deal with an issue and accept the poor performance rather than report it as a problem. Having this proactive visibility and assistance allows an IT operations team to provide real value to the organization they support.
How does TotalView work?
First off, a big claim to fame for TotalView is that it can be stood up and operational in less than twelve minutes. TotalView consists of a lightweight Windows installer, and thus is designed to be implemented quickly and easily on a Windows virtual machine. The solution is self-contained within that single VM installation. There is no need for separate front end or database servers. The PathSolutions stance on this is to provide a valuable network monitoring solution that does not take time and effort away from the IT operations teams to put a lot of care and feeding into the solution itself. Once the server is up and running, it is to be configured with SNMP and SSH credentials, as well as relevant subnets to scan so that it can learn about all of the network devices in your environment. TotalView can gain insights into Windows servers by leveraging WMI queries. A benefit to subnet scanning is that once it is set up, it can catch new devices as they are implemented so that staff does not have to remember to manually add in new devices to the network monitoring solution. Once TotalView has the subnet and credential information, it can continuously crawl the network to retrieve and correlate valuable operational information in your environment.
Troubleshooting Highlights from TotalView
Now, let’s take a look at the troubleshooting guidance from within the solution. First off, from the main screen, we get a nice default breakdown of items like overall network health and charts of device manufacturers and different interface speeds in the environment.
Next, on the Network > Devices screen, we can see the environment inventory and start to see which devices are tagged as having issues, and drill in to see what specifically is at fault. For example, in the demo environment, we can see that interface #4 on the Sauvignon switch has a peak daily transmit utilization of over 93 percent.
Further down on this screen, we see the TotalView Network Prescription that details the next steps to dig into this alert.
To highlight the power of the Network Prescription feature, here is another example. A port on a switch is showing an error due to a high peak daily error rate. Here are snippets of the Network Prescription section that can immediately point you in the right direction before even having to log into a device.
With this level of information and advice, we are empowered to resolve issues quickly and efficiently.
Unleash Your Full Potential
Are troubleshooting and fixing issues part of a network engineer’s life? Of course they are, but we also need to find the time and energy to innovate and provide value to the businesses and customers that we support. We cannot do that very well if we are constantly in break/fix mode, logging into device upon device gathering and correlating data manually to resolve each and every issue. If we can tap into everything that our network already knows and get assistance with correlation and automated troubleshooting, we all win. PathSolutions is here to help you unleash your full potential with TotalView. Learn more at https://www.pathsolutions.com/.
As network/systems engineers and admins, the natural approach to something new is to start with training and understanding a new technology, job, project, or task. This is a valid approach, but many times is only half the battle. For practically any role, you not only need to understand the job and technology, but you also need to be able to leverage potentially many different tools to accomplish your mission on a daily basis. Sometimes you may not have all the right tools in the toolbox to assist you in what you need to accomplish, and need to justify the expense to the organization to add those tools. Other times, you may have so many different resources at your disposal that you need to determine what you really need at the ready to pack for the task at hand. Throughout the rest of this article, we’ll explore this toolbox drama, some best practices to troubleshooting, and how NetAlly can help.
Troubleshooting/Testing Best Practices
A core competency of NetAlly’s physical testing equipment and software platforms is to help engineers and admins effectively test wired/wireless implementations and troubleshoot issues, starting at “Layer 1”. This goes hand in hand with using the OSI Model as a way to approach troubleshooting and testing. Following the OSI model gives a starting point when troubleshooting an issue. It can help you efficiently apply a similar methodology framework consistently so that you can achieve similar results each time without falling into traps of glossing over a simple fix and making something more difficult than necessary. Here are the categories of the OSI model:
7 – Application
6 – Presentation
5 – Session
4 – Transport
3 – Network
2 – Data Link
1 – Physical
From a best practice standpoint, it makes sense to start troubleshooting and testing at the bottom of the OSI model, with the physical layer, and working your way upward. This gives you not only a good, repeatable starting point, but also keeps you from missing common physical layer issues, such as cabling and radio frequency problems (coverage and/or interference issues). NetAlly lives in the Physical Layer with their wired and wireless testing products, with an AutoTest and other diagnostics that aid your troubleshooting to Layer 7.
NetAlly’s Tools of the Trade
NetAlly offers a wealth of both hardware and software testing tools to help you implement and troubleshoot wired and wireless networks. From testing newly installed copper cabling, to troubleshooting a reported wireless coverage issue, NetAlly has you covered.
The wired test and analysis tools include:
LinkRunner® 10G – Advanced Ethernet Tester
Testing of 1 Gbps, Multi-Gig, and 10 Gbps copper and fiber Ethernet implementations.
Layer 1-7 AutoTest to easily find network issues within any part of the stack.
Monitor for issues over time up to 24 hours to help catch those intermittent problems.
Validate up to 90W PoE implementations.
LinkRunner® G2 – Smart Network Tester
Enhanced AutoTest diagnostics for copper and fiber Ethernet networks.
Validate up to 90W PoE implementations.
Discover nearest switch information with CDP/LLDP/EDP.
LinkSprinter® Pocket Network Tester
Fast and easy network connectivity tests for copper Ethernet links.
Discover nearest switch information with CDP/LLDP/EDP.
Validate 802.3af and 802.3at PoE implementations.
LinkRunner® AT – Network AutoTester
Fast and easy network connectivity tests for copper and fiber Ethernet links.
Discover nearest switch information with CDP/LLDP/EDP.
Validate 802.3af and 802.3at PoE implementations.
The wireless test and analysis tools include:
AirCheck™ G2 – Wi-Fi Tester
One-button AutoTest to quickly provide a pass/fail score of Wi-Fi quality.
Visualize available Wi-Fi networks.
View valuable information such as utilization, noise level, throughput, potential rogue devices, and interferes.
Test the different Wi-Fi standards.
AirMapper™ Site Survey
Create visual heat maps for Wi-Fi analysis.
See SNR, noise, and interference measurements right on the handheld display of your NetAlly product.
For one tool to rule them all, NetAlly offers a wired and wireless testing option with the:
EtherScope® nXG – Portable Network Expert
Testing options for Ethernet, Wi-Fi, and Bluetooth/BLE deployments.
Ethernet testing available up to 10 Gbps.
On top of all of these solutions, NetAlly also provides the Link-Live™ Collaboration, Reporting, and Analysis Platform to pull in all of the results and data from your network testing gear for further analysis. Link-Live™ provides the following features and benefits:
Free cloud platform enabling collaboration on validation and testing projects.
Generate Wi-Fi heatmaps on the NetAlly physical testing equipment and upload them to Link-Live™.
Easy report generation.
Tool Proliferation and Efficiencies
As you can see, NetAlly provides many different tools for many different scenarios and use cases. Sometimes it can be difficult to determine which tools make it into the tool bag (and yes, NetAlly has their own tool bags as well) for a specific task, incident, or project. I feel like you need to strike a nice balance between “prepared for absolutely anything possible” and “I had to make seven trips back and forth because I never had the right gear for the job”. I will not say that this is an easy feat, especially if you are in a hurry because something important is broken. Again, you want to be reasonably prepared for what may come your way, but you also want to make sure you are comfortable as well. I used to struggle with this. There was one point that I was carrying around switch stack cables and a spare wireless access point in my bag wherever I went. With all the other gear I had in there, I’m not sure I want to know how much that bag weighed at its peak. Did I ever actually need either of those in a pinch? No, I don’t think so. This all being said, don’t fret. Knowing what you need and selecting the right gear for the specific situation will come with time and practice. You’ll start thinking about what-ifs and caveats while you’re getting ready for a task. Just remember to continue to learn from what goes well, and sometimes even more importantly, what doesn’t go well.
Tool-ing Up
It is definitely important to not only have the proper tools of the trade, but also know how to use them. For NetAlly’s suite of tools, they have your back with product videos and webinars right there on their website. Also, refer to this report understanding the tools and trends for smarter network management.
This article is sponsored by Auvik and first appeared on their blog
There’s a point in every IT professionals’ career where they inevitably ask themselves,“do I want to get into management?”
Sometimes this point occurs when they find themselves already are in management, either by design, or as I like to say, by accident. IT pros can find themselves thrust into a management position when the old IT manager leaves, or in a de facto leadership spot: the team suddenly grows, and the new techs have to report into someone.
As I say to my kids, “accidents do happen”. But, it’s far better to avoid them if we can. Going into management, like a lot of major life decisions, shouldn’t be accidental if you can avoid it. It should be intentional, actively considered and thoroughly thought through.
There’s a lot of components to IT leadership— people management, vendor management, budgeting, planning, performance and cost reporting, etc. To ensure you’ll be most successful (and happy) in a management position, or at the very least know what you’re getting into, spend some time investigating these areas of responsibility before taking the leap. Better yet, if you have the opportunity in your current role, ask your leader to take on some of these responsibilities in a mentored capacity, where they can help you grow and learn.
But does that mean that as an IT pro you have to get into management to advance? In my opinion, no. I’ve had people leadership roles, and I’ve had senior individual contributor roles, and to be honest, I love them both. But they’re entirely different skill sets, and knowing not only what you’re good at, but what you like to do can help you be successful in your career, and happy in your life.
So if you’re sitting there trying to decide between, “do I want to lead an IT team one day?”, or “do I want to be the most amazing network engineer out there?”, then this is for you!
Considerations
Speaking from personal and anecdotal experience, the decision on whether to stay technical or go into management is very much a personal one. While I don’t expect you to discover your true calling while reading this post, I’ve put together some considerations that you’ll hopefully find valuable when making your decision.
First, start by reflecting on what components of the jobs you’ve had you’ve enjoyed doing, versus the components of the job you’ve done simply because you had to. I don’t subscribe to the idea that you’ll love every minute of your job, but ideally you should be enjoying it most of the time. If you have a great day 9 out of every 10 days, that’s a win for me! Identify the things in your work that give you satisfaction and see that they are a part of whatever career path you go down.
Next, spend some time thinking about how you want your job to contribute to your overall life. For some people this may be financial resources to support their lifestyle (travel, grown-up toys like boats, ATVs, RV’s, or support for a large family)). For others, there may be value they place on the impact their work makes on their own wellbeing, the wellbeing of others, or the impact it has on society. Some derive their purpose or self-worth through their career accomplishments. Wow, getting deep in here!
How you define success in your life or your career is ultimately up to you. Different paths will provide for different outcomes. What’s important is that you consider them before you jump in.
Some other standard “job interview” considerations include::
Career progression opportunities. Are there advancement opportunities in only one path with your current employer?
Seniority. Do you need to, or want to, be at the top of the “corporate ladder”? Does your organization enable technical leaders to have a seat at the table on big decisions, or only people leaders?
Compensation: Does your employer have comparable high-level technical leadership roles that come with increased pay, or do you need to go into management to get that increase?
Job Availability. While many companies are embracing a work-from-anywhere model, if you prefer (or need) to be in an office, the availability of jobs along your preferred path can be affected by the local job market.
Mobility. If there’s low availability of job options in your ideal career where you are, are you able and willing to relocate?
While these are all important factors, the most important one for me was simply understanding the intersection of “what are things I like to do” and “what am I good at”.
If you want to move into management, what should you focus on?
First, get out of your cubicle. Whether it’s an actual stall in a cubicle farm (aka the corporate open-plan office), or a virtual cubicle in the new distributed work world many of us find ourselves in, you need to become visible and present to the rest of the business. While you may not be in a formal leadership role yet, providing indirect leadership with indirect power can be a very rewarding experience, and it is an in-demand skill for employers.
This means increased and improved communication. Work on your communication processes, as well as your personal communication skills, to help effectively talk with your colleagues, managers, and executives in a way that positions you as a subject-matter expert people can trust (creating comfort with the idea of you in a leadership position).
Next, network. No, I don’t mean work on IT networks. Get out and meet with your colleagues over a coffee or lunch. Talk with IT leaders at other companies. Ask them how they made the transition from a technical role into leadership, and what they learned along the way. You’ll get a tip or two from them, and some may be open to a more formal mentorship! Never undervalue the return on simply asking others for advice.
Finally, speak with your current manager about moving into a leadership role. A good leader will help set you up for success in a leadership role, even if that means preparing you for a new employer. There’s also value in the concept of being radically candid, ask your manager to be direct: do they see you in a leadership position? If not, is there something you can do to steer towards that goal? Nothing is ever a done deal, but don’t operate under the guise that you are already something you’re not. Getting an honest assessment of your skills and potential is just good career advice.
If you want to remain technical, what should you focus on?
There are many, many of us out there that will choose to stay in a technical role for our entire careers—and that is definitely not a bad thing!
Technical leaders are a commodity in short supply, and keep in mind if you’ve decided to stay technical, it shouldn’t mean that your career growth and development is done. IT is constantly evolving, and to stay on top of your game you need to be consistently working on your skills. Remember, you cannot be an expert in everything, so identify your passion, then grow and learn skills around that. For example:
These are some trends today. Keep an eye out for new technologies that will lead the way in 2022 and beyond.
The right answer on whether to stay in a technical role or head into a management role is unique to every person. While I hope that this post gave you a bit to think about, I wish you luck on your journey of understanding what is the right path for you.
Every journey, even one toward network automation, starts with a single step. If you haven’t already, why not give Auvik a try? Get your free 14-day Auvik trial here.You’ll see the difference that automated documentation, config backup, and alerts will make to your network management.
In this day and age, saying that enterprise networks are critical would be an understatement. Networks have essentially become a utility similar to electricity, gas, and water. When you turn that proverbial knob, those packets had better flow; and quickly! Except, the knob is stuck in the on position and never gets turned off. If it does get turned off, somebody is in trouble. As businesses grow, so does their digital footprint, which means the network must grow as well. Not alongside the business, but faster than the business. The network has to be ‘one step ahead’, always ready for what the business has next to throw at it next. Oftentimes, as the network grows, the complexity of the network grows as well. With this growth and complexity come challenges. The network must be built onto, changed, and maintained. These challenges include:
Manual, static configurations across many devices.
Configuration drift and compliance issues.
Multi-vendor environments.
Change management processes that are multi-step, manual, and disaggregated.
The challenges listed above can cause the management of enterprise networks to quickly and easily get out of control. Modern networks require a management strategy that provides value. They need a strategy that can provide the solutions of centralized configuration management, backup, and compliance that can scale with the organization.
Itential
Itential is a company that addresses the challenges mentioned above by providing network automation, configuration, and compliance solutions for enterprise networks. Itential believes that modern networks need to “support and enable digital transformation”. Itential was founded in 2014 and since then, through their products they have supported the automation of over one billion processes. The automation platform supports both on-premises network and cloud environments. The platform itself can be delivered either as an on-prem solution or as a cloud native software as a service (SaaS) solution. The main features that will be covered throughout the rest of this article include Configuration Manager, Automation Studio, and Automation Gateway.
Configuration Manager
A major challenge in medium to large sized modern networks is managing consistent configurations across devices without making the process entirely too complicated. You want to maintain consistency to reduce the risk of ‘one-off’ issues, but you may also have compliance and regulatory requirements that you have to follow. Configurations not only need to remain consistent, but it may also need to be proven that they stay consistent throughout the phases of a device’s life cycle. The configuration phases can be described as such:
Day 0 – On-boarding. This phase entails getting enough configuration to the device so that it can be reachable and managed on the network
Day 1 – Initial configuration. This phase includes deploying a common baseline configuration to get the device itself actually operational in the network infrastructure. This type of configuration can include but is not limited to:
NTP servers
Syslog
SNMP
Day 2 to Day N – Production ready. This is the ‘up and running’ phase and includes applying the proper configuration to the network devices so that they are operational for production traffic.
Itential believes that a configuration management solution should include:
Having a full view of the device inventory and the ability to categorize that inventory into groups.
A method to easily define, update and view golden configurations.
The ability to remediate, with automation whenever possible, when config drift happens.
Having documentation of the configuration drift and remediation.
Support for non-CLI accessible devices/cloud (API integration).
Itential’s Configuration Manager provides customers with the ability to set configuration standards and detects non-compliant assets that need remediation. The Golden Configuration Editor is utilized to create standardized configurations. Those golden configurations are then applied against a customizable tree structure of inventoried devices. On the proactive side within Configuration Manager, compliance checks can be run against proposed changes to see if they will cause a device to be out of compliance. Configuration Manager can manage infrastructure via CLI and API integration. While managing configurations, the platform also supports pulling real-time backups of network devices as changes are made in the environment.
To better simplify cloud network deployments, the Itential Configuration Manager platform can treat cloud infrastructure as if it were traditional network infrastructure and translate complex configurations into more simple, JSON objects. Finally, Itential understands there is oftentimes no single source of truth in an organization. Many systems have their own source of truth and we often need information out of multiple sources of truth to make a single change. That is why Itential, through APIs, can aggregate necessary information from separate, disjointed sources of truth so all of that information is available when it comes time to make configuration changes.
Automation Studio
Although it can be easily overlooked, even the smallest configuration changes that need to be made to the network can quickly and easily become complicated. Many times, the change itself is quick and simple, but the additional pre and post work can be cumbersome and lengthy.
Itential’s goal is to greatly lessen this burden on practitioners with their Automation Studio platform. This platform provides low code, drag and drop automation workflows that can include third party solutions. Automation Studio provides end-to-end change automation. This means that it is able to automate pre and post change tasks as well, such as:
The change request process.
Performing prerequisite validation.
Pulling pre-change backups.
Temporarily suspending monitoring.
Post change validation.
Reactivation of monitoring.
The updating of documentation.
The closing of change requests.
Automation Studio allows practitioners to create centralized workflows of all change related tasks so they can focus on the change itself rather than making sure they remember all of the additional before and after steps that have to take place as well.
Automation Gateway
Before adopting an automation suite like Itential’s platform, many individuals and organizations may have already built their scripts and workflows to efficiently complete tasks using tools like Python, Ansible, Terraform, NetMiko, and Nornir. Itential’s Automation Gateway gives you the ability to onboard your different scripts and modules, or connect to existing tools via API, so that they can be orchestrated centrally by the entire team from the Itential platform. This provides customers the ability to continue to use the results of the tools and work they have already invested in, while adding in the value of bringing those different tools together with Itential.
Bringing it all Together
To support digital transformation, IT Infrastructure teams need to be able to keep up with the business in order to provide value. To ‘keep up’ means to have the ability to grow and modify the network quickly and efficiently. With the size, complexity, and sophistication of modern networks, it just isn’t possible to do so manually. Infrastructure teams need a network management solution that can provide end-to-end change and compliance automation. Itential can provide this value to network infrastructure teams with their automation platforms. To learn more, visit itential.com or check out their YouTube channel. Itential also recently presented at Networking Field Day 27, and the full list of videos can be found here.
In this article, we will show you how to do a basic Linux Server OS install using Ubuntu Server. Linux is an extremely popular operating system in our field. Many system builders will build their platform on Linux. As a result, having the skills and experience with any version of Linux can help you navigate those platforms. Ubuntu Server is Open Source, and available for free, and can be installed on nearly any platform, physical or virtual. This makes it a platform for lab use, as well as production.
Preparing the media will depend on what you’re installing on to. If it’s a physical machine you’ll likely be going to create a bootable USB drive or if you’re going to run a virtual machine you can just mount the ISO file directly. Rufus is a great tool for creating bootable USB drives for any bootable image.
Boot from the Install Media
The first thing you’ll do is select your language. Use the arrow keys to navigate the list and then press enter to select.
Next, select your keyboard layout.
Then, select a Network Interface. In our case we only have a single network interface, named ens33, and it is connected to the network and getting a DHCP address.
A Proxy is sometimes used to connect to the Internet. All traffic is sent to a proxy address so it can be scrubbed to ensure security. If this is a home or lab network you likely do not have a proxy. Leave the line blank and press enter.
Ubuntu Archive Mirror Address is the location on the internet where Ubuntu will download updates from. Leave the default here and press enter.
Next, configure your local storage. By default (recommended) you can just use the entire disk. However, in a production environment, you may want to be more specific about partitioning the storage.
Review the Storage Configuration Summary and then use the arrow keys to navigate to Done and then press enter.
You’ll be warned that the disk will be formated and all data will be lost. Use the arrow keys to highlight and select continue by pressing Enter.
Profile Setup – Here you enter in your name, the server’s hostname, your username, and then your password. This is the first user and will also be an administrative level user with Root privileges.
Press the Space Bar to select Open SSH Server and then use the arrow keys to navigate down to, and select, Done by pressing enter. Open SSH Server will allow you to remotely access the server via SSH.
Ubuntu is now being installed. Monitor the progress here. It will take several minutes to complete.
Once the installation is complete you’ll see the Reboot Now option at the bottom of the screen. Use the arrow keys to highlight it and then press Enter.
You will be prompted to remove the installation media so that upon reboot the installation process doesn’t start all over again.
Post Installations Tasks
After the installation completes there are a few things you may want to do, such as applying updates, setting a statically assigned IP address, or adding additional users.
After rebooting you’ll be at a login prompt. Enter in the username and password that you created earlier to get going.
Download and Apply Available Updates
First, let’s download and apply package updates that may have come out since the build was created. To do that we’ll use a couple of commands. First, is ‘sudo apt update’ for you first-time Linux users let’s break that down. Sudo is short for Super User Do – basically the “run as administrator” of the Linux world. Apt is short for Apt-get or Aptitude, and is a package handler for Debian flavors of Linux. On Red Hat flavors of Linux, such as REHL – Red Hat Enterprise Linux, CentOS, and Fedora, you would use Yum as the package Handler.
This refreshes the package database and can tell you how many packages that have updates available. In the above screenshot we see 87 packages can be upgraded. To get a detailed list of available updates we can run “apt list –upgradeable.”
Here we have a list of all of the packages, in green, listed with a / and then the latest version of that package, followed by a set of square brackets with the currently installed version within.
To execute the upgrade we can run sudo apt upgrade. This will list all of the packages that have updates available, and the size on disk these updates will take to install. In this example, we see the updates will take up 399 MB of disk space.
At the prompt press Y and then enter to continue.
The package manager will go through and apply all of the available updates.
Setting a Static IP
A statically assigned IP address makes management of a remote host a little bit easier in that you’ll always know what the IP address is for that host. First let’s view the IP Address information for our host. Use the command ‘ip address’
In this example we can see this device has two network interfaces, the Loopback which is lo here, and the Ethernet Adapter, ens33. To view the IP info for a specific adapter you can use the command IP address show dev [device name]:
Newer versions of Ubuntu use netplan to manage Network Adapters. There’s a folder under /etc/ called netplan that holds YAML configuration files for each network adapter. We can modify these files and set the desired configuration.
First let’s look at the files in the /etc/netplan folder. To do this, run the command ‘ls /etc/netplan’
On this host, we only have the one file 00-installer-config.yaml. Your system may show more files depending on how many adapters are installed. Let’s open that file and change the settings. Use the command sudo nano /etc/netplan/FILE-NAME.
First, let’s start by changing the dhcpv4 key value from true to false. Use your arrow keys to navigate to that line. Then we’ll add the following, addresses, gateway4, and nameservers. Pay particular attention to spacing. YAML files will not process correctly if the spacing and indentation is not correct. Your file should look something like this:
Press control X to exit, and then press Y and Enter to confirm and save the changes you’ve made. Now let’s go refresh Net Plan to pick up the changes. We do this by running the command ‘sudo netplan apply.’ You may be prompted to enter in your password again.
There isn’t much for feedback here so let’s go ensure the changes took affect with IP address show dev [DEVICE NAME]
And now, we can see that it is, in fact, using the IP we configured in the netplan YAML file. We can further verify things are working by using the PING command to ping our local gateway, a DNS server out on the public internet, and we can verify DNS is working using the nslookup command.
Add Users
Lastly, let’s add some users. Perhaps we want to add users to our lab machines so we have extra accounts we can do testing with. In an Enterprise environment it’s just a generally accepted best practice to give each user their own account. This is part of Authentication, Authorization, and Accounting. We need to know who the user is, give them the bare minimum privileges they need to do their work, and then log and verify their access to that system. If everyone shares the same user account we can’t tell the difference between when one person or another uses it.
To add a user account we’ll use the command adduser. Let’s add the rest of the AONE Co-Hosts to the server. The syntax is ‘sudo adduser username‘ Be prepared to enter in a password for the new user accounts.
The system also prompts you for some additional, but optional information. We can verify the user accounts have been added by listing all of the folders in the /home/directory, by typing ls /home/:
Here we can see I’ve created a new user account for each AONE Podcast Co-Host. Now, let’s add one of them to Super Users, or the sudo group, so they have administrator rights on the system. We do that using the usermod command with the -aG switch.
Summary
In this article we showed you how to: 1. Install Ubuntu Server 2. Complete common post-installation tasks: Applying Updates, set a Static IP, and add additional user accounts.
Ubuntu is an extremely popular platform as it is Open Source and easy to learn Linux on. There are many other flavors of Linux out there, so do some research and find one that fits you the most!
We hope you enjoyed this article. If you had any trouble or would like to add to it you can contact us, or connect with us on Twitter!
In our Discord Server – It’s All About the Journey – we’ve got a book club where all of our server members share books that have helped them throughout their journey. We’ve compiled a list of the Top 10 books recommended by Network Engineers, for Network Engineers. It’s composed of tech and non-tech books alike. As a bonus, we’ve had the pleasure of interviewing some of these authors on our podcast! Here’s the list:
Make it Stick: The Science of Succesful Learning – Brown, Roediger, McDaniel This book discusses the science of how we, humans, learn! It discusses several strategies and tools people of any age and profession can use. The book does not read as a scholastic paper, but a really good book. It starts each section by engaging the reader with a powerful story about learning and then highlights a particular strategy or tool learners can use. Bonus – We interviewed one of the co-authors on Ep 32 of The Art of Network Engineering Podcast, you can check out the YouTube video of the interview here: https://youtu.be/yXk_3TEspfA
The Subtle Art of Not Giving a F*ck – Mark Manson There are so many things in life we can put effort into and so many more we are told we should put our energy and effort into (RIGHT NOW!). This book will help you decide which ones are actually worth putting your effort into and the rest you can just let go over.
Network Warrior – Gary A. Donahue As the subtitle of the book suggests this book contains “Everything You Need to Know That Wasn’t on the CCNA Exam.” While some of the switches referenced in the book are End of Life the knowledge that this book provides is certainly not! Network Engineers from the most Jr. to the most Sr. will all get something from this fantastic book!
Succeed: How We Can Reach Our Goals by Heidi Grant Halvorson In this book author, Heidi Grant Halvorson offers some very insightful bits that will help you set goals, build willpower, and avoid failure. “Succeed unlocks the secrets of achievement, and shows you how to create new possibilities in every area of your life!”
A Mind for Numbers – by Barbara Oakley Revealed that the way most of us are taught in school is not really a good way to learn, and then it reveals much better ways of learning based on science-based research. There is also a related course on Coursera.
The Practice of System and Network Administration – Limoncelli, Hogan, Chalup The book was suggested because it is a non-technical book written specifically for network and Sys Admins to guide them on how to behave in different situations like how to hire and fire people and how to deal with misconducts by co-workers and managers.
The War of Art – by Steven Pressfield “The War of Art emphasizes the resolve needed to recognize and overcome the obstacles of ambition and then effectively shows how to reach the highest level of creative discipline.” One Discord book club member said the book helped them to realize that failure is part of the process and that everyone faces resistance when trying to accomplish something hard.
Outliers– by Malcolm Gladwell In this book, Malcolm Gladwell asks “What makes high achievers different?” His answer is that too much attention gets paid to what the people are like, and not enough attention to their background and upbringing. One Discord member said this book helped them to deal with imposter syndrome because it highlighted the fact that some people have access to resources that others of us may not, and that adds to their success.
Did we miss one? Make a suggestion in the comments below or let us know on Twitter, we are @artofneteng
Studying for certifications is hard, and a lot of people are studying for certifications. It would be great to be able to leverage the thinking of other people: their viewpoints, opinions, ways of solving problems you might not have thought about.
You’d like to join a study group for the cert you are working on, but everyone else is just looking for a group too, and there isn’t an active one to join. Lots of people express interest in joining a study group, but no one seems to know how to set one up. Never fear, we’ve put together some suggestions that will help you start a group and keep it working like a well-oiled machine, carrying the occupants to Certification Valhalla.
Getting Started
The first step in starting a study group is trying to find a group of people looking to join a study group. Thank God for the Internet. There’s Twitter, Facebook, Slack, Discord (shameless plug for IAATJ) and other social media platforms out there where people are studying and collaborating already. You pretty much can’t throw a rock without hitting people looking to study for certifications. Now stop throwing rocks at people, you monster.
Study Group Do’s and Don’ts
Starting and running a study group requires a very different set of skills than joining and participating in the same group. Just like Dungeons and Dragons, someone has to be the Dungeon Master so everyone can play. Here’s a list of suggestions on creating a running a successful study group:
DO:
Decide on a common platform for collaboration
Whether it be Discord, Slack, Google Hangouts, Facetime or Webex, the first step in forming a group is establishing what technology you use to meet/collaborate.
Decide on common training materials, or agree to focus on the exam blueprint agnostically
This is where a lot of study groups tend to stumble right out of the gate. Let’s be honest, all training materials are not created equal, and people may have acquired their study materials any number of ways. This could be a constraint on your group and the first hurdle to clear.
As a group, it’s better to decide if the group prefers to stick to one provider or approach the topics vendor-agnostically. There are pros and cons to each. One of the biggest pros is that it makes cadence easier and focuses the entire group on the exact same topics and labs. The biggest con of going with this approach is it could be exclusive to people who don’t have and can’t acquire the agreed-upon materials, and thus the group misses out on the added value that some might otherwise bring.
Develop ground rules early in the process
Here is another large stumbling block that most don’t even see. So much is assumed that often causes problems down the line, and when dealing with people of different cultures and expectations, it’s really imperative to declare the ground rules for the group and make it accessible to anyone who wants to join. This isn’t just administration for its own sake, it helps defuse arguments before they arise and streamlines the whole process.
Ground rules cover the basic expectations of the group and how it will interact. Cameras on or off? Mute when not talking? What common language will the group work in? Do we raise our hands (digitally or otherwise) and wait to be recognized or can we be more freeform? What is the expectation if late? Is there a consequence for habitual lateness?
Establish the frequency of meetings
This seems like a no-brainer, but it can get complex. How often will the group meet? Weekly? Twice a month? Monthly? The frequency influences a lot, including expectations of what can be accomplished outside the group meetings, and the the target dates for taking the exam.
Scheduling the meetings
What day of the week should the group aim to meet? What time? Which time zone will the group use as the reference? This could be very simple or extremely complicated depending on where study group members live. Some groups that want to be hyper-focused restrict membership to within 2-3 hours of the reference time zone. Some are more loose but place the burden of making it to meetings on time on the members who live far outside the reference time zone. There’s no right answer here, but in general, the closer the group is to the reference time zone, the easier scheduling the meetings (and making them) will be in the long run.
Agree upon the group’s topic format
It would be foolish to study only when the group meets. However, a pace must be set to keep the group somewhat synchronized. To ensure optimal study time when the group is together, it’s important to establish what should be covered in the group and what should be covered on your own between meetings.
For example, simply reading a chapter of a certification guide together in a meeting is a waste of time. It would be more efficient if everyone reads the chapter ahead of time and brings certain review items to the group. That could be questions on the text for review, it could be creating some sort of virtual lab based on the chapter(s) and reviewing that with the group. Generally, reading should be done outside the group and discussion should be the goal of the group meetings. The whole reason to join a study group is for accountability and exchange of ideas, after all.
Now, let’s look at a few things we should NOT do.
DON’T:
Establish everything prior to creating the study group and saying, “Take it or leave it”
Study groups aren’t dictatorships. The reward for starting and running a group is that you can drive these discussions, but not decide them alone. Start with finding interested study group members, then start discussing things like ground rules, materials, and let the above details come out of that discussion.
Leave the above unvisited for long
Study groups change over time. Someone may get the cert knocked out before others, others may get refocused to something else. Someone new may join, People change and so must things like scheduling, ground rules, etc. Every 3-4 meetings it’s worth revisiting and ensuring all the details are up to date.
Waste your own time and others’ by being habitually late and/or distracted and failing to do the work
Time is a precious resource for us all. Most of us are busy professionals juggling work, family and other obligations. A study group is an investment of time towards a goal and that investment is easier for some, harder for others. It’s important to be respectful of your time and the time others are investing by being focused when the group meets, on time, and most importantly, on schedule.
Things happen and you may not be able to do the pre-meeting work one week, but it can’t become a habit. If the group is meeting to trade/review OSPF labs, as an example, failing to create your own OSPF lab to share means you’ve failed to contribute to the group’s learning. Once or twice, life can get in the way, but if this happens habitually, you’re taking from the group without giving back. Just don’t.
Forget the point of a study group is to get different ideas and views
IT is full of introverts but there’s a few of us extroverts here too. We extroverts have to be very conscious of ourselves because often, people who are introverted are content to listen. For some, English is a second or third language and they are self -conscious about speaking. The point is, don’t dominate discussions. Make an effort to engage everyone.
Fail to participate in group discussions and activity
On the other side of that coin, failing to share your ideas, views and knowledge also makes for an ineffective group. Teaching others is a powerful way to cement knowledge you have and find your gaps. Don’t deprive yourself of that opportunity. Others also benefit from your questions and clarifications. A lot of times, people are wondering the same things but are not brave enough to speak up thinking they may be the only one who isn’t ‘getting it’. Speak up, the study group is a place to get information you can’t get from a book, video or blog post. It’s real human explanation addressed to your specific question.
I hope this has given a solid framework of things to pay attention to when starting and running a study group. It shouldn’t be a stressful endeavor, though at the outset it can feel like herding cats. Don’t be afraid to do what works for the group as a whole. Don’t be afraid to firmly refer to the ground rules when they are broken. The study group has an ultimate goal of ensuring those within the group get certified. That’s the mission statement and so focus on that.
In this article, we are going to discuss several parts of Section 6 – Automation and Programmability of Cisco CCNA Syllabus. Programmability and Automation are two huge and very hot topics in the world of Networking. Having Programmability and Automation skills is practically a requirement – so many organizations are adopting it. This article hopes to cover sub-sections 6.1, 6.2, and all of 6.3.
First, we should address the age-old question – Will Network Automation replace Network Engineers? No, this is a very common misconception. Automation is ultimately about consistency. Doing the same task over and over again manually can introduce human error. Sometimes these errors, while not catastrophic in nature, can be problematic and cause downtime.
An infamous example is adding a VLAN to switches throughout your network. In order for the VLAN to work properly, it needs to be created on each switch and then allowed on the trunk links that interconnect the switches. When adding the VLAN to the trunks a very common mistake is to forget the “add” keyword which will remove all VLANs that are tagged on the trunk and then allow the new vlan only. This simple fatal mistake has sent many a network engineers running with their laptop and console cable in hand.
A quick word about the above – This is a very common mistake. You will make this mistake in production and it will cause problems. But, find comfort in the fact knowing that many other network engineers that came before you have made that same mistake.
When using network automation you can get the syntax for the commands you need to send correct once, and then let automation do the rest for you. But, be aware. Automation is the tool that you use to deploy that thing over and over again. If you make a mistake it will do that mistake over and over again. So, always test your code before deploying it.
Automation and Network Management
Automation has changed the way we manage networks. In a traditional network, everything is done manually. From the deployment of new switches, updates to standard or baseline configurations, and deploying new network services are all done by the network operator.
In SDN (Software Defined Networking) Controller-based networks, a lot of the mundane repetitive tasks are handled by the controllers. Some examples of controllers in Cisco-based soltuions are: DNA Center in SD-Access, vManage in SD-WAN, and the APIC in ACI. The controllers handle all of the configuration deployment, as well as software upgrades, services deployment, applying security policy, and can even handle deploying new networking devices with Plug-and-Play or ZTP (Zero Touch Provisioning). This allows the network operator to focus on higher-level tasks like designing the network for scale and to best support the business, support operations, and more, like making progress on projects and other tasks.
The 3 Planes
In any networking device there are three planes of operation: The Management Plane, the Control Plane, and the Data Plane.
The Managment Plane is how the Network Operator accesses the devices and manages it. Whether it’s through SSH, HTTPS, or a Secure API and manually or via automation tools the Management Plane is where this takes places. This how the Operator tells the network device to function.
The Control Plane is where the device makes forwarding decisions. If we’re talking about a router then this is where Routing Protcols live, the routing table, and so forth.
The Data Plane is where traffic ingresses and egresses the device. This is literally the data being sent across the network, from an end user device out to a web server on the internet.
In a traditional network these three planes live on each and every device in the network. If you need to deploy a new security policy or update an existing one then you need to access the management plane on EVERY device in the network, or at least where the policy update is applicable, and update or apply the new rules. This is where Controller-Based networks make a huge impact.
In a Controller-based network the Management Plane is the Controller. This is where the Network Operator manages the network, regardless of how many network devices there on. The Control plane pushes the configuration, as described by the network operator, down to the devices. The networking devices themselves are the forwarding plane and just move traffic based on the instructions provided by the Controller. Let’s take a closer look at this in practice in Cisco’s SD-WAN.
In Cisco’s SD-WAN (Software Defined Wide Area Network) you have several pieces that fit within the 3 planes.
Within the Management Plane you have vManage, vBond, and vAnalytics. vManage is administrative interface for the rest of the network. vBond is the Orchestrator. When a device comes online either for the first time or after a reboot the device reports to vBond first and vBond will provide the device with the information on how to reach vManage and the rest. vAnalytics takes in all of the telemetry data and turns that data into useful information to be consumed by the network operator so they can make informed decisions about their network.
Within the Control Plane are vSmart Controllers. These controllers take the instructions from vManage and push the configuration down to the devices. They can also control the routing table for each device.
The Data Plane is composed of the routers themselves. In the above example it’s the vEdges, which is simply a Cisco SD-WAN capable router.
Overlay, Underlays, and Fabrics
Overlays, Underlays and Fabrics are very common terms that you’ll hear when discussing Controller Based networks. If you’ve ever looked at GRE or IPsec Tunnels across a network, like the Internet, then you already familiar with Overlays and Underlays.
In the example of a GRE or IPsec tunnel operating over the Internet, the Internet is the Underlay network. It provides the networking connectivity from one endpoint to the other. The Overlay is the tunnel being formed over top of the internet. The underlay is just forward traffic, it really has no knowledge of the overlay.
In, for example, a Cisco Secure SD-Access network the underlay is composed of network devices that move traffic. They don’t really even need to be Cisco devices, or understand what SD-Access is. However, the edge devices need do, because they use the overlay protocols to initiate communications.
Going back to our previous example of IPsec tunnels across the internet – the internet routers are not speaking or using IPsec to form the tunnel, they are just routing packets using protocols like BGP. The end-point devices like laptop and firewall pictures above are using IPsec in the overlay. In an SD-Access network the underlay is using a routing protocol like OSPF, and the overlay uses protocols like VxLAN or LISP – more on those later. But, only edge switches and routers need to understand LISP and VXLAN in order for the Overlay to work.
Finally, the Fabric. This term is used often and simply refers to the network where the overlay and the underlay are operating. Once you exit that you have left the fabric and are back in a traditional network, or perhaps a different fabric. Again, back to the IPsec tunnel examples, once the packet has arrived to the destination firewall it is exiting the fabric and entering the Enterprise network. That network maybe a Cisco SD-Access Fabric, so it’s exiting one Fabric and entering another one. The Fabric is just a term for controller based networks, and not just a traditional network.
APIs
First off, what is an API – an API stands for Application Programming Interface. It’s a way for someone to interact with a piece of software and APIs can even be configured to interact with each other. The API enables automation and programmability, as well as Orchestration. API’s typically use standard HTTP calls, which are verbs like GET, POST, PUT, DELETE, and PATCH. This of the HTTP GET like the Cisco CLI version of show. The show command lets you view configuration. The HTTP GET will let you view information as well.
The network operator can use tools and the verbs to get information and then send configuration changes. Automation and scripting can be used to make these changes as well. Additionally, when one system sees certain changes or things happening in the network they can be configured to send API calls to other APIs on other controllers. This is very common in the Data Center. You’ll have an API on the ACI controller, called the APIC that interacts with the virtualization controller, in VMware known as vCenter.
These are two different interactions. When a Network Operator is interacting with an API, or two APIs are interacting with each other, this is a Northbound API interaction. When the API is interacting with network, or other, devices that it controls, this is the Southboud API interaction.
Summary
In this article we discussed sub-sections 6.1, 6.2, and 6.3 including 6.3a and b of the Cisco CCNA 200-301 Syllabus. This article should be considered a starting point for the topic and may not be comprehensive enough to fully prepare the learner for the Cisco 200-301 CCNA exam.
Competition is everywhere. Sometimes it is unavoidable. For instance, when you are looking for a job. You want to focus on you, skill up, and set yourself apart from the rest that are competing for that same job. It is definitely stressful, but can also be necessary when it comes to career advancement. Not always, but sometimes. However, job hunting is not the scenario that I want to cover in this post. In this one, I want to go over the scenario in which you are already in the role that you want. You are not only bright, established, driven, and hard-working, but you are also a part of a team. Let’s say in that team, there are some new, up-and-coming, less experienced members. Or maybe, there is someone within another department in the company that is looking for a change, and wants to explore your specialty. How would you handle something like that?
The Reflex? This obviously isn’t ‘one size fits all’, but I think a natural reaction could be to want to protect yourself. That first reflex might be to immediately enter the competition mode that was brought up earlier. Your mind could quickly take you to a far-end, worst case scenario spectrum quickly, if you let it. You could find your brain starting to race with questions such as:
Well, who is this new and ambitious person?
Why do they want to get into, and familiar with my responsibilities?
Do they think they are better than me?
Are they trying to take my job?
What if I train them and my boss likes them better than me?
Honestly, I think it’s fine if this is the first place your mind goes when this situation comes up. This competitive instinct pops up in me fairly often. I think it’s important however, to realize this happening, and shift the energy elsewhere.
Flip the Script As stated earlier, the strong competitive spirit, and looking out mainly for yourself has its time and place (job searching for example), but successfully functioning in a team environment is definitely not it. Let’s turn the tables on the situation. If you were the one that was new and trying to better yourself, would you rather have a role model/mentor to look up to and get assistance from, or a standoffish, information hoarding co-worker who looks down on you and pays you minimal attention? I’m hoping we all agree that we would want the former, rather than the latter. The ol’ golden rule seems to fit nicely here. Treat others the way you want to be treated.
Be the Ally Being an ally, a mentor, or even just someone who is helpful when needed can make a big impact on someone’s career and life in general. For me, the first step is to be observant. This could happen directly and obviously, with someone new joining the team. Or, you may just happen to see someone outside your direct team that is showing an interest in what you do and potentially wants to be a part of it some day. If you have the time and energy to spend, I encourage you to key in on that observation and reach out to that person. Some newcomers may reach out to you, but others might be a little more reserved. If you start the conversation, that can be the spark to making a real impact on someone’s career. Again, there is no ‘one size fits all’ here, your involvement can be varied based on your judgement. It can range from just making it known that you see that this person has an interest in career growth and you are willing to help out and answer questions; all the way to setting up recurring meetings with this person to provide assistance and advice. I assure you that any degree of assistance you give to someone in this scenario will be appreciated.
The Win-Win Now, this could be seen as selfish on my part, but I see no shame in gaining a benefit from helping or mentoring someone else. Now, if you get into a trend of only providing assistance when you know it will benefit you is another story. No, the win-wins I am talking about here are the indirect benefits you can gain from being that helping hand, and mentoring someone:
Teaching something is a great way to help you solidify your knowledge in a concept, and practice gathering your thoughts to present them to someone else.
Taking time for others can build upon the image that people see of you. You will be seen as a kind, thoughtful, and helpful person. People will want to share ideas and work with you.
To add on to the previous point, your management will see what you are doing. You will be seen as a team player, and maybe even a leader.
Again, try not to get the goal skewed. The goal is to show that you care and are willing to give back, with time and effort to someone who needs it. That might be because someone else did the same for you, or because you wish you had someone like that when you were coming up and now you want to be the difference maker for someone else, that you never had. Either way, the end result is the same. Someone that wanted or needed some help to further their career got it. I just wanted to highlight some indirect benefits that you could see by helping others.
Bert’s Brief I seem to often say this phrase on the podcast: “just be cool”. What I really mean by that is to be kind, considerate, and helpful. You never really know what someone else might be going through, and you can easily help be a reason that things get better, or at least pointed in the right direction. There are many different ways to help, but I think the most important thing to do is to just start. Don’t wait for someone to ask a question. Be proactive and start the conversation. Share that knowledge and experience, don’t hoard it. Be the ally, not the ego.
For years now, the ability to be productive has been changing. In many cases, you do not need to be tethered to a desk working off of a computer that is wired into the network to get things done. We have evolved from that practice, to leveraging laptops, tablets, and even smaller mobile devices such as phones to get work done and stay connected, not to mention the growing plethora of Wi-Fi connected IoT devices. Supporting a mobile workforce is key, and how do we do that? This is accomplished by building, maintaining, and enhancing robust wireless networks. Wireless networks and RF environments can be more difficult to plan, maintain, and troubleshoot in respect to their wired counterparts. As an engineer, you need to understand many factors such as:
What kinds of devices and applications will the wireless network support (ex: voice, video, location services)?
What is the layout of the space that needs to be supported with wireless coverage?
Are there walled offices with cubicles?
Is it a large open space with a high ceiling?
Are there long, narrow hallways?
Understanding the physical environment helps determine what AP and antenna type will make the most sense.
How many access points will be needed to provide both RF coverage and capacity support? With having to support the Internet of Things, having just enough access points to provide sufficient wireless coverage is not good enough anymore. We also have to be able to support large amounts of clients simultaneously, and that can mean that we need more APs due to capacity rather than RF coverage.
So, how do we plan out our wireless design? Then, once deployed, how do we validate the design to make sure it is functioning as expected? These common scenarios are exactly where NetAlly can help. For wireless network planning, the AirMagnet SurveyPRO is the application to use. For post-validation and troubleshooting, the AirMapper™ Site Survey application runs on both the AirCheck™ G2 and EtherScope® nXG to collect performance metrics and upload them to the Link-Live Cloud Service. This cloud service is included with the purchase of a device in the network tester portfolio. Within Link-Live you can create and view visual heat maps to see how the design measures up. If it is determined that the design needs to be modified; once the changes are implemented, you can run through the Air Mapper process again to check the results of your modifications. The goal of AirMapper™ Site Survey is to take the stress out of wireless site surveys by allowing you to gain meaningful data quickly and easily. The primary features of AirMapper™ Site Survey include:
The ability to view SNR, noise, and interference measurements directly on the AirCheck™ G2 or EtherScope® nXG devices.
Comfort of completing full enterprise site surveys without balancing (potentially clumsily) a laptop and multiple external antennas.
Find rogue devices with automatic triangulation of wireless access points on a floor plan with the use of the Link-Live Cloud Service.
Even complete Bluetooth/BLE surveys with the EtherScope® nXG to gauge Bluetooth coverage areas.
Automatically find typical Wi-Fi issues with the new InSites™ feature in the Link-Live Cloud Service.
A versatile feature of the AirMapper™ integration with Link-Live is the ability to view different types of heat maps. Typically, when I think of a wireless heat map, it is just strictly the AP coverage, or essentially a visual representation of each access point’s signal strength. Well, that is just one of the many pre-configured heat map visualizations that exist within Link-Live. The pre-configured heat maps that you can choose from include:
Signal (dBm)
Noise (dBm), SNR (dB)
Co-Channel Interference
Adjacent Channel Interference
AP Coverage
Min Basic Rate (Mbps)
Beacon Overhead
Max Tx, Max Rx Rates (Mbps)
Max, Min MCS
In addition to the existing features, NetAlly recently released the InSites™ Intelligence feature into the AirMapper™ platform by directly integrating it into the Link-Live Cloud Service. The InSites™ Intelligence feature allows customers to create custom pass/fail thresholds so that when survey data gets imported into Link-Live, users can quickly and easily see where potential issues reside in the Wi-Fi environment. In addition, InSites™ will also automatically filter and show the problem areas right there on the floor plan. A major goal of this feature is to provide actionable data to IT generalist teams so they can make intelligent wireless decisions without needing to be Wi-Fi experts. This can be a simple, yet powerful way to get through root cause analysis.
The different customizable threshold categories include:
First AP Coverage
Secondary AP Coverage
SNR (dB)
Co-Channel Interference
Adjacent Channel Interference
Beacon Overhead
Max TX Rates (Mbps)
InSites™ Intelligence takes the data supplied to the Link-Live Cloud Service from the AirCheck™ G2 and EtherScope® nXG analyzers and provides an easy to digest view into the ‘goods and bads’ of the wireless infrastructure. For each metric category, you can simply see if the environment test is a pass or fail, what the threshold limit is set at to determine a failure, and the value of the worst reading in the environment.
Let’s face it, gaining actionable insights into RF environments can be difficult without the right tools and applications to help. It can force you to spend time inefficiently guessing and checking to try to get to the root of the problem and implement proper resolution. In some cases, you just need a visual representation of the physical RF environment with metrics that can allow you to see problems and data to help point you in the correct direction to resolve those issues. The combination of the NetAlly network testers, AirMagnet SurveyPRO, AirMapper™ Site Survey software, and the Link-Live Cloud Service can help you do just that. For more information, check out this introduction video to NetAlly and their products.
For more information on NetAlly network testers and analysis solutions visit www.netally.com/products
***This article was written by Patrick Kinane. We thank Patrick for this contribution!***
I recently used my Cisco Time2Give to help families in my local community via Toys For Tots. While I was there volunteering for 7 days, I was fortunate enough to do a little of everything from receiving toys at the warehouse to sorting the toys and filling orders, even delivering toys to a family. I will elaborate on my experience, but here is a short list of cool things that happened throughout my Time2Give.
Working with Toys For Tots, in general, was pretty cool (details and pictures later)
Seeing fellow Marines I’ve not seen since 2012
Working alongside my new team (which we are all remote) and working with Cisco Partners from ePlus
Getting to know people who were delivering toys (I always asked where the toys were coming from)
My Toys For Tots journey
Delivering toys to the house of a recipient family
Shout out to fellow Cisco employees
Let’s go on down to the unit and dive into things. Note: I am a Marine; I like books/blogs/reading material that has plenty of pictures… That’s right, reading material = pictures. Other note: I promise there will be a lesson here for people working in (or aspiring to work in) tech.
General Coolness Working with Toys For Tots (T4T), in general, was pretty cool. Just seeing the piles of toys coming and going. Getting to be a part of it. I do not have the metrics from this year as the current T4T campaign is just now coming to an end. I was able to get the metrics from 2020 though, and I expect this year’s numbers would be comparable.
27,000+ children received toys from the local T4T campaign (servicing North Carolina)
Roughly 80,000 toys distributed
$86,000 raised
The basketball courts and the warehouse. That’s where all the magic happens.
What it looked like once T4T launched.
Among the highlights of the campaign, for me, was when a U-Haul van filled with $28,000 worth of toys arrived:
It took a very long time to offload that truck. You cannot see all the bicycles under that massive pile of toys, but there were so many really nice bikes. I asked the driver where the toys were from, he said a family donates each year, and last year they did $22,000 worth of toys (I will revisit this later).
One of the Cisco Volunteers (Michael Dayton) started a toy drive in their neighborhood. Michael was collecting toys at his house, and then in the morning, he would bring the toys to the warehouse. Then the toys would be offloaded and sorted accordingly. Afterward, Michael worked the day helping with whatever tasks were waiting. One more thing about Michael, he is a former Marine (SFMF). The next photo shows just one of the toy hauls Michael and his neighbors collected.
Reconnecting With People Something to note about the unit where we did T4T is that I was once a Platoon Sergeant at the same unit; with two other Sergeants (Hudson and Presslein). The uniformed picture captured the last night we were together (back in 2012). That night Hudson and I got pulled over in a taxi by 9 sheriff deputies, but that’s a topic for another time (maybe something to cover in a podcast episode of The Art of Network Engineering). The following picture is Hudson and I at our old unit, assembling bicycles for T4T.
I was also able to work with two other Marines from the old unit. One of them is Lewis, who is the CEO of SPOTR. He does a ton of great work for the community (locally and nationally) and does work with USVC. Hernandez is the Marine I was referring to in this tweet. This is one of the important lessons for people looking for a job in tech. She is about to graduate with a degree in cyber security, and she met cybersecurity professionals. They discussed which certificates to go for and why; furthermore, she received some excellent guidance with career development and job market trends. People also started reaching out to their networks to ask about vacant cybersecurity positions.
Team Building and Partner Relationship Building Several people from my new team were able to join us, and working with my new team, in-person and sitting down together for lunch was huge! I believe it was an intense way for us to finish out our first year working together. It was also great that new relationships between my current team and people from my previous team were able to take root. Even more beneficial is that we worked alongside Cisco Partners from ePlus, which facilitated some Cisco Pre-sales Eng interacting with Cisco Partner Pre-sales Engineers (Brian Meade specifically – those in collab may know his name).
What’s The Story Behind The Toys? I would get to know people who were delivering toys, and while talking with them, I would always ask about the background of the toys. Some originated from office toy drives such as a dentist or doctor office, others neighborhood toy drives, often a fire station (bring a toy and get to ride the fire truck), some veteran groups, and boxes outside local stores (Walmart, Target, Starbucks, Grocery Store, etc.).
What about the family who donated $28,000 worth of toys? The gentleman driving the U-Haul of toys is a local firefighter. He let us know the family lost their son in a tragic car accident in 2003. The family donates all those toys in honor of their son, and it is incredible how something so sad has also become something so amazing.
My Toys For Tots Journey I joined the Marine Corps out of high school. This took me from New York to some yellow footprints, and I eventually landed in Huntsville, Alabama (for a few months to learn a job). While I was there, it was the holiday season, so we Marines helped with T4T. The best part of that experience was interfacing directly with the families. While giving a bicycle to a family, it reminded me of when I was a kid, and someone delivered toys to our place (good ole 1994). I remember getting a bike from him and wondering why, but not thinking much of it because I was psyched about the new ride. At T4T in Huntsville, I realized the deal with the toys and bike from that day back in 1994.
While on Active Duty that was my last time working with Toys For Tots; however, I joined the Marine Corps Reserve after my time on Active. This is important because Toys For Tots is a Marine Reserve initiative. So I was back to interacting with T4T during the holiday season while I was a reservist; however, I left the unit in December 2012 because I began working at Cisco in January 2013 and I wanted to put all my focus into Cisco.
While working in Cisco TAC (pre-covid) I used to work with several other veterans to help facilitate the T4T drive throughout the Cisco RTP campus. I eventually stepped away from Toys For Tots (having more kids, studying for CCIE, etc.); however, this year was my first time back since pre-covid and it was awesome!
Something I want to reiterate is, my experience and the experience of my fellow Cisco employees was made easy by Cisco providing us with Time2Give.
The Best Part There’s a family about 20 minutes away from where I live today. The children lost their dad earlier this year, and a wife lost her husband. A mom and dad lost their youngest son, and two brothers lost their younger sibling. Assisting families during trying times is one of the most rewarding things I’ve ever done. I wish everyone who donates their time, money, food, toys, etc., could see the impact of their efforts because it is beautiful.
There’s no denying that network engineers can be a tricky group to shop for, especially if you aren’t a network engineer yourself. This year-round guide can help you shop for the network engineer in your life, regardless of the occasion. Use this list for some inspiration to help make their work lives a little bit better. You may even find yourself on their gift-giving lists in return!
**This article contains affiliate links as part of the Amazon Associates Program which means if you click through and make a purchase we get a small commission. We only recommend products we love!**
10 Gifts for Network Engineers
Wireless Console Cable
Every engineer has been here. In a data center or a data closet or a wiring closet. Countless hours sitting on concrete floors gave them a sore back, sore legs, and sore everything else. Simply because they’re limited to the 6ft/2m length of a standard console cable. If only there was a way for an engineer to extend that so they could feel free to sit nearly wherever they want. That’s where the wireless console cable comes into place. Enabling the engineer on your list to sit more comfortably while they work will certainly go a long way for them.
Photo Credit: Cloudstore Limited
Air Console makes a series of products that will help your engineer out. Their entry product, the LE, works perfectly fine over Bluetooth for $59. However, if you step above the LE into either the Mini/Standard-Pro/XL, the addition of Wi-Fi and Ethernet-based IP connectivity is a terrific addition. Those step above models start at $85 and range up to $150.
Collapsible Chair
Speaking of those hard floors, engineers can’t always expect to have a comfortable place to sit at a job site. The job can take them from warehouses to factories to retail stores and it’s not realistic to assume there will always be a good chair available. This is where a good, portable, compact and easy to carry chair can be a back saver.
Photo Credit: Trekology
Something like this Yizi Go Portable ($40) chair would be an ideal addition to any engineer’s trunk. Unlike other compact chairs, it has a seat back to reduce strain while retaining its compact and easy-to-carry profile. This is guaranteed to make the work days a bit easier.
Sergeant Clips
Unfortunately not every task a network engineer has in front of them can be performed from a newly gifted chair. Many times they need to get hands on with a lot of little cables, and losing track of those cables can lead to longer and more stressful days. One way to get around this is to label every cable, which can be pretty tedious.
Photo Credit: SergeantClip
A nicer way to work is with a tool that clamps onto the cables in groups and keeps them in alignment. Over at SeargentClip.com (£12.50 – £37.00, ships from the UK) they make a handy little tool that clips onto cables, in groups of 6 or 12, and keeps all of those cables in alignment. If you aren’t certain how many to buy, I’d suggest starting with a 48 port bundle. The largest number of ports, and cables, you’ll see on a single switch is 48 ports. SeargeantClip is also available at Amazon.com.
Multi-use Headlamp
A common theme here, which was highlighted under with chairs as well, is the fact that every environment is different. It’s easy to take a chair for granted, good lighting falls into this category as well. Poorly lit environments can wreck what would otherwise be a productive day. It’s not uncommon for a new site to not be fully lit when a network is being installed. It’s not uncommon for an existing site to forget to change the lights in a network closet. Having a good headlamp ahead of time is a great way to avoid any of these scenarios up front.
Photo Credit:Victroper
There are a lot of headlamps you can choose from. I’ll recommend one type specifically, this lamp made by Victroper, for a very specific reason. It has multiple types of headlamps in one. If you need to flood an entire room with light, it can do that. If you need to spotlight something right in front of you, it can do that. There are some other nice features for outside of work, such as red LEDs and strobe, but the ability to recharge it can be very handy.
Cage Nut Tool
If you’ve ever seen a network engineer with band-aids on their fingers and knuckles odds are they were working on installing equipment within the past few days. It’s hard to fully describe the perils of this sort of work but messing with small thin bits of pressure-loaded metal, it’s not uncommon for accidents to occur. Some rack manufactures include a basic version of this tool, but it’s often discarded. Many engineers work for years without knowing a tool like this even exists. You can help in those situations, and more, by gifting an upgraded version.
Photo Credit: StarCase
This screwdriver-ish-looking tool made by STARcase is an upgraded version of what an engineer may find attached to a new rack. Those tools are usually a small piece of curved metal. This upgraded version provides a sturdier install with an easy-to-grip handle which will reduce on inadvertently cut-up knuckles.
Work Bench Safe Drinking Vessel
After all this work, any network engineer is going to require some work-appropriate hydration to stay healthy. One of the trickier things to do, depending on where they’re working, is to make sure their beverage of choice stays where it should be. A spill on a work bench could be devastating and lead to a RGE (Resume Generating Event).
Photo Credit: Coleman
I’m partial to this Coleman Autoseal bottle. Comes in 2 different sizes, 6 different colors, and the feature that keeps it safe is a push button valve to control when liquid flows or not. Knock it over or turn it upside down, the liquid stays inside. It’s also a stainless steel insulated bottle, so no worries about the bottle sweating either.
Loopback Keychain
When it comes to testing equipment an engineer can find themselves in a pinch without some really simple tools. These tools can go high tech or low tech. Each of their time and place. A nice, and affordable, low tech tool is a loopback tester. It’s the equivalent of calling a friend to see if your new headset sounds good, but for a network engineer.
Photo Credit: Networx
It’s hard to know exactly what sort of equipment any given engineer could be working on. I’d suggest at least these two: – Ethernet loopback ($9) – LC Multimode loopback ($15)
One very common task a network engineer may have to perform is to check if there is “light” coming through a fiber-optic connection. It’s recommended that you do not look into the fiber optic cable directly as the laser light can damage your eyes, but some people do it anyway. A clever workaround is to use your phone camera, but this may not work for 10gig or single-mode fiber. A good way to make sure they can always safely see the light? With another somewhat low tech tool specifically for the task.
Photo Credit: GESD
This Visual Fault Finder ($30) is technically used to find breaks in fiber runs but can double as a handy locator for perfectly good fiber connections. This can save an engineer a good amount of troubleshooting on something you’re not technically supposed to look at.
NetAlly LinkSprinter
This is a big-ticket, high-tech item, but it can truly be a lifesaver for an engineer in the field. The NetAlly LinkSprinter is a pocket tool that packs a lot of information into a small, handheld, unit. When working at a job site it can be pretty unpredictable where cables connect behind the scenes. Even when it appears predictable, you never know when you’ll come across an oddball that connects somewhere totally unexpected!
Photo Credit: NetAlly
The LinkSprinter 300 ($400) helps answer a good number of questions. It can tell an engineer where they’re connecting, how their connection is configured, if the connection is good, and a slew of other good information in the palm of their hands. It can shave hours of troubleshooting time by eliminating a game of hide and seek around a facility.
Raspberry Pi Kit
This last item isn’t specifically for a network engineer, really any technology savvy person, but it’s hard to go wrong with a Raspberry Pi kit. It can help them set up a test bed for learning how to learn programming, which is becoming a common trend for network engineers. It can run dedicated applications aside from their regular computers. It can serve as a house wide ad blocker. A good digital sandbox like this can be truly invaluable.
Photo Credit: CanaKit
You’ve got two ways to go about this. You can buy the Raspberry Pi on it’s own but I prefer to gift someone an entire kit to save them having to pick up some odds and ends they’d need to really put it all together. A good starter kit ($130) will cost more but it will give them everything they need, and more, to start using it on day one.
Wrapping it all up – literally!
So there you have it! 10 items that can really help an engineer in their work day year-round. With a few items off this list you can help save them from body pain, or hours of wasted troubleshooting time, and maybe give them a nice learning tool in the process!
Prices are subject to change at any time. The prices displayed herein were the prices as of the publication of this article (December 2021)
This is not meant to be a “hooray for me” success story. The purpose of this post is to be a message of hope. I’m not someone who goes out and gets 10+ certifications a year. There is absolutely nothing wrong with that, I respect and admire the determination and focus of people that are able to accomplish that, but that is not me. I move slow. Perhaps too slow, but that is the pace I typically adopt when preparing for a certification exam. Recently, I passed the Cisco 350-401 ENCOR exam. Yes, it was on the first attempt, but there is much more to the story. Remember the slow pace I mentioned? I began studying for the ENCOR exam in January of 2020. It took me until November of 2021 to feel ready enough to take the test. It really wasn’t too much of an on again/off again thing either. Other than a few breaks here and there, I studied a fair amount of those almost two years. Now, if you are thinking about or already working toward this certification, this isn’t meant to scare you. There are people out there that have accomplished this in much less time. There is a critical mistake that I feel like I made in that first year that caused me to practically reset my study progress at the beginning of 2021. I’ll get into that in the next section to try to prevent others from falling into the same trap. Back to the message of hope. I don’t consider myself someone who can just jump into anything and absorb/retain concepts right away. What I do have is passion, drive, and determination. I feel like those three things, along with discipline (CC: @TeneyiaW) will get you there when it comes to this certification. The exam blueprint is definitely wide, but I believe in you. I mean this in the most sincere way possible, if I can do this, you can do this.
Alright, now let’s get into the study plan that helped me reach this goal. Therein lies the first step, in my opinion. Make a plan and stick to it. That does not mean that you cannot modify it, but making a plan gives you a guide. I used five main resources to prepare for the ENCOR exam:
CCNP and CCIE Enterprise Core ENCOR 350-401 Official Cert Guide (OCG)
What I have above is not meant to be “one size fits all”, it is just what worked for me, and I should caveat that my employer got me access to CBT Nuggets and the Cisco On Demand learning and I am incredibly grateful. Now that we have the resources squared away, what’s the plan? I started with the the OCG. I would cover a chapter (or grouping of chapters if it made sense), then cover the same topics with the relevant CBT Nuggets and Cisco On Demand learning content. With all three resources I would create Anki flashcards along the way and set time aside to try to review cards as close to every day as possible. Finally, I would leverage CML and EVE-NG to lab up any concepts that made sense to do so. I do feel that getting experience either through on-the-job or labs is very important to really tie concepts together so that they actually make sense in practice. You are probably beginning to see what took me so long to reach my goal. Again, I want to highlight that this is not the only, or even the best way. This was the plan/strategy that I chose, and it eventually got me there. Now, what was that critical mistake that followed me throughout 2020? It was the lack of flashcards and review. Basically, all through 2020 I was just going to content in the three platforms I have mentioned and doing some labs. I was not taking notes/flashcards or reviewing anything. Looking back, what I was doing made zero sense. Because I wasn’t reviewing anything, I was essentially losing things that I learned shortly after going through the content. Thanks to the advice from the AONE podcast, I adopted the Anki application both on a computer and my phone and I absolutely love it. Typically, I would create cards on the PC app while going through content, sync the cards, then review on my phone so I could also walk on the treadmill. The flashcards were really a critical piece of reaching this goal for me. Finally, being tapped into the community as a resource was very helpful as well. There are many bright and encouraging people there that are willing to help. Whether it is providing advice, teaching a concept, or giving encouragement, they are there and they are inspiring.
I’ll admit, this whole process was tough for me, but it was an excellent learning experience. Not just because of what I learned through the content, but I also essentially learned how to learn (and retain). Preparing for the ENCOR exam provided me the repeatable modular plan to prepare for the next challenge. For me, that next challenge will be the 300-420 Designing Cisco Enterprise Networks (ENSLD) exam. My advice to you is that if you are invested in studying for ENCOR, don’t quit, don’t give up. There were multiple times that I felt overwhelmed and just wanted to stop. Seeing that notification that I passed the exam made it all worth it. Reach out for help if and when you need, and try not to neglect your support system. I will definitely be taking some time off to rest and give time back to the ones I love.
It’s been a few months since I last checked in blog wise. It’s been a long stretch for me personally, maybe it’s been the first time I’ve been feeling Covid fatigue, work burnout or maybe interviewing for a job just introduces a lot of anxiety into my bloodstream. In any case, blogging here was the first to go as far as where I’ve spent my time. That doesn’t mean I haven’t been doing anything and I’m writing today to catch up a bit!
Hacking Passwords
One of my work projects recently had me figuring out how to use hashcat with a list in an attempt to crack Linux hashes of our users. The best little cheat sheet that has helped me along the way came courtesy of Black Hills. Embarrassingly, it took me a week and a half to get a command together that would actually start cracking hashes. The worst of it was simply figuring out that I needed the hashes by themselves for processing to begin. I was initially trying to process usernames:hash thinking hashcat would simply find the hashes in my document but instead just threw an error. There are a lot of tutorials out there on using hashcat for the first time, so I won’t do that here. Instead, I’ll highlight a little ‘automation’ I did once I had my hashcat output file. Here is a representation of what my original file looked like when I pulled down every users hash:
My list was a lot longer, and had actual hashes but for demonstration purposes this should suffice. I simply need to use the cut command from here to get the hashes by themselves and then run that file through hashcat…
If you redirect that to a file, call it hashcat.txt, you’d be ready to run hashcat. And using Black Hills cheatsheet, you can specify with the -m what hashes you are running, which in my case I was doing SHA512 unix hashes. By the time I got this going, it was exciting to check my output file and see it filling up. We were really cracking some hashes. This was exciting. The next part of the journey was marrying up the password of the cracked hash with the user name. This is because the output of the cracked.txt (output file from hashcat) is hash:password like so:
$ cat cracked.txt
$6$aaabbbbccccd:1qaz2wsx!QAZ@WSX
$6$aabbbbccccdd:1q2w3e4r!Q@W#E$R

# this is a cool file and all, but what username does this
# belong to???
To begin, I was manually using grep and going back to my original file that had the usernames:hash, but who wants to do everything manual forever? Also, my list was pretty long so figuring out how to do this more efficiently was worth the investment. So I came up with a quick little bash script that allowed me to grep each hash from my cracked.txt from my original list (hashes.txt):
$ cat script
cat cracked.txt | cut -d : -f 1 | while read -r line; do
    grep $line hashes.txt >> grep.txt
done

# running the script
$ bash script

# checking out the file created from script
$ cat grep.txt
poopd:$6$aaabbbbccccd
poodf:$6$aabbbbccccdd
At this point I was half way there. I had each username that I cracked a password of, now I just needed to get the password. To finish the job, I used the cut command one more time to isolate just the passwords and then used the paste command to put everything together:
I eventually added this all up in one bash script and I was set to get a file with usernames and passwords. There are probably 18 more ways to do this and I may have done the least effective way of them all but I just wanted to share the little journey I went on cracking my first hashes. Most exciting of all I got to play with a new command, I’d never used the paste command and it works perfectly here.
GIAC Network Forensic Analyst
I was lucky enough to take SANS FOR572, advanced network forensics course which maps to the GNFA exam. This was my second SANS course and GIAC exam. The first being SEC503 and the GCIA. I’ve got to say, the order in which I took these courses was great for me. SEC503 and FOR572 use a lot of the same tools: Zeek, nfdump, tcpdump, tshark. Both courses even go over some of the same protocols, like DNS and HTTP(S). But, in my opinion SEC503 stands to be a great intro to these topics if you are not fully immersed already, and FOR572 takes these topics and applies them to ‘real world’ type data and scenarios over and over again. I’d recommend taking a course from Phil Hagen, the gentlemen behind my instruction, any day of the week.
Exam wise, I found the GNFA to be a solid 5x to 10x harder than the GCIA although the GCIA was pretty cool in that you had to interact with data on a VM for a few questions and the GNFA, at least today, is all multiple choice. But the questions for the GNFA were very applied compared to the GCIA. Instead of just knowing the proper switch for a command, you were looking at some output and had to interpret something 2-3 levels deeper than what’s simply displayed. This was very challenging and rewarding. The closest to ‘real world experience’ I’ve ever felt while prepping for an exam.
As I look at SANS catalogue and contemplate what comes next, it’s hard to choose. Thinking of shooting for FOR508, and even if there is overlap with courses I’ve already taken I think getting insight and another instructors perspective is always useful.
Interview
Now it’s time to delve into somethings that didn’t come out as an immediate success. I got to interview, 4 in total, for a position in which I was really excited about. A possibly life changing opportunity. The job was remote, working on SIEM of sorts for a networking vendor as a technical writer.
I hadn’t interviewed for positions since the 2016-18 time frame. But I enjoyed these interviews and come to find out I really like doing interviews in a video chat over in person. Felt way more comfortable. Looking back, I was always a way more nervous wreck checking in with the receptionist and being in the fancy corporate building than I was during this iteration of interviews. In the comfort of my own home, wearing more comfortable clothes and sipping a coffee from my home espresso set up was something I’d sign up to do again if I have the choice.
After interviews I waited about 3 weeks before I heard that I wasn’t going to be extended an offer. Which hurt, as my mind couldn’t help but daydream about possibilities during the wait. In truth, the interview process and having a shot for something like this consumed me, I was useless as far as studying for the exam above, another exam, the Cisco SCOR exam, I failed during this time. Trying to do any sort of studying or focus on anything was very difficult for me. I ended up pushing my GNFA exam out as far as possible, and got closure that I wasn’t selected before I sat for that exam, which I think helped. It was exciting to go through the process and be considered but the process of waiting to see if I was going to be selected was excruciating for me.
I didn’t get picked up for the position but I did get practice telling my story and I think I made a good pitch for myself irregardless of the outcome, in any case, I’m improving in that area. I’ve never been that great at pumping my own tires but I’m getting more and more confident as my cyber belonging goes. As long as I keep my head to the ground I’m confident an opportunity I’m excited about will present itself when the time is right.
In my quest to pursue my next certification I sat down and thought about what cert I should dedicate time studying for. There were many things I was interested in which is my first reason to pursue a cert. I was knee deep in Security products at work and even now that doesn’t seem to be going away anytime soon. Most of the products were Cisco, so it made sense to give the CCNP Security a shot. I looked online at Cisco’s site as a start and dived in. Months later, I passed the SCOR exam! I then chose to give the SESA exam a shot and passed (barely)! The CCNP Security however has been completed so I want to take some time to write about my experience related to exam material, relevancy, and difficulty.
Before diving into the exam material, I believe it is important to mention what it takes to earn the CCNP Security certification. To earn the CCNP Security, you will pass two exams. A core exam must be passed as well as one concentration exam. You can find the list of exams at Cisco’s site. There are several concentration exams. Passing a concentration exam also nets you an individual Specialist cert. As an example, if you are interested in learning more about Cisco’s Identity Services Engine, the 300-715 SISE might be the concentration exam for you. Passing that exam also grants you a Specialist cert. However, to obtain the full CCNP Security, you would need to pursue the core exam.
Material
When I study for a certification exam I like to rely on multiple resources. I want to read something. I want to watch something. I want to lab something. I believe doing each of those things can lead to success. Gain knowledge from multiple sources. I attacked the Core exam first (350-701 SCOR).
The first thing I looked at was the Exam objectives and the outline. This is exactly what Cisco is expecting you to know for the exam. Copying this over to Microsoft’s OneNote, I could make individual notes under each of the topics in the outline as I study them.
I ordered the CCNP and CCIE Security Core Official Cert Guide. The book was my main study source. I wouldn’t call the book an easy read at first. The first chapter is a journey, but it covers important fundamentals and dives into various attacks. My weaknesses are Cryptography and VPNs, which each have their own chapters. I found those chapters to be an uphill climb, but that might possibly be because I am weaker in those areas.
I spoke to my manager about training. This led to be able to take the online, self-paced SCOR course on Cisco Digital Learning. This probably made the biggest impact since it included a few labs to follow through online.
Finally, I was able to go through Pluralsight’s Cisco Core Security (by Craig Stansbury). I would usually watch this on my phone whenever I was out of the house or while laying in bed right before sleep.
As you can see, I had a plethora of material for the SCOR exam. However, it was the opposite for the concentration exam Securing Email with Cisco Email Security Appliance (300-720 SESA). The SCOR material covered Email Security, but it was not a deep dive. The SCOR exam glances over the importance of Email Security, how it works, and some of the components, but not everything. Studying for the SESA involved me recycling the above resources I had access to specifically only for Email Security information. Thankfully, my experience at work with Cisco’s ESA and CES made up for the lack of material.
Difficulty
For the SCOR exam, I did use the Official Cert Guide’s Pearson Test Prep engine that comes with the book. I also used Boson’s test engine for the SCOR practice tests. Between those two, I preferred the Boson test engine. The Pearson Test prep questions inserted a ton of fill in the blank questions. Those usually throw me for a loop. That probably led me to fail most of my practice test attempts. With that in mind, I went into the SCOR exam thinking it would be a very difficult exam. I believe reviewing all the topics the day before was a big help in passing the exam. I found the practice exams a bit more difficult than the actual test. However, I cannot say the same for the SESA Concentration exam. I’d like to say I spend a decent amount of time in the Email Security world, so I went into that test thinking that it would be an easy test. It was not. This was the test I barely passed. If I needed 10 points to pass, 10 points was exactly what I passed with. I believe the lack of material for the SESA exam led me to have a difficult time during the test since I simply relied on most of the material from the SCOR exam and my own personal experiences.
Relevancy
Is the CCNP Security exam relevant to what is happening in the world today? Yes! Especially Chapter 1 of the SCOR Official Cert Guide. Chapter 1 was one of the longest chapters as it covered a wide range of agencies, documents, attacks, and defenses. This is mostly general information that applies to the security world, not just Cisco security. As I mentioned earlier, this chapter is a journey, but one that was extremely educational. With everything we do in our professional lives, we should always have a security mindset. As I have experience with most of the security products covered in the guide, the SCOR and the SESA were personally relevant. The CCNP Security would be a certification to pursue if you are going to work with or have experience with the products. It’s mostly Cisco-centric and not a general security cert. My advice is to also pick a concentration exam that you might have experience with, or at least have some materials to use for your studies.
I found pursuing the CCNP Security to be a pleasant, but mildly challenging journey. It was not the most difficult certification I’ve pursued, but it made sure to keep my stress levels elevated during the exams. There is plenty of material and test engines out there for the core SCOR exam. If you are working with Cisco’s security products, give this one a try.
“Faces of the Journey” is a series that highlights individuals in the network engineering community. The journey is the path we take through our careers, and it can be very different for each of us. While the destination is important, it’s all about the journey!
Chris Denney (AKA Smilin_Chris) was born and raised in a suburb of Jackson, Mississippi and currently resides in Asheville, North Carolina. Chris has done it all since he started working, as a teenager. At the age of fifteen, he had a summer job working for the city doing everything from laying asphalt, to maintaining ballfields and cemeteries. That job taught Chris the lesson that he did not want to do that kind of work long term. During college, Chris managed a clothing store in between soccer seasons. Like many others we have talked to, Chris gained an interest for technology from video games. A good friend from high school helped him build a computer from spare parts so they could play Counterstrike together. A few years later, the company that his friend was working for was looking for an IT tech and Chris was recommended for the position. Other than building a couple of computers, he had not had professional experience in IT so he was starting off in the deep end of the pool. Chris was immediately supporting lawyers, doctors, dentists, and a small processing plant. It was wild, scary, and awesome all at the same time. He learned a lot and is very grateful that this company took a chance on him. While Chris kind of fell into IT, he chose to pursue networking as a discipline. Most everything else he had encountered in IT just made sense, while networking took some more work. That drove him to want to dig deeper, so when a work opportunity presented itself that was geared toward networking, Chris jumped on it. When it comes to the future, the only given direction for Chris is growth; stagnation is terrifying and he wants to keep moving forward!
What advice do you have for aspiring IT professionals? If you’re looking for a job, be patient. This is an ever-expanding field and opportunities will continue to make themselves available. Keep studying. Keep applying. Also, don’t be afraid to take a job that isn’t a perfect fit for you. Get in, get some experience, and move on. If you’re just starting out at a company and trying to make a name for yourself, find a hole in your team’s armor and fill it. Then, be the go-to person for it. Prove your value.
What is something you enjoy doing outside of work? I’ve played soccer for over 30 years. I hope I’ve got another 30+ years in me. A few other things I truly enjoy are chasing waterfalls and overlooks with my wife, hanging out with friends, watching concerts/music live, and traveling to any place that is wholly unlike anything I grew up around.
How do you manage your work/life balance? Poorly, lol. I’ve allowed myself to become the “go to” guy for too many things and I’m always the first call on them all. That includes after hours, unfortunately. I’ve been working to make sure that everyone on my team knows where to find my documentation for troubleshooting/creating tickets.
What is your strongest “on the job” skill? That’s a good question. I’d love to tell you that I’m the “knower of all things technical.” Since I’ll probably never be the smartest person in the room when it comes to tech…I’d have to say it’s either my dependability or my soft skills. I take great pride in my ability to see things through to completion. Also, having a very diverse work history helps me communicate with pretty much anyone in my corporate environment.
What motivates you on a daily basis? My family and my team. I never want to let either of them down. They both deserve the best version of myself I can offer, and I continue to work to ensure that they get that.
Bert’s Brief
I’m not just saying this because he plays soccer, but Chris is a team player, for sure. What I really enjoy about Chris is that he is incredibly personable. He will always ask you how you are doing and what you are up to before ever bringing anything up about himself. Chris brings a strong balance of technical and soft skills to the table and has to be a bright spot on any team. It’s always great to have Chris on the IAATJ Happy Hours, where I believe he is definitely a fan favorite.
This weekend I definitely felt old online. I was trying to figure out how to get into DEFCON’s packet hacking village’s CTF Friday morning. I couldn’t figure out the process for the life of me and had to ask for help…very specific help. ‘Go to this channel and type exactly this’…I felt like a real old dude trying to figure out technology. You had to access their Discord server, choose the correct role, go to a specific room and type out a specific cmd for a bot to put you into a queue.
The CTF was pretty cool. First of all, you had to actually capture traffic. I haven’t done that many CTFs but all previous ones involved a pcap that you download. Here they had packet generators and you had to use tcpdump, tshark or wireshark to capture the traffic. This in itself was neat. You did all of this inside a linux VM that you get creds for once you follow all the steps described above. Second of all, you had a 2-hour time limit in which to solve your prompts. I could get about half done of most of the prompts, but they didn’t just ask you to find a certain type of traffic. You then had to do some sort of forensics, to download and decode a pdf or mount an image to find a file. So, since I don’t have much of the forensic type of experience, and nothing with those sorts of tools, with say pdfcracker, I didn’t far too well. I think I left after 90 minutes and a score of negative 250 (I took some hints) I felt like I have a lot more to learn. I did tell the person helping me in the chat that I would do better next year 🙂
In the midst of all this, at some point after the CTF, I was messing around with some settings in Discord, and accidentally called a friend I’ve been chatting with online for some time now. Tony E didn’t answer but called back a few seconds later. We maybe only chatted for ten or fifteen minutes but something he said during this conversation, along with the conversation in it of itself struck me, he said:
You can’t spread yourself too thin on a whole bunch of different social apps if you want to have meaningful online relationships.
This one thought, one sentence, really made me reflect a bit for the rest of the afternoon. I had been chatting with Tony for maybe a year, almost daily but we have never hopped on a chat. In this one chat, he got to meet my daughter, he showed me some cool note taking ideas. I feel, I can’t speak for him, that in regards to a ‘meaningful online relationship’ hopping on a live chat can really help facilitate that.
My main social app, ever since my mom died, has been Twitter full stop. I was mostly on Facebook to upload photos of the family for my mom to see. I’ve found quite a few friends on Twitter. People I talk with all the time. After my conversation with Tony I was wondering; Am I really having as meaningful online relationships as I can? I mean, the people I talk with everyday are really cool, but what if, we just jumped on a call? Would they be down with that? These thoughts lead me to think perhaps I can move more to Discord and spend less on Twitter.
Morning.
Thinking of moving mostly to discord as my main social app and off Twitter.
Accidentally called someone I’d been chatting with for awhile and it was pretty cool. He said stuff about the quality of your relationships…not spreading too thin…
Today, I got on a thirty minute call with Robin. He helped me troubleshoot somethings on my end and I got to try and figure out some issues he was having with his home lab. Again, nothing really ground breaking came of the conversation itself but moving beyond text, how I mostly interact on Twitter, to video on Discord did seem more meaningful (by a lot).
I’ve tried doing the Art of Network Engineering’s ‘happy hour’ and while I do enjoy the time I’m on there, it is a bit harder to be around a larger group of people I don’t know online. When do I chime in, what do I saw or talk about?! Being an old guy, I realize this is something I probably quickly got to get more familiar and comfortable with.
A lot of people, like Network Chuck, will tell people to create a blog right now. Teach people things. Get active on social media…put yourself out there. I see a lot of blog posts or youtube videos that are really not good, where you can tell the person didn’t put that much time into it. It looks more like they were trying to put themselves out there before they figured out what they were putting out or trying to package it well. I’ve never really like accounts on Twitter that are heavily curated, only sharing articles, never in the replies, never having an opinion. I’ve always tried for the most part to have meaningful interactions online, straying away from things I don’t like and doubling down on being authentic and myself.
This blog, my social presence, due to a short conversation I had on Discord by accident, will be a bit more intentional in creating more meaningful interactions and relationships and to that I’m grateful to those I’ve made friends with and those who’ve I’ve not yet to meet. All the best. Till next time.
So I was just checking the Cumulus Docs as you do to see if they finished this feature I was really excited about and guess what, it looks to be up! The big thing I’d been waiting for was the ability to build your own topology on their ‘Cumulus in the Cloud‘ platform. This will also be my first post, of which I’m somewhere up to 15, that will be primarily image driven so that I can show the true beauty of the platform.
You’ll have to create an account but accessing and using their platform comes with zero out of pocket, at worst, you may receive an email from time to time. Once you login you’ll wind up on this screen, where you can choose between building a prebuilt simulation or creating your own.
Alright, this is where I was getting a bit excited, my pupils began to dilate and a slight rush of euphoria began to run throughout my body. Let’s click on ‘Create your own’ and check out this awesome UI!
Alright, once you drag and drop your devices and connect them, which is very intuitive I might add, you’ll be able to either save your simulation in a multitude of ways and/or simply start your simulation by clicking the button in the top right. Options you have of each node are host name, OS, Memory, CPUs and hardware model. All hardware model seems to do is map the correct amount of ports to the chosen model. If you wanted to, save this simulation for later use. You’d want to save this as a .dot file. I’m a leave it at default kind of guy when first trying something out.
Once you are all loaded up, you’ll be able to console your devices right from the browser and all of your devices can be nicely tabbed in the same window, as shown below, for pretty gosh darn easy access.
One thing you may want to consider when building a configuration is creating a ZTP file or just know that no configuration will be completed when your simulation comes online. Even devices you have connected in your prebuild beautiful UI will need to be administratively turned on once you are all booted up.
Another cool thing to check out, after you have fun connecting up and running all your little devices is cumulus netq, which is fun to check out from the gui or the command line.
The only thing that I tried to do, but couldn’t get to work on the custom build as opposed to their prebuilt simulations was the ability to enable ssh. I kept getting an error, whereas, when I use the prebuilt configurations I’m able to upload a key and get a IP and port number so that I can connect to my simulation from my laptop instead of using the console through the website like I showed above. Perhaps I have to do a bit more configuration but adding a service isn’t outlined in the docs as of this writing. One other thing I’ll have to further investigate is what the minimum configuration needed to get my nodes connected to the internet like the prebuilt simulations are.
What is cool is that you can, in perpetuity, run your network simulations on someone else’s CPU cycles which I think is pretty darn cool. It lowers the barrier of what you need to build a multi-node simulation. You don’t need your own server, just an internet connection. If time is running out on your current lab you can bring down your configuration and relaunch the same exact simulation. It’s got to be possible to connect to your devices from your local machine and have the devices in your simulation connected to the internet which pretty much means the possibilities are endless.
Today I’d like to talk to you a bit about studying in public, how I go about it and some of the benefits it has given me the last few years. Studying in public, which I’ve mostly done on Twitter until I started writing for this blog is something I’d recommend everyone trying to learn something new do. In the following I’ll give two examples of me ‘studying in public’ and then give insight along the way and conclude with it’s benefits.
As weird as this may sound, my favorite thing to do lately as it relates to tech is parsing logs and pcaps. I’ve enjoyed getting introduced to tools like editcap, tcpdump, tshark, jq, cut, uniq, and sort and piping them all into each other to extract just the right information and display them in a pleasing way. The past few months I often see people on my timeline getting acquainted with python and if it has anything to do with reading in a file and doing some parsing then printing I’m often running through my mind ‘how would I do that in bash…’
One tool I’ve yet to touch, which I feel may level up my log and pcap ninja slicing is awk. One coworker of mine, and now my current FOR572 instructor casually use this tool to do some amazing things. So perhaps it’s time for me to dip my toe in the awk waters?!
As I’m writing this very sentence, I’ve still not used awk, I’m literally going to try it out right here for the first time. What we need though, is a task, so let’s look at Kirk Byers first set of exercises for his free Python for Network Engineers course. To be clear, I’m not saying you shouldn’t learn python or that doing everything from bash is ‘better’ but I think it’s fun to learn how to do things using multiple tools, and also, you may find yourself on a Linux server that isn’t connected to the internet, may not have a certain version of python installed or you are missing the python packages to get your script to run but chances are you will have common bash tools at your disposal. We move.
Create a Python script that has three variables: ip_addr1, ip_addr2, ip_addr3 (representing three corresponding IP addresses). Print these three variables to standard output using a single print statement.
Well we won’t be using python to do this, let’s try this with awk in bash. [15 min passes while I went to the google and tried a few things out]. I’m back and we do have ourselves a bash one-liner that will solve the first prompt:
What did I learn doing this first exercise? Well, first off, to set a variable with awk you use the ‘-v’ option. Furthermore, their is no syntax I could find to do multiple variables with one ‘-v’ option, instead, as shown above you have to do a ‘-v’ for each variable. With print we are able to print all three of our variables separated by a ‘,’ within brackets and a quotation. I am left with one question though:
so…
why does echo | to awk give me one line and give me my prompt back but
awk by itself runs it over and over with each hit of <enter> and i have to <ctrl> <c> out of it?
I don’t understand why the command works with echo and doesn’t run the same way without it…what magic is echo doing here is the real question OR what is possibly missing syntax wise without echo. One cool thing about twitter is that people much smarter than me are willing to offer their time and provide insight, as Roddie and Quinn do here. I’m very thankful for having so many people out there helping me along 🙂
If I'm your go-to on this stuff — you need help 😉 That being said, you're right Roddie. Passing arguments using shell redirection provides the implicit <EOF> and executes the resulting command only on the piped input.
A quick aside, I often do learning in public, that was this blog post is and I think it’s helping me grow more than anything else. By posting what I’m doing, even if it’s the most trivial newbie thing it starts a lot of conversations. From other people learning at the same level as me or from more senior people showing best practices or alternative or faster ways to accomplish a task. I definitely recommend sharing what you are learning in some capacity on a platform where others can interject. You’ll learn a lot and make a few good connections along the way!
If you were curious how Kirk solved his prompt with python:
Another person who’s quick to help anyone learning is Kirk himself. This is yet another example of how studying in public can help open your eyes and give insight you’d otherwise be left in the dark about. For me, I’ve been doing a bit of tech stuff since the early 2000s. When I first started there wasn’t an online forum with people interacting. I thought I was doing ok, as compared to people in my office and those I interacted with, but today, with a bunch of people on line, I’m continually pushing myself and my boundaries of knowledge with people way smarter than me. So, even if I’m not being pushed were I’m at I have a whole world to help guide and help me grow now.
Looking a bit into awk it looks like I got a lot to learn, and once I get back into my bigger data sets at work I’ll dive deeper into it’s search and printing functionalities. I’ll also reference ‘Effective awk Programming’ Arnold Robbins on Oreilly Books. Did we learn a lot from this one example? Maybe not, but sometimes the first step is the hardest and I hadn’t written a post here on the Art of Network Engineering recently and I wanted to try and get back on the horse so to speak. If I’m able to break through in the next few months on the awk train, be sure to check back in for a more extensive awk walkthrough.
This was just one example of ‘learning in public’ and I found myself writing a script later the same night. Another thing I’m trying to navigate and get better at. I got help again when I was stuck and ended up finding out I could do my whole script in one line. I found out all these things in a matter of minutes and a good nights rest. If I wasn’t learning in public who knows how long it would of taken me to gain these insights.
If you are interested in the script you can follow this thread, or see the final version below:
for i in {0..599}; do
    echo -n "Status Code ${i} seen: " >> ./statuscode.txt
    tshark -n -r lab-1.2_capture.pcap -Y "http.response.code == ${i}" | wc -l >> ./statuscode.txt
done

sed -i '/seen: 0/d' ./statuscode.txt
This will give you the output:
$ cat statuscode.txt
Status Code 200 seen: 1138
Status Code 204 seen: 28
Status Code 301 seen: 2
Status Code 302 seen: 44
Status Code 304 seen: 21
Status Code 307 seen: 1
Status Code 403 seen: 1
Status Code 408 seen: 6
But, after a good night’s sleep I realized you can get this all done in one line much more efficiently:
So while I didn’t dive all the way in and provide a step by step tutorial I hope I was able to give you insight to another aspect of my learning style and perhaps it can help you when you are starting out on a new learning venture. I remember at first being a little nervous of putting myself out there or ‘sounding dumb’ and I soon realized everyone is out here beginning or everyone has at one time been a beginner. Will, that’s all today, happy learning!
Andre was gracious enough to let me give my thoughts on the “learning in public” concept. I share the same sentiment about getting started with writing publicly as you are learning something knew. I had the thoughts like:
If I’m new to this, what’s the point of writing a blog post? Nobody is going to get anything out of this this, right?
Do I really want to show the world that I’m a beginner in X, Y, or Z?
I’ve learned to throw those thoughts to side and I agree 100% with Andre. There are great benefits to learning in public, such as:
Writing a blog post about something you are learning forces you to explain what you learned. You become a teacher, if you will. This can really help you better understand concepts. You do NOT have to wait until you are an “expert” in something to write a post or teach it to someone else. This was a hurdle that I had to get over.
As far a blogs go as a method of learning in public; writing is a skill. Writing about what you are learning about allows you to practice the art and find your own style.
You never know when you might bring inspiration to others. You could be greatly helping other people who are at similar points in their journeys.
As Andre mentioned, just by posting a question on a social media platform like Twitter, you can make some awesome connections.
So, I encourage you; write that post, ask that question, practice your craft, and help others along the way. And if you need a platform to write blogs, connect with us here at the Art of Network Engineering!
So Linux has never been my daily driver until a few months ago. Now it’s my daily driver for work and home and with that I’m learning a lot and since you can use a lot of the applications in conjunction with each other with piping and what not. So in essence, learning one new tool or application can open up unseen possibilities in other tools.
The coolest command I learned this past week is watch. In my day job I’m often deploying tools that create logs, like Zeek, and I’d often ls or ll to see if I was having logs created or if the conn.log was getting bigger. Enter watch, simply run any command as you normally would and ‘<ctrl> a’ and add watch to the beginning of the command. Doing this, you get your normal output but it updates every two seconds and if any values change they will change within the output. I found myself using this command again when I was monitoring my kubenertes cluster, instead of ‘kube get pods’ I’m now typing watch ‘kube get pods.’ I’d have it open like a dashboard when deploying or troubleshooting pods.
Then later on in the work week I started having an issue with trying to track time on all of my devices. I surmised that when time got too far off one of my applications would begin to fail. My first attempt was a bash script that simply ssh’d to each device and ran the time command. But by the time I got to the 8th or 9th device, since I was putting in the password, I wasn’t really getting the result I was looking for. So if you got a hammer use it on everything right?! I ended having 10+ windows open, all small and organized on my desktop running ‘watch timedatect’ and I would watch the timing of my devices slowly drift and in due time, prove my hypothesis.
Then came the weekend, and I started looking into ansible. I found an example where they had used one command to connect to and check the time of all the devices in their inventory file. This really perked my interest. Could I have found a tool even cooler than watch in less than a week?!
Interlude: I installed gns3 and started a small topology of cumulus Linux devices to go on this ansible adventure. I’m not going to dive too far into the specifics of the playbook as far as indention or how to or where to put vars as the documentation is really good. Google is your friend here. I’m just here to walk through my first playbook 🙂
The first thing I did when starting this adventure into my first interaction with ansible was creating an inventory file:
Next I used ssh-keygen and shipped a public key to all the devices in my topology so I could connect without username:password. A quick google search of ssh-keygen will get you squared away in no time. This is all what’s needed to do what I was trying to do at work earlier in the week, check the time on all my devices:
ansible all -a "date"
leaf01 | CHANGED | rc=0 >>
Sun 13 Jun 2021 12:37:15 AM UTC
leaf02 | CHANGED | rc=0 >>
Sun 13 Jun 2021 12:37:15 AM UTC
spine01 | CHANGED | rc=0 >>
Sun 13 Jun 2021 12:37:15 AM UTC
leaf03 | CHANGED | rc=0 >>
Sun 13 Jun 2021 12:37:15 AM UTC
spine02 | CHANGED | rc=0 >>
Sun 13 Jun 2021 12:37:15 AM UTC
Since I’m trying to learn automation I began to brainstorm what could my first ansible playbook do?! A playbook is simply a series of tasks rather than just running one task like illustrated above. To do this I followed along with the cumulus documentation and did one of my switches manually so I understood the steps and what was needed to accomplish this task. In short, here are the main things my ansible playbook needs to do:
edit two lines of a conf file
enable and start two services
Let’s try to go line by line-ish on what’s happening in my playbook.
---
- hosts: all
I guess the beginning of all yaml files, of which the playbook is, starts with a ‘—‘ and the second line is saying that I want to run what follows and all the things in my inventory file.
Become with the switch to yes is saying that you want to be root and on the next line i’m declaring the value of the variable conf_path which I’ll call later in the playbook.
Here is the first task, of which you can name whatever you want. In path, I call the variable above and then I do a regex search and then replace with the last line. The goal of this task is to comment out a line.
    - name: edit another line from file
      replace:
        path: "{{ conf_path }}"
        regexp: '# listen \[::]:8080 ipv6only=off ssl;'
        replace: 'listen [::]:8080 ipv6only=off ssl;'
In this task I’m trying to uncomment a line. I also had to escape the [::] in the regex search, which tripped me up for a bit.
    - name: enable nginx service
      ansible.builtin.service:
        name: nginx
        enabled: yes
    - name: start nginx service
      ansible.builtin.service:
        name: nginx
        state: started
    - name: enable restserver
      ansible.builtin.service:
        name: restserver
        enabled: yes
    - name: start restserver
      ansible.builtin.service:
        name: restserver
        state: started
The rest of the playbook is just enabling and starting the needed services as speechified in the cumulus linux documentation. All together the playbook looks like the following, of which, with all yaml files indentation is very important.
To further improve this playbook, while it does work, I’ll build in some checks to verify everything is working as it should so you don’t have to do it after the playbook runs. To run the playbook I use the following command:
I use the –ask-become-pass so that I can enter in the root password for the devices instead of me hard coding them as a var or something. There maybe another way but today that is where we stand.
Thanks for hanging out with me and going through my very first ansible playbook journey. I’ll leave you with the verification that the REST service is working on the cumulus device, till next time!
In this post of the CCNA Series, we will be covering endpoints and servers in the network. In the CCNA exam topics, we are looking specifically at Network Fundamentals > Explain the role and function of network components > Endpoints and Servers. While studying in-depth enterprise network infrastructure topics and concepts, I think it can be easy to gloss over why the network is there in the first place. I always like to think of the network as a service that is there to support business functions. Businesses utilize technology for many reasons, for example to become efficient, scalable, and to provide excellent outcomes. Typically, they look to implement and leverage applications to achieve these goals. Well, those applications need to be able to be accessed and hosted (or served) somehow. That is where endpoints and servers enter the picture. If enterprises didn’t have endpoints and/or servers, then we wouldn’t really have a need for networks, would we?
Endpoints
Endpoints are the actual devices that connect to our networks so that we can gain access to those business critical applications that we brought up earlier in the post. In the last post around L2 and L3 switches, we introduced the concept of the three-tier architecture with the core, distribution, and access layers. As depicted in the image above, endpoints can be thought of as being at the edge of the network, so naturally, they connect to our access layer switches that provide initial connectivity or entry into the network at the edge. Endpoints can connect to the network either wired via directly connecting to a switch, or wirelessly, leveraging radio waves to connect to a wireless access point. Examples of common endpoints at the access layer are desktop and laptop computers, printers, phones, tablets, and scanners. Some endpoints, such as desktops and laptops are used to access applications and services, while other endpoints, such as printers, provide a service. For example, a laptop can communicate with a network attached printer to print documents. Endpoints in the network are used to gain access to services, as well as provide services themselves.
Servers
At a basic level, servers can be thought of as endpoints as well. They connect at the edge of the network just as end user endpoints do. The difference is that servers typically connect to the data center access layer versus the end user access layer such as a switch in a small data room on a floor of a building. It was stated earlier that businesses rely on the network to provide access to critical applications. Well, those applications are hosted on devices called servers. Servers can be physical (meaning typically one application per box), or virtual (meaning multiple apps/servers per physical machine). Also, servers can be hosted in on-premises data centers, external co-location facilities, as well as “in the cloud”. Examples of applications or services hosted on servers are email, websites, ecommerce systems, and media servers. To round this out, in our enterprise business example, servers house the applications that provide value to the business.
But Why?
Conclusion
I think it is important to remember that the network is a service (or potentially even a utility, if you want to take it that far). In an enterprise setting, the network is necessary because access to applications and information drives a business forward. Client or user endpoints are leveraged to gain access to those business critical applications, and servers house or host those applications and information. The network is there to provide the connectivity from the client endpoints to the servers that host the applications.
“Faces of the Journey” is a series that highlights individuals in the network engineering community. The journey is the path we take through our careers, and it can be very different for each of us. While the destination is important, it’s all about the journey!
Teneyia Wilson is a Network Engineer originally from Denver, Colorado, who recently found herself back home. In 2004, Teneyia and her family moved away from Colorado. Being part of a military family, she and her family have lived in many cities in the last sixteen years. Teneyia currently holds two network engineering positions (yes, you read that correctly, two), one of which as a Network Engineer III with the ISP, Spectrum. If you thought that holding two network engineering positions was impressive, get this, IT/network engineering is not Teneyia’s first profession. Before getting into IT professionally, she ran a personal training studio from 2012 to 2019, while also managing a retail store with GNC. Teneyia has been fascinated with technology since middle school and knew then that she wanted a degree in IT, but took a different path for a while. Then, in 2018, she decided to quit her retail job to become a Network Engineer. She went to Barnes and Noble to purchase the CompTIA Network+ book and the Cisco CCNA 200-125 book set. At that time she was not working, so she spent five to eight hours a day reading, taking notes, and watching videos to catch up on the technology that she had missed out on over that nine year window. Teneyia found quickly that getting certifications made sense to her to be able to break into IT so that she could build experience and grow on a technical level (but she has not stopped the certification study by any means). After achieving both the Network+ and CCNA certifications, Teneyia got a help desk position at a managed service provider (MSP). A year later, she earned the CCNP Routing and Switching certification, and accepted a position as a Network Administrator with DXC Technology. In August of 2020, Teneyia moved back to Colorado and is now a Network Engineer with a 911 dispatch center and Spectrum. Teneyia’s fascination with technology started early in life by taking apart a Nintendo NES, computers, and phones to see how they worked. Teneyia is always striving to be a great engineer, who is highly skilled at troubleshooting and design, while helping others along the way. She is currently studying for the CCIE certification and will one day become a Principal Engineer or Solutions Architect.
What did you want to be when you “grew up”? A multi-business owner. I had plans/ideas for restaurants and clothing lines. I use to love cooking and making clothes. I created a whole clothing line/brand between 2003-2009.
What advice do you have for aspiring IT professionals? Like anything else, don’t rush the process. Take your time to fully understand the technologies. Know how and when to use them. Ignore the imposter syndrome, no one knows everything. Take risks and never stop learning.
What is something you enjoy to do outside of work? Outside of work, I love lifting weights and competing in bodybuilding competitions. I also have a project car. I’m not in the car scene as much as I was when I was living in Los Angeles but still love fixing up and cruising in my 350z.
How do you manage your work/life balance? When studying for certs and/or training for a bodybuilding show, I create weekly schedules and stick to them. I schedule work, family time, errands, study, gym, everything. I prioritize most important to least and try not to deviate. In the off season and when I’m not preparing for a cert exam, work stays between 9am-5pm. I completely shut off computers and work thoughts to spend time doing what my family wants to do.
When learning something new, what methods work best for you? When learning something new, I like to get the information in multiple ways. I read books, watch videos, ask questions to people who have experience and get as many hands-on hours as I can. Even when I don’t have access to get hands-on practice, I find alternate ways to “do” the things I’m learning. For example, I write out or type in notepad configurations over and over when I don’t have access to physical equipment or an emulator. When I didn’t have real people to practice leading fitness classes, I setup my video camera and lead the workout like it was a gym full of people.
Bert’s Brief
“Discipline is more important than motivation!” This is the current pinned tweet on Teneyia’s Twitter profile. I guess I’ve always kind of thought that finding motivation or “the want” to do or accomplish something was the most important thing. Well, as Teneyia has shown, that’s only part of it. I’ve now shifted my thinking that motivation is really just the beginning. To achieve something that is important to you, discipline is the real secret sauce here. If you can find a way to stay consistent on your path, you will get there. Teneyia’s journey is great example of this. She decided to shift into IT just three years ago and what she has accomplished since then is really incredible. Teneyia does not keep her passion to herself, by working to help others along the way. Although she has already accomplished so much, this is really just the beginning for Teneyia and I predict that there are big things to come in the future. Check out Teneyia’s episode on the AONE podcast. One thing that I learned from that episode that I have already put in to practice is to give myself just five seconds to be scared or overwhelmed in a situation. After that five seconds, you put it behind you and focus. I have a feeling that will stick with me for a long time.
If you’ve been following my feed a bit, you know I’ve been going pretty strong for the last four months into SANS503. More than half the blog posts I’ve had published on this site were dedicated to a tool introduced or covered in this course. Well, I cleared the exam and it’s probably in no small part due to blogging. Not that blogging or studying in public was the only thing that amounted to a successful exam but it surely did help in my opinion. In the following I’m going to reflect a bit on the SANS503 course and GCIA exam.
I know, the major drawback to SANS courses is cost, and I get that. Each 5-6 day course runs on the plus side of seven thousand dollars and a certification attempt is no small pocket change either. That aside, if we are just here to judge content, this was the best cyber related course I’ve taken and the best certification experience I’ve ever had. To put this into a little bit of context, I’ve taken 7 Cisco exams at the associate and professional level, 4 Juniper associate level tests and 3 CompTIA exams. I’ve subscribed to INE, CBT Nuggets, Pluralsight, Linux Academy and O’Reilly Books. This course bests everything I’ve done up to this point. Perhaps this is just a hint that I need to do more focused training and less video on demand type stuff?!
SANS503 (the course)
The number one thing I liked about the course was the Virtual Machine and the Lab Workbook. Each section of the class concluded with lab exercises that we completed on our vm. We created rules, tuned rules, searched pcaps, created packets, created scripts and had a comprehensive capstone exercise to bring everything together. I went through this workbook twice. I probably spent 100 hours in the exercises alone. I went through the first time as I was following along with the course. I needed a lot of hints and had to do a lot of extra research as most of these tools were new to me. The second time through, I did almost all the exercises without using any of the hints. Really felt like I got the foundational understanding of how to use the main tools discussed during the class, namely, snort, tcpdump, tshark, scapy, wireshark and zeek.
I did the self paced version of the course. I got a recorded version of the course that I could watch at my own pace. This was perfect for me. As I mentioned before, this was the first time I’d ever used snort or wrote a snort rule. So I got to take my time with the material and really hone in on the fundamentals of using the tool. The instructor was excellent, clear and engaging even though it was not interactive. Besides just learning some tools the class also dug into major protocols. We went through ethernet, ip, tcp, udp, icmp, dns, smb, http and tls. One of the major themes of the course was being able to parse these different packets in hex. After doing this for a few months it’s not so difficult to pull out the next header field and what have you.
GCIA (the certification)
The certification exam was difficult for me. I had done one practice exam before taking the actual exam and scored an 89%. Not only that, I had more than an hour to spare. This had me feeling very confident. On the actual exam, as opposed to the practice test I took, I didn’t get any feedback per question, whether it was right or wrong. For whatever reason, perhaps just the added pressure of it ‘being an exam’ I was second guessing myself and was looking up more answers and even verifying answers I knew were right (it’s an open book exam). When I submitted the last question I had one minute remaining of my four hour allotted testing time. I scored two points lower than my practice test when all was said and done, an 87%.
What I like most about the exam is that since it is open book, there isn’t any really stump the chump kind of feeling when an obscure question about an IP option comes up. Instead, using documentation you can easily decipher what you need and come up with the answer.
Before going through the examination process I had read in other blog posts or youtube videos of people making an index. People would go through each book and index terms so that when they came across a question they could go to their index and hopefully find the answer in a reasonable amount of time. I did not do this, I used the index provided in the lab book portion of the materials and truth be told I didn’t use it that much. My thought process is that if you put in the time on the material (there are five main books), you will have a pretty good idea of where to start looking for that topic.
Lastly, one of the coolest parts of the exam is that it has a VM portion where you interact with pcaps using the tools and protocol knowledge outlined in the course to pull out answers. This was way more slick than any Cisco simulation I’ve ever done. Overall I think the exam really covered everything in a fair and balanced way and didn’t at all feel like a random trivia question extravaganza.
Conclusion
If you get the chance definitely take the opportunity to do some of their training. I’m hoping to take FOR572, Advanced Network Forensics: Threat Hunting, Analysis, and Incident Response and the associated GNFA next. It will, I’m sure, be covering a lot of the same tools but I’m excited to get the point of view of a different instructor that will hopefully shed light on new things.
Also, I think I’m going to continue to keep blogging a bit here. I started out not knowing whether I would like it or find it useful. I think blogging and ‘studying in public’ is kind of a way to hold myself accountable even when the passion or motivation maybe lacking a bit that day. Hope you will continue this journey with me and I’ll see you on the other side on our next adventure.
In this edition of the CCNA Series, we are going to cover network switches. In the CCNA exam topics, we are looking specifically at Network Fundamentals > Explain the role and function of network components > L2 and L3 switches. Before we get into the difference between Layer 2 and Layer 3 switches, let’s describe and understand what switches are and what their role is in a network. In their simplest form, switches are hardware or software devices that provide connectivity to the network. For the simplicity of this article, unless otherwise specified, we will be focusing on hardware based (physical) switches. Who and/or what do switches provide connectivity to the network? Well, that depends upon which “layer” the switch resides. In the traditional campus infrastructure model, we can look at the network as having three layers; access, distribution and core.
Traditional 3 layer campus design
Access Layer
The switches at the access layer provide endpoints, or devices their initial connectivity to the network. The access layer can be thought of as the edge of the campus network, because this is where the network begins for devices. This is where our computers, printers, phones, and much more, connect to the network. The network is providing the service of delivering data to the required destinations for the connecting devices.
Distribution Layer
While the purpose of the access layer is for switches to connect to endpoints, the distribution layer switches connect to other switches. The distribution layer bridges the gaps between access layer switches at the local site (intra-site communication), and the local site access layer and the core layer, which provides connectivity to other sites (inter-site communication). The distribution layer provides two main functions, that both stem from the concept of network scalability.
Acts as an aggregation layer for the access layer switches. As the number of access layer switches grows at a site, it is not functionally or cost effective to connect each access layer switch together directly to provide connectivity between them. It makes more sense to create a layer of switches “above” the access layer to provide the intra-site connectivity.
Provides connectivity to the core layer which in turn provides connectivity to other sites (inter-site connectivity).
Core Layer
The purpose of the core layer is similar to the distribution layer in that it provides the service of aggregating switches to provide scalability. However, rather than aggregating access layer switches, the core layer ties together the different distribution layer switches between sites. Configuration and service-wise, we try not to get too fancy with the core layer. The core is there primarily to move packets through the network (between sites, if you will) as quickly as possible. In depth security and authentication services are typically handled in the lower layers of this three-tier model.
Now that we have covered the very basics around the purpose of switches and their roles depending on where they live in the network, let’s now describe, compare, and contrast Layer 2 and Layer 3 switches. Back in the “old days”, switches solely provided the Layer 2 functions in the network and routers (previous post) solely handled the Layer 3 functions. Switches typically have many physical ports and as stated earlier, connect to either devices at the edge of the network, or to other switches to get up or downstream in the network. Routers, on the other hand, tend to have fewer ports and provided routed (Layer 3) connectivity between different network segments. What do we mean in the traditional sense of switches operating at Layer 2 and routers at Layer 3? At Layer 2 of the OSI Model, we forward data (called frames) through switches based on their destination MAC addresses (burned in, or hardware addresses). In contrast, at Layer 3, data (called packets) is forwarded through routers based on destination IP addresses (logical addresses).
Layer 2 Switches
As covered in the previous section, switches operate at Layer 2 of the OSI Model by default. As frames flow through a switch, the switch builds what is called the MAC address database (aka the MAC table). The MAC table is used to properly forward data frames to the correct destinations. When a frame enters a switchport, the switch takes note of the source MAC address, the port the frame entered the switch on, and the VLAN that the port belongs to, and adds that as an entry into the MAC table. Later, when a frame enters the switch with a destination address of that first MAC address that was added to the table, the switch knows which port to forward that frame out. If that original device/MAC address gets moved to another port, the MAC table will be updated to reflect the port move. At Layer 2, VLANs are used to provide network segmentation. An access port on a switch can only belong to a single data VLAN, and traffic from a VLAN should only be forwarded out ports in the same VLAN. For traffic to cross VLANs, a routing function is needed.
Layer 3 Switches
Again, traditionally, Layer 2 functions have been handled with switches, and when subnets have been needed to be defined and Layer 3 forwarding used, we had relied on separate devices, called routers. As switches developed over the years and resources could be added to them, they began to be able to handle more functions. It then became a popular question that if switches can handle handle routing functions from a resource standpoint, do we really need separate hardware routers everywhere in the network that we define a Layer 3 boundary? Enter, Layer 3 switches. Layer 3 switching is just another way to say that we are providing routing functions in a switch. This can be handled in few different ways from an interface standpoint.
Routed Port
This is a native Layer 3 interface on a switch and most resembles a “normal” interface on a traditional router. To recap, switches operate a Layer 2 by default, so to convert a Cisco switchport to a routed port, the command no switchport is entered on the interface. After that, an IP address and subnet mask can be entered just like on a traditional router interface.
SVI (Switch Virtual Interface)
An SVI is a virtual Layer 3 interface on a switch that corresponds to a specific VLAN. Before Layer 3 switches, to provide routing for devices on a VLAN, we would need connectivity to an external router via access or trunk ports and the router would handle the Layer 3 functions of separating routed networks and forwarding packets between networks/subnets. An SVI is initiated by entering the global config command of interface vlanvlan-id. Then, an IP address and subnet mask can be defined. Finally, the SVI needs to be enabled with the no shutdown command.
Layer 3 Portchannel
To provide higher bandwidth and resiliency at Layer 3 on a switch, a Layer 3 portchannel can be used. The physical member interfaces need to be configured for Layer 3 with the no switchport, added into a portchannel, then the IP and subnet mask information is configured on the portchannel interface.
But Why?
Summary
Many switches out there today can operate at both Layer 2 and 3, which can cut down on the amount of network hardware that is needed. As always, when selecting solutions, you need to determine your network requirements to make sure you are selecting the correct gear to suit your needs. You can think of a Layer 3 switch as a switch that can also act as a router.
Enter Cumulus Linux, the networking arm of Nvidia. They’ve had a cumulus in the cloud offering for sometime now and I logged in the other day after a long hiatus just to check things out. They are currently running Cumulus Linux version 4.3 with vim now on it’s standard image 🙂
wouldn't it be cool if you could just spin up this lab in minutes…using someone else's hardware…for free
There was one new thing that really caught my eye. One of the ‘Demo Modes’ they have now, once you are all logged in and have your virtual 2 racks of equipment powered on, virtually cabled and spun up is called ‘Challenge Labs.’ Currently, there are 4 challenge labs. Each lab is loaded and solution validated from the oob-management-server within the topology by way of an bash script. To load the first challenge you simply run a bash script that loads the configuration to the applicable devices using an ansible playbook.
cumulus@oob-mgmt-server:~/cumulus-challenge-labs$ ./run -c 1 -a load
Challange #1
Server01 is unable to ping server02 or server03. Server02 and server03 are able to ping each other.
Challenge #1 Topology
Here we go! Are your wheels spinning? Are you coming up with possible issues and areas to look? The first thing I like to do when I first encounter a problem ticket is:
Recreate the issue, in this case, verify the ping fails from server01 -> server[02|03]
I don’t really have to worry about power here since we are all virtual but I can verify that the IPs in the diagram and the interfaces connecting the devices are correct. Let’s take a look at server01, is it’s IP correct and is it using ‘eth1’ as specified in the diagram?
cumulus@server01:~$ ip a show eth1
3: eth1: <BROADCAST,MULTICAST,UP,LOWER_UP> mtu 1500 qdisc fq_codel state UP group default qlen 1000
    link/ether 44:38:39:00:00:32 brd ff:ff:ff:ff:ff:ff
    inet 10.1.10.101/24 scope global eth1
       valid_lft forever preferred_lft forever
    inet6 fe80::4638:39ff:fe00:32/64 scope link
       valid_lft forever preferred_lft forever
Now, when we look into our first cumulus switch, I can discuss one thing that’s really cool about it. You can check the port configuration the same way we did above, with ‘ip a’ or we can use more of a traditional ‘command line’ for a networking device utilizing what they call nclu (network command line utility). Let’s log into leaf01 and have a look:
cumulus@leaf01:mgmt:~$ ip a show swp49
51: swp49: <BROADCAST,MULTICAST,UP,LOWER_UP> mtu 9216 qdisc pfifo_fast master bridge state UP group default qlen 1000
    link/ether 44:38:39:00:00:59 brd ff:ff:ff:ff:ff:ff
So ‘ip a’ isn’t showing us everything we want here but I think it’s mighty cool that i’m on a ‘switch’ and i got native Linux commands at my disposal. We can tell we don’t have an IP address configured so we are operating at layer 2 and we are up.
A command I like to go to straight away on a Cisco device is ‘show ip int br’ and we can get a lot of the same sort of data with Cumulus’ nclu command ‘net show interface’:
cumulus@leaf01:mgmt:~$ net show interface
State  Name    Spd  MTU    Mode       LLDP                          Summary
-----  ------  ---  -----  ---------  ----------------------------  ---------------------------
UP     lo      N/A  65536  Loopback                                 IP: 127.0.0.1/8
       lo                                                           IP: ::1/128
UP     eth0    1G   1500   Mgmt       oob-mgmt-switch (swp10)       Master: mgmt(UP)
       eth0                                                         IP: 192.168.200.11/24(DHCP)
UP     swp1    1G   9216   Trunk/L2   server01 (44:38:39:00:00:32)  Master: bridge(UP)
UP     swp49   1G   9216   Trunk/L2   leaf02 (swp49)                Master: bridge(UP)
UP     bridge  N/A  9216   Bridge/L2
UP     mgmt    N/A  65536  VRF                                      IP: 127.0.0.1/8
With Cumulus, if configured, I always find myself typing ‘net show lldp’ as one of my first orientation sort of activities. LLDP (link layer discovery protocol)
OK. Now let’s verify the issue. Let’s see if server one can ping the other servers in the topology:
cumulus@server01:~$ ping 10.1.10.102 -c 3
PING 10.1.10.102 (10.1.10.102) 56(84) bytes of data.
From 10.1.10.101 icmp_seq=1 Destination Host Unreachable
From 10.1.10.101 icmp_seq=2 Destination Host Unreachable
From 10.1.10.101 icmp_seq=3 Destination Host Unreachable
--- 10.1.10.102 ping statistics ---
3 packets transmitted, 0 received, +3 errors, 100% packet loss, time 2034ms
pipe 3
cumulus@server01:~$ ping 10.1.10.103 -c 3
PING 10.1.10.103 (10.1.10.103) 56(84) bytes of data.
From 10.1.10.101 icmp_seq=1 Destination Host Unreachable
From 10.1.10.101 icmp_seq=2 Destination Host Unreachable
From 10.1.10.101 icmp_seq=3 Destination Host Unreachable
--- 10.1.10.103 ping statistics ---
3 packets transmitted, 0 received, +3 errors, 100% packet loss, time 2027ms
pipe 3
You may have seen the issue already, you may not. But let us get on the working switch, the one where both hosts can ping each other, and see if you can spot the difference:
We can see that the ‘good’ switch has access ports to their servers and the ‘bad’ server is configured as a trunk. Two solutions come to mind straight away. One, we could configure the server link to the switch as a trunk. Since we are working with ‘cumulus linux’ within the challenge I’m going to assume we want to change leaf01 to have an access port to it’s server, but with what vlan? Let’s check on leaf02:
Aright, vlan 10 it is. One last thing I need to check out before logging off of leaf02 is a hint on what the command to use, for this I’ll grep the configuration:
Let’s jump back on leaf01 and fix this issue once and for all:
cumulus@leaf01:mgmt:~$ net add interface swp1 bridge access 10
cumulus@leaf01:mgmt:~$ net commit
--- /etc/network/interfaces     2021-05-04 20:46:36.925028228 +0000
+++ /run/nclu/ifupdown2/interfaces.tmp  2021-05-05 00:42:00.327566444 +0000
@@ -7,20 +7,21 @@
 auto lo
 iface lo inet loopback
 # The primary network interface
 auto eth0
 iface eth0 inet dhcp
  vrf mgmt
 auto swp1
 iface swp1
+    bridge-access 10
 auto bridge
 iface bridge
     bridge-ports swp1 swp49
     bridge-vids 10
     bridge-vlan-aware yes
 auto mgmt
 iface mgmt
   address 127.0.0.1/8
net add/del commands since the last "net commit"
================================================
User     Timestamp                   Command
-------  --------------------------  ---------------------------------------
cumulus  2021-05-05 00:27:03.636686  net add interface swp1 bridge access 10
cumulus@leaf01:mgmt:~$ net show lldp
LocalPort  Speed  Mode       RemoteHost       RemotePort
---------  -----  ---------  ---------------  -----------------
eth0       1G     Mgmt       oob-mgmt-switch  swp10
swp1       1G     Access/L2  server01         44:38:39:00:00:32
swp49      1G     Trunk/L2   leaf02           swp49
cumulus@leaf01:mgmt:~$
Last thing to do is to log into server01 and see if I can now ping server[02|03]:
cumulus@server01:~$ ping 10.1.10.102 -c 3
PING 10.1.10.102 (10.1.10.102) 56(84) bytes of data.
64 bytes from 10.1.10.102: icmp_seq=1 ttl=64 time=20.8 ms
64 bytes from 10.1.10.102: icmp_seq=2 ttl=64 time=4.09 ms
64 bytes from 10.1.10.102: icmp_seq=3 ttl=64 time=3.48 ms
--- 10.1.10.102 ping statistics ---
3 packets transmitted, 3 received, 0% packet loss, time 2002ms
rtt min/avg/max/mdev = 3.489/9.475/20.844/8.042 ms
cumulus@server01:~$ ping 10.1.10.103 -c 3
PING 10.1.10.103 (10.1.10.103) 56(84) bytes of data.
64 bytes from 10.1.10.103: icmp_seq=1 ttl=64 time=5.85 ms
64 bytes from 10.1.10.103: icmp_seq=2 ttl=64 time=11.8 ms
64 bytes from 10.1.10.103: icmp_seq=3 ttl=64 time=2.76 ms
--- 10.1.10.103 ping statistics ---
3 packets transmitted, 3 received, 0% packet loss, time 2003ms
rtt min/avg/max/mdev = 2.768/6.825/11.853/3.772 ms
We’ve verified we have solved the issue, but I also want to let you know that the run script also comes with a verification option that will make sure you solved problem statement. To do this, we log back into the oob-server:
cumulus@oob-mgmt-server:~/cumulus-challenge-labs$ ./run -c 1 -a validate
Validating solution for Challenge 1 ...
PLAY [server] ******************************************************************
TASK [include_tasks] ***********************************************************
Wednesday 05 May 2021  00:57:25 +0000 (0:00:00.059)       0:00:00.059 *********
included: /home/cumulus/cumulus-challenge-labs/automation/roles/common/tasks/validate.yml for server03, server02, server01
included: /home/cumulus/cumulus-challenge-labs/automation/roles/common/tasks/validate.yml for server03, server02, server01
included: /home/cumulus/cumulus-challenge-labs/automation/roles/common/tasks/validate.yml for server03, server02, server01
TASK [Validate connectivity to server01] ***************************************
Wednesday 05 May 2021  00:57:25 +0000 (0:00:00.355)       0:00:00.415 *********
ok: [server01]
ok: [server03]
ok: [server02]
TASK [Display results for server01] ********************************************
Wednesday 05 May 2021  00:57:27 +0000 (0:00:02.523)       0:00:02.939 *********
ok: [server01] =>
  msg: 10.1.10.101 is alive
ok: [server02] =>
  msg: 10.1.10.101 is alive
ok: [server03] =>
  msg: 10.1.10.101 is alive
TASK [Validate connectivity to server02] ***************************************
Wednesday 05 May 2021  00:57:28 +0000 (0:00:00.112)       0:00:03.051 *********
ok: [server01]
ok: [server03]
ok: [server02]
TASK [Display results for server02] ********************************************
Wednesday 05 May 2021  00:57:30 +0000 (0:00:02.422)       0:00:05.474 *********
ok: [server01] =>
  msg: 10.1.10.102 is alive
ok: [server02] =>
  msg: 10.1.10.102 is alive
ok: [server03] =>
  msg: 10.1.10.102 is alive
TASK [Validate connectivity to server03] ***************************************
Wednesday 05 May 2021  00:57:30 +0000 (0:00:00.087)       0:00:05.561 *********
ok: [server01]
ok: [server03]
ok: [server02]
TASK [Display results for server03] ********************************************
Wednesday 05 May 2021  00:57:32 +0000 (0:00:02.087)       0:00:07.649 *********
ok: [server01] =>
  msg: 10.1.10.103 is alive
ok: [server02] =>
  msg: 10.1.10.103 is alive
ok: [server03] =>
  msg: 10.1.10.103 is alive
PLAY RECAP *********************************************************************
server01                   : ok=9    changed=0    unreachable=0    failed=0    skipped=0    rescued=0    ignored=0
server02                   : ok=9    changed=0    unreachable=0    failed=0    skipped=0    rescued=0    ignored=0
server03                   : ok=9    changed=0    unreachable=0    failed=0    skipped=0    rescued=0    ignored=0
Wednesday 05 May 2021  00:57:32 +0000 (0:00:00.083)       0:00:07.732 *********
===============================================================================
Validate connectivity to server01 --------------------------------------- 2.52s
Validate connectivity to server02 --------------------------------------- 2.42s
Validate connectivity to server03 --------------------------------------- 2.09s
include_tasks ----------------------------------------------------------- 0.35s
Display results for server01 -------------------------------------------- 0.11s
Display results for server02 -------------------------------------------- 0.09s
Display results for server03 -------------------------------------------- 0.08s
cumulus@oob-mgmt-server:~/cumulus-challenge-labs$
So this wasn’t the most complicated ticket, and the further challenges get a bit more involved to solve. My hope is that you can see how relatable the output is from the nclu if you are coming from learning or working on Cisco, Juniper or Arista. Also, if you love Linux how cool is it to have all this functionality in a native Linux platform?!
Conclusion
Seeing how easy (and FREE and easily accessible) it was to setup a lab and a challenge from within the lab I hope that you can see the potential of Cumulus VX as a learning platform. Furthermore, this challenge script found on the oob-server within this free cumulus in the cloud offering could be a framework for future TSHOOT challenges.
If you want to run this lab locally, that’s also no issue as they have their process documented on their Gitlab repository. Once more, you’d think with all the devices you’d need some special hardware but as I mentioned in an earlier post, a single instance of Cumulus Linux needs less than 1GB of ram.
Lastly, if you need help getting along, the docs for cumulus are great and my friend Aninda Chatterjee has put together a great series of blog posts covering getting started with Cumulus Linux.
In the first ever post of the AONE CCNA Series, we are going to start from the top. If you are following along on the CCNA exam topics, we will be covering Network Fundamentals > Explain the role and function of network components > Routers. Routers represent a critical component of network infrastructure in that they connect networks together, both physically and logically. What do we mean by logically? Well, the main purpose of a router is to receive data, find out where it needs to go, and send it out the interface (or port) in the right direction. Routers operate at Layer 3 of the OSI model, which means that they “route” or forward packets (data) based on the packets’ destination IP addresses. IP addresses can also be referred to “logical addresses”, and they signify the logical location of a device in a network. The IP address of a device can and may need to change depending on its movement in a network. MAC (or physical) addresses are a contrast to IP addresses in that they describe more of a physical location of a device in a network (at Layer 2). In fact, each device is said to have a “burned in address” or BIA, which is a device’s MAC address at Layer 2. This is a “permanent” address that the device keeps and uses no matter where it lives or moves within a network. But that’s enough about Layer 2 and MAC addressing for now, we’re here to talk about routers. Now that we know that a router’s purpose is to get data from one place in a network to another, let’s get into what routers might look like and how they perform this ever-important function of delivering our precious packets from point A to point B.
Example logical representation of routers in a network.
What do routers look like? They can come in a variety of brands, shapes, sizes, and sometimes the routers themselves are not even physical at all. Yes, we can deploy routers as virtual machines just like traditional virtual servers. And while we are focusing on enterprise networking because this is a CCNA series, routers are leveraged in residential networks as well. If you are connecting personal/home devices to the internet you are leveraging a router to provide connectivity to the internet for all of the devices on your home network. Think of the router as bridging a gap between your local network and the internet.
Finally, let’s go over how routers provide the functionality of transporting data across networks. As stated earlier, routers make their packet forwarding decisions based on the destination IP address in the packet header. That’s all well and good, but how do routers learn about networks and how to reach them so that they can forward packets in the right direction and along the correct path the proper destinations? Routers learn how to reach destination IP networks from three sources.
Connected networks/routes
When an interface is configured with an IP address and enters an “up” state, the network associated with that interface is automatically entered into the routing table. The router now knows what networks are directly connected to itself and which interfaces to use, to forward packets out toward those networks.
Static routes
Network administrators can manually program the router with static routes for specific destination networks.
Dynamic routing protocols
Routing protocols can be enabled and configured on routers to communicate with each other and share routing information.
Once a router has enabled a way or ways or learning routes, it has to know which proper paths to choose when it receives packets. The best path(s) for each destination network is placed into the routing table, which is a database on the router that, at a high level, lists each destination network, the next hop IP, and egress interface to reach each destination network. Here high level sequence of operations that a router goes through when selecting the best path to reach a destination network for a packet it has received.
Longest prefix match
This can be thought of as the rule of specificity and is the first method used for path selection. The route in the table with the most leading bits in the “on” position in the subnet mask will be chosen. An example of this logic is:
A router receives a packet to forward with a destination IP of 192.168.1.200.
The router has two routes in its routing table that match this destination:
192.168.1.0/24
192.168.1.128/25
In this case, the route that matches the 192.168.1.128/25 network will be chosen because it is more specific, in that it has one more bit in the “on” position than the route with the /24 bit mask.
Administrative Distance (AD)
Routing protocols (OSPF, EIGRP, etc.) leverage metrics when determining the route to select when there are multiple routes learned to the same destination. However, the metrics used are only understandable to the given routing protocol. So, what does a router do when it learns the same route from different routing source types (for instance, a route learned both by a static route and EIGRP). A concept called Administrative Distance is leveraged to determine which route will enter the routing table.
Administrative Distance is a “trustworthiness” value (from 0 to 255) assigned to different routing sources so that when a router learns about the same route from different sources, it can decide which route to install into the routing table and use. The lower AD value is preferred.
Routing protocol metrics
When a router receives multiple routes to the same destination from the same source (for instance, OSPF), it leverages the routing protocol’s metric values to determine which route(s) should be selected for the different destination networks. Examples of routing protocol metrics that are used by different routing protocols are hop count, cost, bandwidth, and delay.
But Why?
Why do we build computer networks and need routers?
Summary
There is definitely a lot that can be covered here about routers, but we want to keep these posts in consumable chunks. We have also highlighted some topics that we can go into more depth later on down the road. I think a big takeaway to remember here is that routers are a core component of network infrastructure and are responsible for moving packets through different Layer 3, (or “routed”) networks.
“Faces of the Journey” is a series that highlights individuals in the network engineering community. The journey is the path we take through our careers, and it can be very different for each of us. While the destination is important, it’s all about the journey!
Emmanuel Pimentel (@MannyBytes88) was born and raised in New Jersey, but currently resides in Orlando, Florida, moving there in 2006. Manny is a Network Technician, working as a contractor in the transportation and tolling industry. He has a hybrid role, in which he assists in the management of both the network and server environments. While juggling college, Manny was looking for a way to break into the IT field. He decided to apply for a sales position in the computer department at a local Best Buy, but during the interview, the hiring managers quickly picked up his interest in tech, and found that he would be a better fit in a support role with Geek Squad. That just goes to show that displaying your interests and drive can open doors that you weren’t even looking to open! While with Geek Squad, Manny held positions as an Advanced Repair Agent and Covert Fulfillment Agent (remote Geek Squad agent). His time there gained him enough confidence and experience to book and pass both exams to become CompTIA A+ certified on the same day! Manny also credits developing his soft skills to his time at Geek Squad. After Geek Squad, Manny started with his current company as a Workstation Support Technician, prior to receiving a promotion to Network Technician.
For Manny, the draw to network engineering stems from senses of challenge and curiosity. He actually changed from majoring in general Computer Information Technology to majoring in Computer Network Engineering with a Cisco specialization because he wanted more of a challenge! While initially being intimidated, Manny accepted the challenge and has been “plugged into” (shameless, bad Tim pun) network infrastructure ever since. The draw to IT in general started in childhood with the Nintendo gaming system. From there it grew when he got his first PC and found out that he could dual boot to different operating systems. Manny’s ultimate goal is to become a Network Engineer. That being said, the role means much more to him than just the title. He is striving for all of the knowledge, responsibility and experience that comes with it. This goal motivates Manny each day to keep striving.
What advice do you have for aspiring IT professionals? Never stop being hungry for learning and for your growth. Always dedicate some time to your own personal development whether it’s a half hour before or after work or a few hours or maybe even a day off. Your peers and management will take notice and it will help propel your career as IT evolves for what it seems like warp speed these days. Make sure you learn and grow your soft skills. As Aaron once said on the podcast, “Soft Skills Pay The Bills”. Believe it or not, you have no idea how important soft skills are. You can be very technical and the cream of the crop, but it creates an barrier when you’re unapproachable to work with by your peers, management, and your end-users/clients/customers.
What is something you enjoy to do outside of work? Gaming. RPGs are my favorite genre with great games like Final Fantasy but also love action games like Metal Gear Solid, Yakuza, Uncharted, etc, seriously I can go on and on. I’m a sucker for retro games so if I’m not playing a current-gen title, I’m playing an older title like Parasite Eve, Xenogears, Chrono Trigger, GoldenEye, etc. The other two would be fitness and my two rides: 2007 Suzuki GSXR 600 and 2018 Subaru WRX STi Limited. If I’m not cruising around, I’m in my garage gym.
What is the next big thing that you are working toward? The biggest thing and main focus is obtaining my Cisco CCNP Enterprise certification with either the ENARSI or ENSLD aka “En-Salad” exam as my chosen concentration. The bigger picture is gaining more knowledge in the Route and Switch and Network Security space to become are more knowledgeable and well-rounded Network Engineer. That being said, I have a list of “side quests” that will aid in that along with accumulating experience such as: Juniper Networks JNCIA-Junos, Palo Alto Networks PCNSE, Cisco CCNP SISE, and Aruba Networks ClearPass Associate. I might even tackle the CCNP Service Provider track as that’s another level in the Route & Switch realm. These certs are loaded with knowledge that I feel would help develop me into a powerful, well-knowledgeable Network Engineer plus gaining experience as I grow of course.
How do you manage your work/life balance?
This is honestly a tricky one as I’m sure it is for many, if not all of us. For starters, I’m very strict on separating work from my personal life. Unless I’m on-call for the week or the back-up person, I don’t think or deal with anything relating to my job. Biggest way I accomplish this is I have two phone lines and phones for my personal use and for work. I love what I do, love my job, and the people there but I treat it as self-care that I’m mentally checked out so I can relax. Outside of that, I try to have a schedule or a routine. I always dedicate 1-2hrs of study/lab time before bed or first thing in the morning. I plan my workout days to both the time and muscle group I’m exercising. I even get in a quick jump-rope session during my work lunches when I’m working from home. I try to plan my meals Monday-Thursday. I figure it as one less unnecessary thing on my mind. Kind of like a “set it and forget it” kind of deal. Friday-Sunday, I like to mix it up and cook something random from Breakfast all the way to Dinner. Finally, I try to get in some non-study related time to unwind. Whether I’m relaxing and watching a show, reading a book, or getting in some game time. I usually leave this for the weekend as I’m in a grind mode Monday through Friday.
What is your favorite part about working in IT? You’re always exposed to new tech. Whether you work in the Private Sector which can be bleeding edge depending on the environment or in a more reserved environment like the Public Sector and Healthcare. You’re always exposed to something new. New piece of equipment and software tends to always mean new learning opportunities whether your company provides training, or you take it upon yourself to learn on your own time and be the SME on the new tech. I don’t like the idea of coasting permanently and never changing with the times. IT gives me that constant drive to learn as environments grow, new technologies emerge, and new skills are required and desired. Finally, because there’s so much to learn, it ignites a fire in me when I see my peers or my friends genuinely curious and wanting to learn what I’m doing or showing interest in specializing. What better way to validate your knowledge than by teaching what you’ve learned while also empowering your peers, am I right?
Bert’s Brief
I’m definitely not making light of anyone else when I say this, but Manny is someone from the IAATJ community that I absolutely cannot wait to meet in person someday. He has that perfect balance of positivity, drive, determination, and compassion. When someone has a win or achievement posted within Discord or Twitter, Manny is always one of the first people with a “congratulations” comment. He is not only working hard to help himself to succeed, but he wants to see others succeed as well. I love the mentality he has around the win-win situation of teaching others to help them and yourself, it’s spot on in my opinion. Due to his curiosity and will for a challenge, Manny has had this nice, steady growth in his career thus far, and I fully expect that to continue.
With so many networking books out there, someone coming into networking could find themselves asking: are any of them any good??!
This blog post, in opposition of the title, are not the 5 best. Who am I to say they are the best?! I’ve been studying pretty good for the last two years now. Just the other night I realized when someone asked if a book was good or not that I’ve read quite a few pages over that time frame. Having read quite a bit I’m going to spend a bit of time highlighting what I feel are the best of the best, the must reads. These are all books that I’ve really enjoyed and content I’ve connected with since I started my journey.
Book #1
Junos Enterprise Switching and Junos Enterprise Routing
My absolute favorite book(s) on networking covers Junos. Both books are older than 10 years or so but filled with everything you’d need to understand the fundamentals of switching and routing. The books are Junos Enterprise Switching and Junos Enterprise Routing. The number one reason why these are great books is that they allowed their personality and humor to spill out. Every other paragraph has some bit of hidden humor morsels.
These books are even highly recommended from Juniper’s best Yasmin Lara and Art of Network Engineering’s own Carl. So even though these books are a bit older, their wit really shines and makes getting through all the nitty-gritty all that much more enjoyable. If you are just getting started in networking you can’t go wrong knocking these two books out first.
Even if you don’t really know BGP yet or basic Data Center concepts, do not fret. These books are still for you. Why? Because Mr. Dutt does such a great job at breaking down each technology to a simple digestible nugget before building a beautiful tapestry that ties everything together.
This book was just a joy. It might have had a lot to do with my studying at the time. I was in multiple ENCOR study groups and I’d committed to trying to lead the SD-Access section and this book laid out everything so that I could have a somewhat successful presentation. This book broke down how everything was automated to what was going on underneath the hood of the automation. Harnessing the internet, I watched Roddie Hasan’s Cisco Live presentations (which is an amazing free resource) and followed him on the twitter (you should do the same, super cool dude). If you were only to read one chapter, read chapter 6.
Furthermore, I had won a book giveaway by another author of the SD-Access book Jason Gooley and he sent me a few Cisco Press books so I just have a lot of good vibes from this book and the connections I’ve made from it.
Book #4
The ASCII Construct
The ASCII Construct is not a book, though it should be. The author of this blog writes in such a way that that it inspired me to try and write something. He explains things in pain staking detail not normally outlined or covered. So the tidbits you get on these posts are not found in many other places on the internet. Furthermore, the author, Aninda Chatterjee, is one of the nicest people I’ve had the pleasure of interacting with. He has given his time over and over again on questions about anything. A teacher of the highest quality.
@HugOfThunder the site you recommended by @aninchat is awesome!!! He deep dives on how LISP and SD-Access works. I read his Part I & II and I easily understood it.
— { Eric: NetworkPistolero } (@NetworkPistol) August 2, 2020
Book #5
Network Programmability with YANG: The Structure of Network Automation with YANG, NETCONF, RESTCONF, and gNMI, First Edition
The last book I’d like to highlight is Network Programmability with YANG by Joe Clarke, Jan Lindblad and Benoit Claise. Everyone’s talking about network automation and I think this is the book that really breaks down a lot of the underpinnings in ways other books simply don’t match. This book is just well put together. Great, simple explanations with subsequent code examples with each chapter ending with a cool question answer with a different ‘expert’ related to what’s covered. This was a another book that stood out as an example to me as something I’d like to aspire to if I ever ended up writing some long form stuff.
Honorable Mentions
After reading this you may be wondering to yourself, I’m studying for xxx Cisco exam or what not, and not one OCG was mentioned. Truth be told, I’ve read quite a few OCGs and simply put, I just don’t like them. I don’t like being distracted by ‘do I know this already’ and ‘key terms’ and other certification type related sections. I prefer books that just discuss the technology. If I did have to choose my favorite author of these sorts of book I’d go with Kevin Wallace. My guy spent less than a year at Walt Disney according to his LinkedIn but I feel like I’ve heard 20+ stories about it going through his training, which I enjoyed.
Since I mentioned one blog, and we are talking about learning content, I want to highlight some video content creators out there.
Video Creator #1
Calvin Remsburg
One such creator is Calvin Remsburg. He’s been streaming on Twitch (which I can’t find a link to at this time) and Youtube a bit over the past couple of years. His posts are long and if you get in on the live stream, interactive. He shares his point of view on all sorts of networking and automation concepts as he walks through a technology. Always felt he should have many more subs than he does.
Video Creator #2
Matt Oswalt
This was a short series and only covered one topic, git. Matt Oswalt ran a little series called Labs & Latte where he begins each episode with some cool piano notes and some latte art. If you follow my twitter feed you know I’m into coffee. In any case, the content here is just great. I hope Matt picks this back up in this sort of format. I understand you can find Matt on other channels with a white doctors coat on explaining network automation but I really like this format and presentation.
Video Creator #3
Network Collective
I got into watching their Wednesday night live streams when I was in Arkansas for work a few months ago. They do a cool trivia segment segment and plenty of demos with industry pros. Their production quality of this live stream is very good. At some point, once I climb all the way out of debt, I hope to become a paid subscriber. They have so much content out that once you get a bit hooked you’ll have a mini mountain of content to binge through. Since I’ve been back home on the west coast it’s been really hard to get home and tuned in to the live stream so I’m going to have to make this more of a priority 🙂
Final Bonus
Ivan Pepelnjak
Subscribe to this gentleman’s content. You could be watching an old network field day and hear this voice that’s just firing off question after question. Turning every complex technology into a simple analogy of another technology. I was introduced to Ivan in a Youtube video interview with David Bombal. I’ve since watched all the content I could get my hands on at ipspace.net and listened to all the episodes of his podcast Software Gone Wild. I heard recently he may be taking a step back a bit from content creation but will still be blogging. Whatever the case, make sure to check out his content.
Final Final Bonus
I have a long commute. So I listen to a lot of content as well. Here is a short list of my favorite networking related podcasts: The Hedge, The Art of Network Engineering, Full Stack Journey, Network Collective, Darknet Diaries, Software Gone Wild and History of Networking.
All for now, let me know what books or anything else I’ve missed and need to check out!
Last week I wrote a quick little tutorial so that one could get started using tshark. In this post I want to look at different ways of viewing the same data using a tool called zeek. Zeek is often referred to as a packet examination ‘framework’ as it allows you to see what is happening, the whos, wheres and whats within the traffic. Zeek is often deployed along side other tools like snort, suricata and/or moloch.
Since we will be examining pcaps, not live traffic we will again be going with the ‘-r’ option as we did with previous posts covering tcpdump and tshark.
You can see, after we read in our pcap with zeek a bunch of *.log files were created. You can guess what kind of information is in each log based on it’s name. To view logs nativly, zeek has a tool called ‘zeek-cut’ that allows you to format and view what you’d like. If you use just zeek-cut you will get the default columns:
$ head dns.log | zeek-cut
1613159462.737544	Ci2kw63INthRjNjuae	157.230.15.223	57199	67.207.67.3	53	udp	6601	-	223.15.230.157.in-addr.arpa	1C_INTERNET	12	PTR	3	NXDOMAIN	F	F	T	F	0	-	-	F
What are these columns you ask?! Good question. We can see what are all our options are as far as data within this log by simply looking at the very beginning of the file:
$ head dns.log
#separator \x09
#set_separator	,
#empty_field	(empty)
#unset_field	-
#path	dns
#open	2021-04-16-17-46-03
#fields	ts	uid	id.orig_h	id.orig_p	id.resp_h	id.resp_p	proto	trans_id	rtt	query	qclass	qclass_name	qtype	qtype_name	rcode	rcode_name	AA	TC	RD	RA	Z	answers	TTLs	rejected
#types	time	string	addr	port	addr	port	enum	count	interval	string	count	string	count	string	count	string	bool	bool	bool	bool	count	vector[string]	vector[interval]	bool
Fields we can extract/view from this log are listed after the #fields above.
An aside: A bit about source/destination vs originator/responder. In zeek the one who initiates a request, whether by a syn or what have you, is the originator and the one responding, ie, a syn-ack is the responder. They do not use the lexicon of source and destination. Which, I think, is kind of cool as one of the things you do with tcpdump a lot is filter by syns or syn-acks and here that work is already done for you.
Back to parsing this log file. Using zeek-cut, let’s pull out the id.orig_h, resp_p and the query. I only pipe it to head for brevity.
This information is exactly the same information we pulled out of the file last week with tshark. Zeek is an awesome tool because the logs, once extracted from live capture or a pcap can be held onto for a long time because in relation to the hard-drive space needed for a pcap, Zeek logs take up very little space. You can refer to these artifacts later and retain for much longer/easier than trying to retain pcaps.
Another pro for zeek is that parsing through a log file is computationally super fast when compared to tshark or even tcpdump trying to look through an entire pcap every time you do a filter. So getting information out of your data, once read through zeek is FAST!
So to briefly recap, to get started with zeek-cut looking at your logs, head a log you are interested in, see the possible columns and then use zeek-cut to parse out what you are interested in. Another thing I demonstrated last week in my tshark post was pulling out all the usernames used to login with mysql. Can we quickly do the thing with zeek?
We see we have a mysql.log and the next step is to head it and see the columns.
$ head mysql.log
#separator \x09
#set_separator	,
#empty_field	(empty)
#unset_field	-
#path	mysql
#open	2021-04-16-17-46-03
#fields	ts	uid	id.orig_h	id.orig_p	id.resp_h	id.resp_p	cmd	arg	success	rows	response
#types	time	string	addr	port	addr	port	string	string	bool	count	string
The three columns that stand out as possibilities that could help us reach our goal of getting all the username’s/passwords to log in would be cmd, arg, success, rows and response. One of the cmd is ‘login’ so if we grep for login and show associated arg we are able to see all the usernames:
To briefly look back, here was us last week doing the same thing with tshark:
$ tshark -r ctf.pcap -Y 'mysql' -T fields -e mysql.user | sort | uniq -c
    963
      2 8TmveSod
     12 admin
      4 admin@example.com
      1 flag
      4 jamfsoftware
     12 mysql
    140 root
      4 superdba
     12 test
     12 user
      4 username
      2 wdxhpxxK
One more really cool thing to mention about Zeek before we shift over into looking at the same data in JSON format using jq is that of the uid. Let’s say for whatever reason, you are super interested in someone logging in with the username flag. In zeek, every single log has a UID, which is a unique identifier of traffic consisting of the same 5-tuple or source IP address/port number, destination IP address/port number and the protocol in use. So if we include the UID in the login associated with flag we could then grep all of our logs for that UID to see all the associated traffic.
We have easily located associated traffic with the mysql traffic with the login name of ‘flag’ very quickly.
Another very quick aside. A tool that’s like uid, but even more useful is called community-id. This is the same sort of idea as uid except you can take this ‘community-id’ and pivot to entirely different tools. Say we found something with traffic in zeek that was super interesting but wanted to look at the pcap. If we were using community-id we could copy it from our zeek log like we did with uid but this time search for this community-id within a tool like moloch (view flows and download pcap) and get greater context/viability.
Alright. So many quick asides today. Back to the lesson at hand. Zeek data can also be output in JSON format as opposed to simple text logs as outlined above. This is how zeek is configured at my work and is done so it can be easily ingested into our SIEM. Today we are just going to read in the same pcap and play around a bit with a tool called jq to parse our logs. Here is how we switch to a JSON format:
If we head our dns.log, like we did above to search for quries our data will look much different. So much so that zeek-cut no longer works with this format 🙂
$ head dns.log
{"ts":1613159462.737544,"uid":"CyZQzA1XgYbK1dLIah","id.orig_h":"157.230.15.223","id.orig_p":57199,"id.resp_h":"67.207.67.3","id.resp_p":53,"proto":"udp","trans_id":6601,"query":"223.15.230.157.in-addr.arpa","qclass":1,"qclass_name":"C_INTERNET","qtype":12,"qtype_name":"PTR","rcode":3,"rcode_name":"NXDOMAIN","AA":false,"TC":false,"RD":true,"RA":false,"Z":0,"rejected":false}
{"ts":1613159462.737492,"uid":"C1n5WP2f5tNp0iBXa2","id.orig_h":"157.230.15.223","id.orig_p":56994,"id.resp_h":"67.207.67.2","id.resp_p":53,"proto":"udp","trans_id":505,"query":"223.15.230.157.in-addr.arpa","qclass":1,"qclass_name":"C_INTERNET","qtype":12,"qtype_name":"PTR","rcode":3,"rcode_name":"NXDOMAIN","AA":false,"TC":false,"RD":true,"RA":false,"Z":0,"rejected":false}
We now have a whole bunch of key:value pairs. Which means our log files will be slightly bigger than the plain txt ones but otherwise all the pros mentioned above still hold true here. Instead of piping to zeek-cut we are going to use jq to parse our data. To look at the first log, we will use the -s ‘.[0]’ option (which simply picks out the first thing in the index, ie the first log):
I always find myself heading a log or looking at the first log before I really dive in. This is because I never remember what the key value is or the specific name of the interesting thing I’m looking for. This gives me a chance to look at an entire log and make out what each thing is referencing and I can make a better guess on what search term to use or how it should be formatted. Doing this first saves you a bit of time later in my opinion.
Every key, if you can remember back to the beginning of this post will correspond to a column header when we were using zeek-cut. With zeek-cut we used id.orig_h, id.resp_p and query. To do this we will use the -j (join option) with jq which will put the following things we select on the same line. We have to put ‘id.orig_h’ and ‘id.resp_p’ in brackets because their key value begins with a ‘.’ already and in order for jq to read them the syntax with the square brackets is needed. Since query doesn’t begin with a ‘.’ no brackets needed. “\n” simply means new line. Below we have a csv formatted version of what we did with zeek-cut above.
Above I used grep to do the same sort of search that we did with zeek-cut. But, we don’t have to use grep as jq has some very cool functions built in that allow us to do comparison searching within the tool itself. This is where I think jq really shines. You can use ‘<‘ ‘>’ or ‘==’ to filter your search how ever you need. Here we just want to get all the ‘cmd’ that equal login.
With zeek-cut we zeroed in on the flag login and searched all our logs for the uid to find all relevant traffic with the associated tuple. We can do the same thing with jq no problem.
I might have not shown the most ‘useful’ parsing within jq but I hope by showing you a few examples of how you can select based on the values of certain fields you can see how easy it is to zero in on what you are looking for. You can, for example, only display only logs that have a ip.orig_p less than 1000 in your conn.log with ease. Or, display on logs with a packet bigger than a certain size. The possibilities are endless and being able to use comparison operators in your search, I think, is just awesome.
Also, you can format your output based on whatever values in any order and to csv very easily if that’s a useful avenue for you. There is even more stuff you can do with jq, such as sorting. But I think we’ve went long enough 🙂
That’s all for today as I think I’ve rambled on long enough, with far to many asides. But i digress. Next time I’m thinking of trying to write my first zeek script. Till next time!
“Faces of the Journey” is a series that highlights individuals in the network engineering community. The journey is the path we take through our careers, and it can be very different for each of us. While the destination is important, it’s all about the journey!
Meet Tim!
Tim McConnaughy had lived in Hampton Roads, Virginia most of his life. A few years ago he left to take a position with a global company headquartered in Idaho. Tim now resides in Raleigh, North Carolina. His current role is as an Enterprise Networking Technical Solution Architect at Cisco. Specifically, Tim works in the Customer Proof of Concept labs (CPOC), and develops demonstration material for field engineers on Cisco dCloud. A while back, I had the opportunity to discuss this role with Tim, and it was very interesting to me. The responsibility is to essentially build and prove out solutions to customers that are being proposed by the pre-sales engineering team. Tim has the opportunity to learn and perfect new technologies, and work with customers directly to see how those technologies may, or may not fit in their environment. To me, that sounds like a rewarding experience. Before Cisco, Tim had gained experience in a NOC and as a network engineer in different industries. He got his professional start in IT working tech support at a local dial-up ISP, where he also built Linux web hosts for their co-lo service. IT has always been a passion of Tim’s, stemming from when he first played the Atari 2600 and Intellivision as a kid. As his career progresses, Tim is striving to become an architect who can focus on big picture network strategy, while remaining technical enough to assist in deployment. In relation to this, Tim is quoted in stating “I realize that this is not unlike wishing for more wishes, but it is at least a goal to strive toward.”
What advice do you have for aspiring IT professionals? Learn how to learn. Barbara Oakley has a great free course on Coursera by the same name. There is a firehose of data waiting for you. Start with a strong foundation in learning how to absorb it all in a way that makes it stick. In IT we can’t ‘learn it for the test’ because unlike some fringe classes in high school or college, we might actually be called to utilize what we learned. Besides learning how to learn, learn how to look things up. Learn how to ask Google the right questions. Learn how to ask your peers the right questions. Above all, learn how to research something you don’t already know and how it will fit in with what you do know.
When learning something new, what methods work best for you? I like to start learning something new by determining how it relates to what I do know well already. It becomes a bit of a bridge. I think we have all stared at something that might as well be written in some ancient elvish script and thought, “I will never understand it”. You don’t need to scale that wall directly. Find the handholds by relating it to what you know. When I teach, I try to relate to real-world examples, established technologies, etc., as a scaffold for building the understanding of how it is different and goes beyond those things.
What is your favorite part about working in IT? I think my favorite part of working as a network engineer is when all my hard work pays off. When you spend a lot of time and effort learning something, doing something, and it pays off there is not another feeling like it.
How do you manage your work/life balance? If you figure this one out, please let me know. In all seriousness, there is no secret, no trick, and in some ways that makes it even harder. It is simple willpower and ability to swallow the anxieties of work to pursue the benefits of life, to be able to push back because there will always be a project, a task, some new thing to study. Kids are only kids once, and for far shorter a time than we realize. Usually, we are only realizing it when it’s in the rear-view mirror and too late to change anything. Not just kids, though. Whatever it is that we love and for whatever reasons we live, we have a finite amount of time to prioritize it.
What is something you enjoy to do outside of work? Besides the obvious answer, spending time with my family, of course, I play videogames, though not as much these days. I have a samurai movie collection I have been meaning to watch again. I enjoy (but never have much time to play) board games and role-playing games of various depth and color. I bike when the weather is good. I used to read voraciously but I admit I have let that slide as the years have passed. I am a shameless ramen fanatic, the good stuff, not the grocery store ones. I also spend a good amount of time helping others with their journey. I review resumes, give suggestions about technical interviews, answer questions, explain networking. I am a firm proponent of the idea that you have only mastered something when you can teach it to someone else. So it’s not entirely selfless.
Bert’s Brief
I cannot say enough good things about Tim McC. He has such a down-to-earth attitude and is practically always willing to help. He can be found actively in the It’s All About the Journey Discord community, providing advice and insight. Take it from me, you can learn a lot from the experiences that Tim has documented over the years. I had no idea of the extensive interview experience he had until his AONE episode. There is a fair amount of good content from Tim, so I’ll create a list of my recommendations below. Finally, since I’m starting to become brave like Aaron, on behalf of the IAATJ community, I’d like to thank Tim for his continuous contributions to helping others.
Recommended reading/listening
“10 Pieces of Advice for Network Engineers” blog post
I wrote a quick intro to tcpdump some months ago as I was learning about the tool and I thought it was just the best. You only love what you know right?! Well last week I embarked on a quest to find some flags on Cisco’s CTF 2021 using tshark. I mean, I originally tried to use tcpdump but since their file was saved as a pcapng it was not compatible without a little more work. Mr. Tony E has a how-to on trace wrangler coming up on a network collective live-stream that can solve non-compatibility pcapng issues, and I digress.
The first thing people like to do when they encounter a new pcap is to get the lay of the land so to speak. If they were in Wireshark, most likely they’d venture into the Statistics tab and check out ‘Capture File Properties’ and ‘Protocol Hierarchy.’ Can we get this sort of information from the command line? You bet your bottom dollar we can! The first tool we can use is called capinfos:
$ capinfos ctf.pcap
File name:           ctf.pcap
File type:           Wireshark/... - pcapng
File encapsulation:  Ethernet
File timestamp precision:  microseconds (6)
Packet size limit:   file hdr: (not set)
Number of packets:   203 k
File size:           97 MB
Data size:           88 MB
Capture duration:    330489.302412 second
First packet time:   2021-02-12 19:44:00.093265
Last packet time:    2021-02-16 15:32:09.395677
Data byte rate:      266 bytes/s
Data bit rate:       2,135 bits/s
Average packet size: 432.96 bytes
Average packet rate: 0 packets/s
SHA256:              127353c65071e00c66dd08011e9d45bc75fe8030d3134db061781e7bf97b21b0
RIPEMD160:           d3b4062292749b33aef0d6abf74bf42ee90e900d
SHA1:                9850abbf26d14f2636e1e65d6c64841047317f17
Strict time order:   False
Capture oper-sys:    64-bit Windows 10 (2004), build 19041
Capture application: Mergecap (Wireshark) 3.4.0 (v3.4.0-0-g9733f173ea5e)
Capture comment:     TraceWrangler v0.6.8 build 949 performed the following editing steps:   - Replacing Linux Cooked header with Ethernet header
Number of interfaces in file: 2
Interface #0 info:
                     Encapsulation = Ethernet (1 - ether)
                     Capture length = 262144
                     Time precision = microseconds (6)
                     Time ticks per second = 1000000
                     Time resolution = 0x06
                     Number of stat entries = 0
                     Number of packets = 203528
Interface #1 info:
                     Encapsulation = Ethernet (1 - ether)
                     Capture length = 262144
                     Time precision = microseconds (6)
                     Time ticks per second = 1000000
                     Time resolution = 0x06
                     Number of stat entries = 0
                     Number of packets = 247
We can glean how long the trace took place, how many packets we have, among other things. Believe it or not we can also get some protocol statistics using tshark, getting the same info you would in Wireshark!
Now that we got the lay of the land, seeing what our pcap is made up of, let’s get into what we came to do! Using tshark to parse some packets 🙂
Enter tshark! Tshark is the command line tool for Wireshark. It’s core switches are very close to what you would use with tcpdump. To read in a file you would use ‘-r <filename>’ or to sniff you’d use ‘-i <int name>’
I’m going to read in the value with the -c option which stands for count, so since I’m using ‘-c 1’ I’ll just get the first packet. If you were capturing traffic with the -i option and use the -c you’ll limit how many packets you’ll capture, just like tcpdump.
Do you remember how Wireshark has three separate panes by default? The first pane is the packet list, the second is the packet details, and the third is the packet bytes. In tshark, just reading in the file would get you the packet list. If you use the -V option you’ll get everything in the packet details pane and the -x option will give you the packet bytes section.
In the following example i’ll also use the ‘-Vx’ as well as the ‘-c 1’ option which will just display the first packet in all it’s glory (frame 1).
$ tshark -r ctf.pcap -Vxc 1
Frame 1: 56 bytes on wire (448 bits), 56 bytes captured (448 bits) on interface unknown, id 0
    Interface id: 0 (unknown)
        Interface name: unknown
    Packet flags: 0x00000000
        .... .... .... .... .... .... .... ..00 = Direction: Unknown (0x0)
        .... .... .... .... .... .... ...0 00.. = Reception type: Not specified (0)
        .... .... .... .... .... ...0 000. .... = FCS length: 0
        .... .... .... .... 0000 000. .... .... = Reserved: 0
        .... ...0 .... .... .... .... .... .... = CRC error: Not set
        .... ..0. .... .... .... .... .... .... = Packet too long error: Not set
        .... .0.. .... .... .... .... .... .... = Packet too short error: Not set
        .... 0... .... .... .... .... .... .... = Wrong interframe gap error: Not set
        ...0 .... .... .... .... .... .... .... = Unaligned frame error: Not set
        ..0. .... .... .... .... .... .... .... = Start frame delimiter error: Not set
        .0.. .... .... .... .... .... .... .... = Preamble error: Not set
        0... .... .... .... .... .... .... .... = Symbol error: Not set
    Encapsulation type: Ethernet (1)
    Arrival Time: Feb 12, 2021 19:44:00.093265000 UTC
    [Time shift for this packet: 0.000000000 seconds]
    Epoch Time: 1613159040.093265000 seconds
    [Time delta from previous captured frame: 0.000000000 seconds]
    [Time delta from previous displayed frame: 0.000000000 seconds]
    [Time since reference or first frame: 0.000000000 seconds]
    Frame Number: 1
    Frame Length: 56 bytes (448 bits)
    Capture Length: 56 bytes (448 bits)
    [Frame is marked: False]
    [Frame is ignored: False]
    [Protocols in frame: eth:ethertype:ip:tcp:vssmonitoring]
Ethernet II, Src: fe:00:00:00:01:01, Dst: 00:00:00:00:00:00
    Destination: 00:00:00:00:00:00
        Address: 00:00:00:00:00:00
        .... ..0. .... .... .... .... = LG bit: Globally unique address (factory default)
        .... ...0 .... .... .... .... = IG bit: Individual address (unicast)
    Source: fe:00:00:00:01:01
        Address: fe:00:00:00:01:01
        .... ..1. .... .... .... .... = LG bit: Locally administered address (this is NOT the factory default)
        .... ...0 .... .... .... .... = IG bit: Individual address (unicast)
    Type: IPv4 (0x0800)
Internet Protocol Version 4, Src: 194.147.140.98, Dst: 157.230.15.223
    0100 .... = Version: 4
    .... 0101 = Header Length: 20 bytes (5)
    Differentiated Services Field: 0x00 (DSCP: CS0, ECN: Not-ECT)
        0000 00.. = Differentiated Services Codepoint: Default (0)
        .... ..00 = Explicit Congestion Notification: Not ECN-Capable Transport (0)
    Total Length: 40
    Identification: 0x8079 (32889)
    Flags: 0x0000
        0... .... .... .... = Reserved bit: Not set
        .0.. .... .... .... = Don't fragment: Not set
        ..0. .... .... .... = More fragments: Not set
    ...0 0000 0000 0000 = Fragment offset: 0
    Time to live: 244
    Protocol: TCP (6)
    Header checksum: 0x499b [correct]
    [Header checksum status: Good]
    [Calculated Checksum: 0x499b]
    Source: 194.147.140.98
    Destination: 157.230.15.223
Transmission Control Protocol, Src Port: 52138, Dst Port: 33895, Seq: 0, Len: 0
    Source Port: 52138
    Destination Port: 33895
    [Stream index: 0]
    [TCP Segment Len: 0]
    Sequence number: 0    (relative sequence number)
    Sequence number (raw): 3764456385
    [Next sequence number: 1    (relative sequence number)]
    Acknowledgment number: 0
    Acknowledgment number (raw): 0
    0101 .... = Header Length: 20 bytes (5)
    Flags: 0x002 (SYN)
        000. .... .... = Reserved: Not set
        ...0 .... .... = Nonce: Not set
        .... 0... .... = Congestion Window Reduced (CWR): Not set
        .... .0.. .... = ECN-Echo: Not set
        .... ..0. .... = Urgent: Not set
        .... ...0 .... = Acknowledgment: Not set
        .... .... 0... = Push: Not set
        .... .... .0.. = Reset: Not set
        .... .... ..1. = Syn: Set
            [Expert Info (Chat/Sequence): Connection establish request (SYN): server port 33895]
                [Connection establish request (SYN): server port 33895]
                [Severity level: Chat]
                [Group: Sequence]
        .... .... ...0 = Fin: Not set
        [TCP Flags: ··········S·]
    Window size value: 1024
    [Calculated window size: 1024]
    Checksum: 0x72f2 [correct]
    [Checksum Status: Good]
    [Calculated Checksum: 0x72f2]
    Urgent pointer: 0
    [Timestamps]
        [Time since first frame in this TCP stream: 0.000000000 seconds]
        [Time since previous frame in this TCP stream: 0.000000000 seconds]
VSS Monitoring Ethernet trailer, Source Port: 0
    Src Port: 0
0000  00 00 00 00 00 00 fe 00 00 00 01 01 08 00 45 00   ..............E.
0010  00 28 80 79 00 00 f4 06 49 9b c2 93 8c 62 9d e6   .(.y....I....b..
0020  0f df cb aa 84 67 e0 61 0b c1 00 00 00 00 50 02   .....g.a......P.
0030  04 00 72 f2 00 00 00 00                           ..r.....
That’s pretty neat right? You can see all the way into the first packet and get a bunch of information. Well, turning back to using Wireshark, remember how you would filter packets based on DNS or ICMP or what have you in the ‘display filter’? Well you can do that, with the same exact syntax, by using the -Y ‘<search_term>’ option. It’s best practice to put your search term inside of quotes, so if you have more than one word or periods, strange bash things won’t take place. Let’s take a look:
$ tshark -r ctf.pcap -Y 'dns' | head
  312 422.644017    127.0.0.1 → 127.0.0.53   DNS 42891 53 Standard query 0xb27a PTR 223.15.230.157.in-addr.arpa OPT
  313 422.644227 157.230.15.223 → 67.207.67.2  DNS 56994 53 Standard query 0x01f9 PTR 223.15.230.157.in-addr.arpa OPT
  314 422.644279 157.230.15.223 → 67.207.67.3  DNS 57199 53 Standard query 0x19c9 PTR 223.15.230.157.in-addr.arpa OPT
  315 422.653585  67.207.67.3 → 157.230.15.223 DNS 53 57199 Standard query response 0x19c9 No such name PTR 223.15.230.157.in-addr.arpa SOA ns1.digitalocean.com OPT
  316 422.653761 157.230.15.223 → 67.207.67.3  DNS 57199 53 Standard query 0x19c9 PTR 223.15.230.157.in-addr.arpa
  317 422.656415  67.207.67.2 → 157.230.15.223 DNS 53 56994 Standard query response 0x01f9 No such name PTR 223.15.230.157.in-addr.arpa SOA ns1.digitalocean.com OPT
  318 422.656588 157.230.15.223 → 67.207.67.2  DNS 56994 53 Standard query 0x01f9 PTR 223.15.230.157.in-addr.arpa
  319 422.659817  67.207.67.3 → 157.230.15.223 DNS 53 57199 Standard query response 0x19c9 No such name PTR 223.15.230.157.in-addr.arpa SOA ns1.digitalocean.com
  320 422.662693  67.207.67.2 → 157.230.15.223 DNS 53 56994 Standard query response 0x01f9 No such name PTR 223.15.230.157.in-addr.arpa SOA ns1.digitalocean.com
  321 422.663035   127.0.0.53 → 127.0.0.1    DNS 53 42891 Standard query response 0xb27a PTR 223.15.230.157.in-addr.arpa PTR ubuntu-s-1vcpu-2gb-nyc1-01 PTR ubuntu-s-1vcpu-2gb-nyc1-01.local OPT
We can use our -xV options to look in the first packet displayed. If you look at the first packet you can see it’s ‘frame 312’ and we will use the -c option to look just at this packet:
$ tshark -r ctf.pcap -Y 'dns' -xVc 312
Frame 312: 98 bytes on wire (784 bits), 98 bytes captured (784 bits) on interface unknown, id 0
    Interface id: 0 (unknown)
        Interface name: unknown
    Packet flags: 0x00000000
        .... .... .... .... .... .... .... ..00 = Direction: Unknown (0x0)
        .... .... .... .... .... .... ...0 00.. = Reception type: Not specified (0)
        .... .... .... .... .... ...0 000. .... = FCS length: 0
        .... .... .... .... 0000 000. .... .... = Reserved: 0
        .... ...0 .... .... .... .... .... .... = CRC error: Not set
        .... ..0. .... .... .... .... .... .... = Packet too long error: Not set
        .... .0.. .... .... .... .... .... .... = Packet too short error: Not set
        .... 0... .... .... .... .... .... .... = Wrong interframe gap error: Not set
        ...0 .... .... .... .... .... .... .... = Unaligned frame error: Not set
        ..0. .... .... .... .... .... .... .... = Start frame delimiter error: Not set
        .0.. .... .... .... .... .... .... .... = Preamble error: Not set
        0... .... .... .... .... .... .... .... = Symbol error: Not set
    Encapsulation type: Ethernet (1)
    Arrival Time: Feb 12, 2021 19:51:02.737282000 UTC
    [Time shift for this packet: 0.000000000 seconds]
    Epoch Time: 1613159462.737282000 seconds
    [Time delta from previous captured frame: 9.688921000 seconds]
    [Time delta from previous displayed frame: 0.000000000 seconds]
    [Time since reference or first frame: 422.644017000 seconds]
    Frame Number: 312
    Frame Length: 98 bytes (784 bits)
    Capture Length: 98 bytes (784 bits)
    [Frame is marked: False]
    [Frame is ignored: False]
    [Protocols in frame: eth:ethertype:ip:udp:dns]
Ethernet II, Src: 00:00:00:00:00:00, Dst: 00:00:00:00:00:00
    Destination: 00:00:00:00:00:00
        Address: 00:00:00:00:00:00
        .... ..0. .... .... .... .... = LG bit: Globally unique address (factory default)
        .... ...0 .... .... .... .... = IG bit: Individual address (unicast)
    Source: 00:00:00:00:00:00
        Address: 00:00:00:00:00:00
        .... ..0. .... .... .... .... = LG bit: Globally unique address (factory default)
        .... ...0 .... .... .... .... = IG bit: Individual address (unicast)
    Type: IPv4 (0x0800)
Internet Protocol Version 4, Src: 127.0.0.1, Dst: 127.0.0.53
    0100 .... = Version: 4
    .... 0101 = Header Length: 20 bytes (5)
    Differentiated Services Field: 0x00 (DSCP: CS0, ECN: Not-ECT)
        0000 00.. = Differentiated Services Codepoint: Default (0)
        .... ..00 = Explicit Congestion Notification: Not ECN-Capable Transport (0)
    Total Length: 84
    Identification: 0x16bf (5823)
    Flags: 0x4000, Don't fragment
        0... .... .... .... = Reserved bit: Not set
        .1.. .... .... .... = Don't fragment: Set
        ..0. .... .... .... = More fragments: Not set
    ...0 0000 0000 0000 = Fragment offset: 0
    Time to live: 64
    Protocol: UDP (17)
    Header checksum: 0x25a4 [correct]
    [Header checksum status: Good]
    [Calculated Checksum: 0x25a4]
    Source: 127.0.0.1
    Destination: 127.0.0.53
User Datagram Protocol, Src Port: 42891, Dst Port: 53
    Source Port: 42891
    Destination Port: 53
    Length: 64
    Checksum: 0xfe87 incorrect, should be 0x1e09 (maybe caused by "UDP checksum offload"?)
        [Expert Info (Error/Checksum): Bad checksum [should be 0x1e09]]
            [Bad checksum [should be 0x1e09]]
            [Severity level: Error]
            [Group: Checksum]
        [Calculated Checksum: 0x1e09]
    [Checksum Status: Bad]
    [Stream index: 2]
    [Timestamps]
        [Time since first frame: 0.000000000 seconds]
        [Time since previous frame: 0.000000000 seconds]
Domain Name System (query)
    Transaction ID: 0xb27a
    Flags: 0x0100 Standard query
        0... .... .... .... = Response: Message is a query
        .000 0... .... .... = Opcode: Standard query (0)
        .... ..0. .... .... = Truncated: Message is not truncated
        .... ...1 .... .... = Recursion desired: Do query recursively
        .... .... .0.. .... = Z: reserved (0)
        .... .... ...0 .... = Non-authenticated data: Unacceptable
    Questions: 1
    Answer RRs: 0
    Authority RRs: 0
    Additional RRs: 1
    Queries
        223.15.230.157.in-addr.arpa: type PTR, class IN
            Name: 223.15.230.157.in-addr.arpa
            [Name Length: 27]
            [Label Count: 6]
            Type: PTR (domain name PoinTeR) (12)
            Class: IN (0x0001)
    Additional records
        <Root>: type OPT
            Name: <Root>
            Type: OPT (41)
            UDP payload size: 1200
            Higher bits in extended RCODE: 0x00
            EDNS0 version: 0
            Z: 0x0000
                0... .... .... .... = DO bit: Cannot handle DNSSEC security RRs
                .000 0000 0000 0000 = Reserved: 0x0000
            Data length: 0
0000  00 00 00 00 00 00 00 00 00 00 00 00 08 00 45 00   ..............E.
0010  00 54 16 bf 40 00 40 11 25 a4 7f 00 00 01 7f 00   .T..@.@.%.......
0020  00 35 a7 8b 00 35 00 40 fe 87 b2 7a 01 00 00 01   .5...5.@...z....
0030  00 00 00 00 00 01 03 32 32 33 02 31 35 03 32 33   .......223.15.23
0040  30 03 31 35 37 07 69 6e 2d 61 64 64 72 04 61 72   0.157.in-addr.ar
0050  70 61 00 00 0c 00 01 00 00 29 04 b0 00 00 00 00   pa.......)......
0060  00 00
A common thing one may want to take a look at regarding DNS is what domain names are people trying to resolve. A cool thing about tshark is that you can specify what columns you want it to display. This is where I think tshark, and it’s usability really separates itself from tcpdump. You can do the same sort of things in tcpdump, but it will take a lot more work and will be messier using cut multiple times and what not. Using the ‘-T fields’ followed by the ‘-e <field_name> you can get something very specific and usable really fast. I’m going to pipe this to head simply for brevity, I don’t want to have so many lines to distract from simply what the command is doing:
Look how fast that was. If we have an idea of what we are looking for we can do so very efficiently inside of tshark. We can search for very specific things and drill down very fast. We can use other Linux text applications like sort, uniq and grep with ease. Let’s continue.
From here we can see someone is trying to resolve ‘www.internetbadguys.com’ which doesn’t look good. What are all the IPs trying to resolve this name? We can use our handy Linux tool grep to help us here:
What is another thing that’s really useful with tshark, is you can grep things. How is your grep game? I’d say I’m a beginner in all the things but I’ll let you know about three options with grep I use most. The first option is ‘-i’ which simply ignores case when searching for matches.
The next options with grep I use the most are the -A and -B which will display the lines above and below your match. This can give you more context to your match, which is very useful when looking at logs and packets.
We can see that the packet following our match is ‘Frame 25202’ so if we know our match was in Frame 25201. We can also increase our -A or -B to get more context.
Given everything that we have learned so far, It would take us less than 20 seconds if someone asked you for all the mysql usernames and passwords found in a pcap. Or, if a certain user had attempted to login, etc. Sure you may have to open up Wireshark or google to get the correct syntax of the columns; but that’s easy.
I hope, if you’ve never used tshark, or hell, tcpdump for that matter, that you can see the utility of being able to parse packets at the command line. People are very into scripting with python these days, you could do some bash scripting here for things if you end up doing the same sorts of inquiries over and over again. And of course, if you want to open up Wireshark to take a look, you can do it from the command line as well 🙂
$ wireshark ctf.pcap &
That’s all for today. I’m going to focus on Zeek for the next post. Let’s see if I can get some zeek scripts off the ground. That should be bunches of fun! Till next time.
Here at AONE, we believe in continuous learning and development. We also want to do what we can help those trying to break into the network engineering field. While by no means the only factor, certifications can help you gain applicable knowledge for a specific career path. They can also be used to prove to employers that you have the ability and desire to learn and grow. For those trying to get into a network infrastructure profession or are early on in their careers, the Cisco Certified Network Associate (CCNA) program can be a great way to go. It is by means the only path, as their are other certification providers, but it is the one that we are going to highlight in this series.
This upcoming series is meant for those that are interested in, or are working toward achieving the CCNA certification. The approach for this series is that we will take a look a multiple topics in the CCNA “blueprint” and try to provide potentially supplemental knowledge and perspective to be used along with your other study materials. Before we dive into content in the next post, here are some example materials that you can look into if you are preparing for the CCNA certification. This is not an exhaustive list, just a few options that you can look into as you are trying to get started.
As always, you can check out the IAATJ Discord Community to communicate with others that are also going after the CCNA certification, and those who are willing to help you.
We look forward to you joining us throughout this series!
“Faces of the Journey” is a series that highlights individuals in the network engineering community. The journey is the path we take through our careers, and it can be very different for each of us. While the destination is important, it’s all about the journey!
Meet Chris!
Chris Randall, also known as @Bites_to_Bits, is an up and coming individual to the IT profession, originally from Michigan. At the age of 25, Chris moved to Southern Georgia to pursue career opportunities. However, at the time, the aspirations were not around network engineering or even information technology as a whole. Chris has spent the last 13 years in the culinary industry at different levels. He is currently a Food Service Director for a Fortune 500 client, where he oversees four onsite cafes. At their peak, they served over 2,000 guests per day! Before his current role, he also spent a short time at the former #1 restaurant in the world, Eleven Madison Park, in New York City. Previous to cooking for a living, when he was younger, Chris spent summers helping on his Aunt and Uncle’s potato farm. Growing up, Chris never felt that an IT career was a viable option, because they never had a reliable internet connection in the country and the family computer was outdated. However, a few years ago, he came into contact with Python for a college course and found it interesting. This led to some research into computer networking, which was very eye opening. Although not currently in an IT role, Chris spent the last six months studying for the CCNA exam, which he recently passed! As of now, the focus has been on the Cisco Devnet Associate certification and working through a Python #100DaysOfCode challenge. Chris is also working on a blog, playing around with some vlog ideas, and staying active on different social media platforms to help grow his network. Professionally, the next step is to break into the world of network engineering. The long term goal is to get into the DevOps or security disciplines.
What is something you enjoy to do outside of work? As of late, my wife and I have begun hiking. We have some pretty decent local trails and are heading to Flagstaff, Arizona in April to hike some pretty unique areas. It is nice to be able to unplug for a few hours and spend quality time in some serene landscapes.
What is the next big thing that you are working toward? DevNet Associate and becoming fluent in Python. I want to be an asset as companies continue to implement Network Automation tools.
How did you figure out that information technology was the best career path for you? Cooking was always a means to an end for me, and after getting an Accounting Degree I knew that I needed something more challenging, something that wasn’t going to be redundant for the next 40 years of my life. IT continues to challenge me as I learn everyday, and from everything I see the industry never stops growing, which is exactly what I have been looking for.
When learning something new, what methods work best for you? I have found success in blending different methods together. I tend to watch videos on a new topic to get a baseline reference, and then I move to any sort of print material or online documentation. This helps me have a reference point when reading over the new topic. I will then use ANKI to develop flashcards of what I believe are key topics and then review them frequently. Lab-ing was a big help in my CCNA studies to solidify topics and really tie together how protocols functioned.
What motivates you on a daily basis? I am blessed to have a wonderful wife who deserves so much. She has persevered through even the toughest of times with me, without question, and for that I owe her the world. We are very fortunate to be in the situation we are where she is growing in her field and I have the ability to pivot to a new one. My current industry is very volatile, and I am fortunate to still have such a great job with so many restaurants closing these days. So I am taking advantage of the situation to ensure I do not have to endure such volatility in the future.
Bert’s Brief
I absolutely love to hear these “types” of stories. I am referring to the situations where people pivot their careers. The reason is because doing so takes has a take a large amount of courage, drive, endurance, and really knowing “who you are” as a person. Chris definitely has all of these traits. I cannot even begin to fathom trying to change career paths at this point in my life. The ability and drive to see that you want a change in life and actually going through the process to accomplish that goal is incredible. Chris is definitely someone who has proven that he is willing to put in the time and effort to become an IT professional. Seeing him document his progress over the last six months has been really cool. I cannot wait to see Chris break into network engineering!
I should let you know right off the top, this is not a ‘how-to’ from an expert. Instead, this is a how I was able to do something cool for the first time, article. The reason for this post is that I had to use multiple different how-to sites and was still left to troubleshoot multiple things. I’m writing this so a person in the same position as myself can hopefully get up and running in less time. So, with that in mind, if you are an expert in the tools used later on in this post I welcome some feedback on what I could have done better or what simply didn’t matter as I made my way through creating my first website since the GeoCities days (a Chicago Bulls tribute fan page).
About six months ago I was talking with a friend on twitter and we were discussing creating a website, a blog and video tutorial site together at some point. Life, projects, kids, COVID and home ownership got in the way and we never really got around to tackling it. Then, about 3 weeks ago I saw a post on my timeline discussing docs as code. I read into it, and watched a conference video that really got me excited. Watch this presentation! Now that you are as excited as me, let’s dive in!
The first thing I did was look to see if any of my mutuals that I talk to a little bit use GitHub to host their website and check in, see what they used or thought about their site. Tony E aka shoipintbri has such a site, hosted on GitHub. I reached out and he said if he had to do it all over again he’d use: GitLabs, Hugo and RestructuredText.
After you create an account, it’s time to check our git version and or install it. I was working on Ubuntu 18.04 and the following commands will correspond as such.
Step 2: Install/Upgrade Git, for me I just had to upgrade
The next step is installing Hugo. Most of the documentation just says install the latest version of Hugo, which I did. But, once you get to looking at Hugo themes most of the new ones will want you to have the ‘extended version’ installed. The first time I stepped through this and my theme wasn’t working, it was because I didn’t have the ‘extended version’ installed. So, to save you a possible step, let’s just install the latest Hugo extended version straight away (I’m writing this to save the next person starting from scratch a little time). You won’t get the latest version using your package manager so we’ll pull it down with wget.
Step 3: Install the latest Hugo extended version (make sure you are downloading the version associated with your architecture/operating system)
wget https://github.com/gohugoio/hugo/releases/download/v0.81.0/hugo_extended_0.81.0_Linux-64bit.deb
sudo dpkg -i hugo_extended_0.81.0_Linux-64bit.deb
Hugo version # verify your version/install
rm hugo_extended_0.81.0_Linux-64bit.deb
At this point you have everything you need except for your Hugo theme, but we will get there. At this point move into a working directory you’ll want to use for your project. This is not necessarily needed but I like it.
Step 4: Make a working directory for your project and move into it
mkdir ~/Desktop/hugofthunder
cd ~/Desktop/hugofthunder
At this point, I set up git on my local machine to talk to the master of my newly created GitLabs account using SSH authentication.
Step 5: Create a public/private key pair
cd ~/.ssh/
ssh-keygen -t rsa -b 2048
cat id_rsa.pub
ssh -T git@gitlab.com/<your_username>
cd ~/<your_project_working_directory>
When you are logged into GitLabs you can paste the .pub you echoed above under your profile -> preferences -> ssh keys. The next thing to do before we start setting up Hugo is to set some global git configurations that correspond to your GitLab account.
If we are in the root of our working directory, it should literally be empty if you do an ls command, we can now do a git init command.
Step 7: git init
git init
If you’ve made it this far, it’s time to do our first Hugo command. Congratulations, you are almost to website creation time! The first command you run will name your project and create a new directory with that projects name.
Step 8: Time to fire up Hugo! Name it whatever you want, you don’t have to go with hello-world 🙂 After you run your Hugo new site command move into the newly created directory.
hugo new site hello-world
cd hello-world
If you ll or ls in your newly created directory you’ll see you have some basic files that associated with the barest of bare bones needed for your upcoming site.
This is a very exciting point in the project and this post. Here is where you will decide on what Hugo theme you want to run on your site. This is a configuration that will give a certain look/layout/feel to your website. Each theme has varying degrees of associated documentation but installing them all is pretty much the same. You either git clone or git submodule the theme as follows, and for demonstration purposes, I went with the codex theme.
Alright, at this point you will have a pretty basic page with placeholder text. This is still pretty cool right? How do you get this up on your GitLabs for everyone to see?! You are about to find out!
The first thing we will need to do is decide on a project name as it will appear on GitLabs. For my website I chose the name ‘jobapp’ and used the following command to create it.
Step 10: Your first git push
# this will be down from the <working directory>/<your project> directory (the root of your project)
git add .
git remote add origin git@gitlab.com:<gitlabs_group_name/project_name>
git commit -m "init commit for project"
git push -u origin master
In about 30 – 90 seconds you should be able to refresh your GitLabs account and see your newly created project created along with the files and directories that were in the root of your project locally. The next thing to do is to talk about the files associated with getting this website up and running. There are two main files, the first I will discuss is called ‘config.toml’ and should be seen in the root of your project if you do an ls. If you go back to your themes documentation, which in my case was the Codex theme they will usually have a .toml config file to copy and paste into your .toml
In the .toml the only other thing you HAVE to change is the ‘baseURL’ to match what will be your URL on GitLabs. This will be the ‘root’ level so to speak of your website and all the sub directories will fall off this base. If this isn’t set correctly your website will not render correctly on GitLabs. I’ll show you in a few steps where to find this address.
The second configuration file is what GitLabs uses to create your site. You create this file on the root of your project locally as well, same place the .toml is located and name it ‘.gitlab-ci.yml’ I used vim for this task but you can use any other txt editing application without any judgment (from me anyway).
Step 12: Create a .gitlab-ci.yml file
vim .gitlab-ci.yml
Let me show you what’s in my gitlab-ci.yml file and explain the most important part.
image: registry.gitlab.com/pages/hugo/hugo_extended:latest

variables:
  GIT_SUBMODULE_STRATEGY: recursive

test:
  script:
  - hugo
  except:
  - master

pages:
  script:
  - hugo
  artifacts:
    paths:
    - public
  only:
  - master
For just about every theme I tested out, as mentioned earlier, uses a Hugo extended version. Most of the how-to documentation for setting up your first site doesn’t have you install the extended version locally or call an extended version in your .yml file on GitLabs. Instead, they simply have you call the latest version of Hugo. This didn’t work for me, so to save you an hour of troubleshooting you can either navigate to the exact version of Hugo you want to spin up on GitLabs or simply cut and paste ‘image: registry.gitlab.com/pages/hugo/hugo_extended:latest’ and make sure you are using the extended version.
What GitLabs does, to my understanding, is run a script that spins up a Hugo image and runs a script to create and render your website whenever there is a change. Alternatively, you can run Hugo locally to create your .html files and upload those to GitLab but I won’t be covering that here.
At this point, we can do another git commit to add our edited .toml and newly created .yml to our GitLabs project. This .yml is what GitLabs will use to create your page so after this commit we will be able to verify what our URL is and verify we have the correct address in your .toml config file under baseURL.
Now it is time to go to your GitLab project. On the left side you can scroll down to Settings -> Pages. It is in this location you can verify your baseURL. You can also go to this url to see how your site is currently looking. If you need to change your baseURL in your .toml file you simply make your changes and then push them to GitLabs.
From this point you should have a working site on GitLabs. You’ll need to read your themes documentation on how to create additional posts and how to further edit and personalize your site. Each theme may do things a little different so it is of no use to continue down that train as the documentation for the theme is what you should follow.
I ended up creating https://githugs.gitlab.io/jobapp/ in which I have a simple homepage and then two blog posts. This took me about 8 hours but if I was to follow what I just wrote I could probably accomplish the same thing in 30-45 minutes.
If you made it this far, thanks for reading and I hope you got something out of it. The following is a quick aside as to why I created a site in the first place 🙂
As you can see from the website I created I was trying to get Pete Lumbis’ (who works at Cumulus/NVIDA networking) attention in hopes to start a conversation for a job ask he posted publicly. I’ve been a fan of Cumulus Linux since I first started learning about networking. Most of all, I like that they have their VMs and vagrant boxes publicly available. You don’t have to have a previous relationship with a sales rep to get access or worry about a 30 day license or something. Secondly, their VM can run on less on GB of RAM. This is huge, you can have a little lab going with 6 devices easily with a regular old laptop. No expensive hardware needed. Lastly, both layer 2 and layer 3 work great. With Junos you have to have two VMs up with an internal bridge to do what Cumulus Linux does right out of the box. Cisco VMs are hard to come by and want all of the resources. Thus, Cumulus Linux is great for those that want to spin something up fast and have all the features you are looking for to learn networking fundamentals. If you are up for learning Cumulus check out my friend Aninda Chatterjee‘s new PluralSight course: Cumulus – The Big Picture.
No matter what the specific role, as an IT professional, you are going to be tasked to solve problems. Whether you are in a direct support role, part of an escalation team, or on the architecture/engineering team, you are potentially seen as someone who “fixes all the things”. Sometimes though, I think it can be easy for us to fall into a trap of quickly jumping to conclusions and getting “into the weeds” in potentially an incorrect direction. I’ll admit, I am definitely guilty of this from time to time. This can be for many reasons, from we feel pressured to find a resolution quickly, to assuming that problem is more technical than it is just because it seems somewhat similar to something that happened in the past. In this post, we’ll go through a high-level troubleshooting method that I like to use when problems arise.
In our studies to become IT/Network professionals, one thing that is good to learn or at least know of, is the OSI (Open Systems Interconnection) Model. The OSI Model is a framework that can be used to standardize and understand the different components of a network or computing system. Here is a list of the layers of the OSI model and how they are displayed.
7 – Application
6 – Presentation
5 – Session
4 – Transport
3 – Network
2 – Data Link
1 – Physical
Now, don’t worry. I’m not going to go in depth on each layer, nor am I an expert in each. I mainly just wanted to show the full model list to help explain my thought process when troubleshooting. I will not say that I use this as a definitive method and have to exhaust each layer before even thinking about the next. I merely like to think of the OSI Model as a high level guide to help get mind right went sifting through problems. Thinking through at least parts of this model give me a starting point and keep me in check from getting deep “into the weeds” before it is necessary to do so. An example of this is, for a connectivity issue, should I really be looking in routing tables for a potential problem before I’ve even validated power and physical connectivity of the problem device(s)? At least keeping the OSI Model in mind can keep me on a more narrow path to trying to find that problem resolution quickly. Here are some examples (not an exhaustive list) that can be used in troubleshooting when thinking about some of these layers (typically in this layer order). Like eluded to in the previous example, I find it helpful to take a bottom-up approach when looking at the OSI Model.
Physical
Is all of necessary equipment powered and booted properly?
Are all of the proper physical connections made and functioning without apparent errors?
For wireless, is the device (or devices) able to associate and authenticate to the proper SSID?
Data Link
Are MAC addresses being learned on switchports?
Is Spanning Tree Protocol configured and functioning the way we expect?
Network (this a “fun” one)
IP Addressing
Are devices that are configured for DHCP receiving IP addresses?
Are devices that are set statically configured properly? By properly, I mean with:
A unique IP address.
A correct subnet mask.
A correct default gateway address.
Correct DNS servers.
A good reason to be set with a static address.
I bring this up with just a slight bit of snark here. Statically configuring devices with IP information adds a level of complexity and extra room for error (and I am specifically referencing static configuration, not DHCP reservations by MAC address). There are however, reasons to leverage statically configured IP addresses, so I will not say that they are no use cases.
Routing
Does the router have a correct ARP entry for the device(s).
Are routes being learned or statically defined correctly?
Ping and traceroute are your friends.
Security
Layer 3 (Network Layer) and above is where I really start to consider security factors in troubleshooting such as access control lists (ACLs) and/or true firewall rules.
Transport
Security/ACL/Firewalling.
Session
Not a layer I specifically consider in at least initial, high level troubleshooting.
Presentation
Not a layer I specifically consider in at least initial, high level troubleshooting.
Application
Is the application functioning or being used/accessed as expected?
Security/ACL/Firewalling.
To close this out, I am by no means saying to print out the OSI Model, keep it next to you always, and follow it as an exact step by step troubleshooting method. I am more suggesting to leverage this model to give yourself somewhere to start, and some guidelines, when troubleshooting. We all want to resolve issues quickly and efficiently to keep our customers/clients/co-workers happy, and so we can get on to the next fun and exciting adventure!
“Faces of the Journey” is a series that highlights individuals in the network engineering community. The journey is the path we take through our careers, and it can be very different for each of us. While the destination is important, it’s all about the journey!
Meet Christine!
Christine Pappas, also known as @networkgeekgirl, is a network engineer in Maryland, USA. Christine has spent much of her life in Maryland, leaving for just four years to pursue higher education at Ferrum College in southwest Virginia. Prometric, LLC is the company Christine works for currently and has for twenty one years now. Prometric is a leading provider of technology-enabled testing and assessment solutions worldwide. Christine started at Prometric as an administrative assistant to the IT department with minimal tech knowledge. As she saw the operations of the department, she asked to learn more, and they were more than happy to oblige. First, Christine worked additional hours on the weekends, providing Level 1 support in the data center by monitoring processes and engaging the on-call staff to respond to issues that arose. She then expanded her responsibilities by becoming the technical writer for the processes that she had been monitoring by creating clear instructions for all necessary tasks. Continuing her technical growth, Christine spent time as an FTP administrator, and also joined the security team for a period of time, running reports, and checking for security issues on the network. Then, came the biggest career step. Someone was moving out of the network department, which had been an area of interest for Christine. Christine’s manager and director offered her a transition to that team to learn network engineering. This was about thirteen years ago, and Christine jumped at the opportunity, and has been learning ever since. Initially, she handled the “grunt work” and learned about Juniper and Netopia routers. After a few years of learning and growth, she got the opportunity to work daily on the Cisco routers and switches. Christine now works on both the campus and data center Cisco environments, providing design and implementation expertise for the global enterprise. She has also become the SME for the wireless and VPN disciplines. A love for playing in the CLI is what drew Christine to an IT profession. Understanding that the infrastructure that she designs and implements is a lifeline to the business is very rewarding for her. Christine’s goals and next steps are what I would deem well thought out and methodical. The short term goals are to become a senior network engineer, and to obtain a CCNP certification. Christine is taking it one step at a time so that her goals are achievable. She enjoys leveraging the knowledge that she has gained throughout her career and using it to teach up and coming junior engineers.
What do you want to be when you “grow up”? Senior Network Engineer, with CCNP, CCDP and eventually (possibly) CCIE.
What advice do you have for aspiring IT professionals? Study every day, even if it is for only 10 min, make sure you learn one new thing. The best way to learn is to do and do often, so labbing or working on real equipment is key to solidifying that in your brain. Figure out how you retain knowledge best and use that method. Listen in on troubleshooting calls to learn real world issues and how they are resolved. As you grow, help others with your new knowledge, don’t keep it all inside your own mind.
What is something you enjoy to do outside of work? Spending time with my family is my number one priority. My husband and I love to travel (pre-COVID). Reading and singing (many moons ago I did get a degree in Music) are my passions.
How do you manage your work/life balance? Managing that balance has been more difficult this past year in COVID times. I have learned to work from home full time, while helping my 3 girls do virtual school, and try to keep us all sane from being locked down in the house. I have had to learn to be patient with myself and determine how much work I could get done in a day realistically. Two of my girls have medical issues, so at times I am forced to balance work with doctor appts (my bosses and coworkers are amazing with this). I take time out in the evenings and weekends to watch true crimes or DIY shows with my husband, sit, and talk with him and the kids, plan future travel, and just be around each other. I talk or FaceTime with family and friends. When I need my own space, I will read or scroll social media. Time is a premium around here – I have 3 very different children who all rely on me in various ways. I am also now a passenger as my oldest learns to drive, so that tends to take your mind off everything else!
What motivates you on a daily basis? My kids – seeing them grow and learn and wanting to give them a positive role model. They love me as mom, but also see me studying for exams, and ‘hacking the world’ as they call it when I am connected in CLI. They see a woman in a predominately and historically man’s role, and I hope that they see their own possibilities are endless if they work hard for what they want.
Bert’s Brief
Strength, determination, and compassion are three (among many) traits that Christine Pappas wields on a daily basis. She has seen every challenge in front of her as an opportunity to practice and grow her skill sets. While she been with the same company for the last 20+ years, she has taken different roles to broaden knowledge in different areas. I really think there is a lot to be said for that. Even more so, Christine has been able to advance her career while still making her family and friends priorities, and finding balance, which is very impressive. Christine also finds time to be an active member in the It’s All About the Journey community, providing perspective, guidance, and encouragement. I can’t wait to hear her named called on the AONE podcast when she passes the Cisco ENCOR exam later this year!
You’ve made it to the 4th and final post in the OSPF Route Optimization series, I’m proud of you! I honestly wasn’t sure if I’d make it this far, myself. Anyway, in this post we will build upon the work we accomplished in post 3, in which we converted our flat, single area OSPF topology into multi-area OSPF with each site having a boundary between area 0 and the local area (1, 2, 3, or 4 per site). By just implementing multiple areas, we do not yet see a large benefit. Our routing table sizes are still larger than they need to be. In this post, we will leverage route summarization in our area border routers to start seeing that benefit of smaller routing tables. Multi-area OSPF is what makes route summarization possible. Just like the last post, to avoid too much clutter, we will focus in on site1-dist and site1-access1. Keep in mind, that the rest of the topology is getting configured also, just behind the scenes. First, let’s get a refresher on our topology.
With OSPF, route summarization is implemented in the area border routers. In our case here, this will be done in the “dist” switch at each site. For the purposes of this demonstration, we will summarize the route advertisements of the entire /16 of each local site network. In the output below, we will take a look at the configuration on site1-dist, then some “show” output from site1-dist and site1-access once the summarization configuration has taken place throughout the entire topology.
site1-dist
site1-dist#configure terminal
 site1-dist(config-router)#area 1 range 10.1.0.0 255.255.0.0
 site1-dist(config-router)#end
 site1-dist#show ip route ospf
   10.0.0.0/8 is variably subnetted, 29 subnets, 4 masks
 O        10.1.0.0/16 is a summary, 00:04:38, Null0
 O        10.1.11.0/24 [110/11] via 10.1.200.2, 00:04:38, GigabitEthernet0/2
 O        10.1.12.0/24 [110/11] via 10.1.200.2, 00:04:38, GigabitEthernet0/2
 O        10.1.13.0/24 [110/11] via 10.1.200.2, 00:04:38, GigabitEthernet0/2
 O        10.1.21.0/24 [110/11] via 10.1.200.6, 00:04:38, GigabitEthernet0/3
 O        10.1.22.0/24 [110/11] via 10.1.200.6, 00:04:38, GigabitEthernet0/3
 O        10.1.23.0/24 [110/11] via 10.1.200.6, 00:04:38, GigabitEthernet0/3
 O        10.1.31.0/24 [110/11] via 10.1.200.10, 00:04:38, GigabitEthernet1/0
 O        10.1.32.0/30 [110/11] via 10.1.200.10, 00:04:38, GigabitEthernet1/0
 O        10.1.33.0/30 [110/11] via 10.1.200.10, 00:04:38, GigabitEthernet1/0
 O        10.1.255.1/32 [110/11] via 10.1.200.2, 00:04:38, GigabitEthernet0/2
 O        10.1.255.2/32 [110/11] via 10.1.200.6, 00:04:38, GigabitEthernet0/3
 O        10.1.255.3/32 [110/11] via 10.1.200.10, 00:04:38, GigabitEthernet1/0
 O IA     10.2.0.0/16 [110/21] via 10.100.0.1, 00:03:32, GigabitEthernet0/1
 O IA     10.3.0.0/16 [110/21] via 10.100.0.1, 00:02:50, GigabitEthernet0/1
 O IA     10.4.0.0/16 [110/21] via 10.100.0.1, 00:01:25, GigabitEthernet0/1
 O        10.100.0.4/30 [110/20] via 10.100.0.1, 00:04:38, GigabitEthernet0/1
 O        10.100.0.8/30 [110/20] via 10.100.0.1, 00:04:38, GigabitEthernet0/1
 O        10.100.0.12/30 [110/20] via 10.100.0.1, 00:04:38, GigabitEthernet0/1
 O        10.100.255.255/32
            [110/11] via 10.100.0.1, 00:04:38, GigabitEthernet0/1
As you can see, the configuration itself is simple and done within the router ospf instance. Due to the IP addressing plan we used, combined with multi-area OSPF and route summarization across the topology, we were able to reduce the OSPF routes in this Layer 3 switch from 64 down to 20 (including the /16 null route)!
site1-access1
site1-access1#show ip route ospf
   10.0.0.0/8 is variably subnetted, 28 subnets, 4 masks
 O        10.1.21.0/24 [110/21] via 10.1.200.1, 00:12:56, GigabitEthernet0/1
 O        10.1.22.0/24 [110/21] via 10.1.200.1, 00:12:56, GigabitEthernet0/1
 O        10.1.23.0/24 [110/21] via 10.1.200.1, 00:12:56, GigabitEthernet0/1
 O        10.1.31.0/24 [110/21] via 10.1.200.1, 00:12:46, GigabitEthernet0/1
 O        10.1.32.0/30 [110/21] via 10.1.200.1, 00:12:46, GigabitEthernet0/1
 O        10.1.33.0/30 [110/21] via 10.1.200.1, 00:12:46, GigabitEthernet0/1
 O        10.1.200.4/30 [110/20] via 10.1.200.1, 00:12:56, GigabitEthernet0/1
 O        10.1.200.8/30 [110/20] via 10.1.200.1, 00:12:56, GigabitEthernet0/1
 O        10.1.255.2/32 [110/21] via 10.1.200.1, 00:12:56, GigabitEthernet0/1
 O        10.1.255.3/32 [110/21] via 10.1.200.1, 00:12:46, GigabitEthernet0/1
 O        10.1.255.255/32 [110/11] via 10.1.200.1, 00:12:56, GigabitEthernet0/1
 O IA     10.2.0.0/16 [110/31] via 10.1.200.1, 00:06:01, GigabitEthernet0/1
 O IA     10.3.0.0/16 [110/31] via 10.1.200.1, 00:05:15, GigabitEthernet0/1
 O IA     10.4.0.0/16 [110/31] via 10.1.200.1, 00:03:45, GigabitEthernet0/1
 O IA     10.100.0.0/30 [110/20] via 10.1.200.1, 00:12:56, GigabitEthernet0/1
 O IA     10.100.0.4/30 [110/30] via 10.1.200.1, 00:12:42, GigabitEthernet0/1
 O IA     10.100.0.8/30 [110/30] via 10.1.200.1, 00:12:42, GigabitEthernet0/1
 O IA     10.100.0.12/30 [110/30] via 10.1.200.1, 00:12:42, GigabitEthernet0/1
 O IA     10.100.255.255/32
            [110/21] via 10.1.200.1, 00:12:42, GigabitEthernet0/1
Here, you can see that the downstream routers from the area border router also benefit from the route summarization as the OSPF routes in the site1-access1 routing table have been reduced to 19. I want to highlight that the routes from areas 2, 3, and 4 are now seen as single /16 routes to routers in area 1. This is a great start to shrinking the routing tables in our topology, but we can go further. Is there really a reason for the access layer switches to have routes to the other sites? I encourage you to take a look at the different stub area types next. Thanks for joining me on this journey, and until next time, happy routing!
So I’ve made it through just about all of the SANS SEC503 material. That’s no small accomplishment in it of itself and I already feel like I’ve leveled up a bit. I now know some of the secrets about the TCP handshake, checksums and window size 🙂 If you’ve followed me through my first three posts you know I’ve touched a bit on tcpdump, scapy and snort while going through the material.
The next big hurdle, which will be coming up in just over 60 days is my first GIAC exam. For those that don’t know, this is the certifying body that is directly relevant to the SANS courses. As I understand it, it’s a 4-hour exam in a PearsonVue type center that is open book/paper. Since it’s ‘open book’ and I have some 5 books of slides and another two books of labs, there has to be a method to organize this into something efficient and useful to a test taker. I’ve searched the web and watched some YouTube videos about how to prepare for a GIAC exam and I keep coming across the word ‘index.’ While the end of my book 5 does have an index, I looked through the terms and tried to imagine how useful it would be, and my conclusion is not much.
Sheesh. So, anyone take a GIAC exam ever do an index for exam?
To be fully transparent, I started writing this blog post as something to put out there in public to hold myself to completing this indexing task and I’m currently about 18% through I’d estimate. The plan is to reread each book and then pull out the relevant information I think would be useful if I need to reference something quick related to the topic. I’ve decided I’m going to break up my key terms by protocol and/or tool, sometimes making an entry for both referencing the same page number.
Once I get through rereading all the books and completing my index, I’m going to type it up and sort. From there I’ll deliberate the most useful format for the index and set aside some time for a practice exam. Depending on how the practice test goes will give me an idea of what I need to tinker with to be my most successful test taker self. Luckily, I have two practice exams so I get to try out my improved plan before going in on the actual exam.
I’ll do a post later when I’m further along in the process, but like I mentioned above I’m just writing a quick note and putting this out there to help hold myself accountable. If you see me out there tweeting too much Heat basketball send me a dm and let me know what the real goal is 🙂 Till next time!
In this post of the OSPF Route Optimization series, we take a look at multi-area OSPF. As stated before, while single-area OSPF provides us with global IP reachability, it tends to not scale well from an efficiency standpoint as the network grows. In our sample topology, we will treat the “inside” zone of each site as its own area while leaving the distribution to core layer in area 0. With our IP address design, doing this will allow us to perform IP summarization and shrink the size of our routing tables. Here is an updated view of our topology and in the output shown in the rest of this post, we will work with area 1 (site 1).
As a reminder, here is what the routing table (OSPF routes) looks like on access switch #1 at site #1 with single area OSPF.
site1-access1#show ip route ospf
Codes: L - local, C - connected, S - static, R - RIP, M - mobile, B - BGP
D - EIGRP, EX - EIGRP external, O - OSPF, IA - OSPF inter area
N1 - OSPF NSSA external type 1, N2 - OSPF NSSA external type 2
E1 - OSPF external type 1, E2 - OSPF external type 2
i - IS-IS, su - IS-IS summary, L1 - IS-IS level-1, L2 - IS-IS level-2
ia - IS-IS inter area, * - candidate default, U - per-user static route
o - ODR, P - periodic downloaded static route, H - NHRP, l - LISP
a - application route
+ - replicated route, % - next hop override, p - overrides from PfR
Gateway of last resort is not set
10.0.0.0/8 is variably subnetted, 73 subnets, 3 masks
O 10.1.21.0/24 [110/21] via 10.1.200.1, 00:07:01, GigabitEthernet0/1
O 10.1.22.0/24 [110/21] via 10.1.200.1, 00:07:01, GigabitEthernet0/1
O 10.1.23.0/24 [110/21] via 10.1.200.1, 00:07:01, GigabitEthernet0/1
O 10.1.31.0/24 [110/21] via 10.1.200.1, 00:07:11, GigabitEthernet0/1
O 10.1.32.0/30 [110/21] via 10.1.200.1, 00:07:11, GigabitEthernet0/1
O 10.1.33.0/30 [110/21] via 10.1.200.1, 00:07:11, GigabitEthernet0/1
O 10.1.200.4/30 [110/20] via 10.1.200.1, 00:07:11, GigabitEthernet0/1
O 10.1.200.8/30 [110/20] via 10.1.200.1, 00:07:11, GigabitEthernet0/1
O 10.1.255.2/32 [110/21] via 10.1.200.1, 00:07:01, GigabitEthernet0/1
O 10.1.255.3/32 [110/21] via 10.1.200.1, 00:07:11, GigabitEthernet0/1
O 10.1.255.255/32 [110/11] via 10.1.200.1, 00:07:11, GigabitEthernet0/1
O 10.2.11.0/24 [110/41] via 10.1.200.1, 00:06:37, GigabitEthernet0/1
O 10.2.12.0/24 [110/41] via 10.1.200.1, 00:06:37, GigabitEthernet0/1
O 10.2.13.0/24 [110/41] via 10.1.200.1, 00:06:37, GigabitEthernet0/1
O 10.2.21.0/24 [110/41] via 10.1.200.1, 00:06:27, GigabitEthernet0/1
O 10.2.22.0/24 [110/41] via 10.1.200.1, 00:06:27, GigabitEthernet0/1
O 10.2.23.0/24 [110/41] via 10.1.200.1, 00:06:27, GigabitEthernet0/1
O 10.2.31.0/24 [110/41] via 10.1.200.1, 00:06:37, GigabitEthernet0/1
O 10.2.32.0/24 [110/41] via 10.1.200.1, 00:06:37, GigabitEthernet0/1
O 10.2.33.0/24 [110/41] via 10.1.200.1, 00:06:37, GigabitEthernet0/1
O 10.2.200.0/30 [110/40] via 10.1.200.1, 00:06:37, GigabitEthernet0/1
O 10.2.200.4/30 [110/40] via 10.1.200.1, 00:06:37, GigabitEthernet0/1
O 10.2.200.8/30 [110/40] via 10.1.200.1, 00:06:37, GigabitEthernet0/1
O 10.2.255.1/32 [110/41] via 10.1.200.1, 00:06:37, GigabitEthernet0/1
O 10.2.255.2/32 [110/41] via 10.1.200.1, 00:06:27, GigabitEthernet0/1
O 10.2.255.3/32 [110/41] via 10.1.200.1, 00:06:37, GigabitEthernet0/1
O 10.2.255.255/32 [110/31] via 10.1.200.1, 00:06:37, GigabitEthernet0/1
O 10.3.11.0/24 [110/41] via 10.1.200.1, 00:06:16, GigabitEthernet0/1
O 10.3.12.0/24 [110/41] via 10.1.200.1, 00:06:16, GigabitEthernet0/1
O 10.3.13.0/24 [110/41] via 10.1.200.1, 00:06:16, GigabitEthernet0/1
O 10.3.21.0/24 [110/41] via 10.1.200.1, 00:06:06, GigabitEthernet0/1
O 10.3.22.0/24 [110/41] via 10.1.200.1, 00:06:06, GigabitEthernet0/1
O 10.3.23.0/24 [110/41] via 10.1.200.1, 00:06:06, GigabitEthernet0/1
O 10.3.31.0/24 [110/41] via 10.1.200.1, 00:06:06, GigabitEthernet0/1
O 10.3.32.0/24 [110/41] via 10.1.200.1, 00:06:06, GigabitEthernet0/1
O 10.3.33.0/24 [110/41] via 10.1.200.1, 00:06:06, GigabitEthernet0/1
O 10.3.200.0/30 [110/40] via 10.1.200.1, 00:06:16, GigabitEthernet0/1
O 10.3.200.4/30 [110/40] via 10.1.200.1, 00:06:16, GigabitEthernet0/1
O 10.3.200.8/30 [110/40] via 10.1.200.1, 00:06:16, GigabitEthernet0/1
O 10.3.255.1/32 [110/41] via 10.1.200.1, 00:06:16, GigabitEthernet0/1
O 10.3.255.2/32 [110/41] via 10.1.200.1, 00:06:06, GigabitEthernet0/1
O 10.3.255.3/32 [110/41] via 10.1.200.1, 00:06:06, GigabitEthernet0/1
O 10.3.255.255/32 [110/31] via 10.1.200.1, 00:06:16, GigabitEthernet0/1
O 10.4.11.0/24 [110/41] via 10.1.200.1, 00:05:38, GigabitEthernet0/1
O 10.4.12.0/24 [110/41] via 10.1.200.1, 00:05:38, GigabitEthernet0/1
O 10.4.13.0/24 [110/41] via 10.1.200.1, 00:05:38, GigabitEthernet0/1
O 10.4.21.0/24 [110/41] via 10.1.200.1, 00:05:38, GigabitEthernet0/1
O 10.4.22.0/24 [110/41] via 10.1.200.1, 00:05:38, GigabitEthernet0/1
O 10.4.23.0/24 [110/41] via 10.1.200.1, 00:05:38, GigabitEthernet0/1
O 10.4.31.0/24 [110/41] via 10.1.200.1, 00:05:38, GigabitEthernet0/1
O 10.4.32.0/24 [110/41] via 10.1.200.1, 00:05:38, GigabitEthernet0/1
O 10.4.33.0/24 [110/41] via 10.1.200.1, 00:05:38, GigabitEthernet0/1
O 10.4.200.0/30 [110/40] via 10.1.200.1, 00:05:48, GigabitEthernet0/1
O 10.4.200.4/30 [110/40] via 10.1.200.1, 00:05:48, GigabitEthernet0/1
O 10.4.200.8/30 [110/40] via 10.1.200.1, 00:05:48, GigabitEthernet0/1
O 10.4.255.1/32 [110/41] via 10.1.200.1, 00:05:38, GigabitEthernet0/1
O 10.4.255.2/32 [110/41] via 10.1.200.1, 00:05:38, GigabitEthernet0/1
O 10.4.255.3/32 [110/41] via 10.1.200.1, 00:05:38, GigabitEthernet0/1
O 10.4.255.255/32 [110/31] via 10.1.200.1, 00:05:48, GigabitEthernet0/1
O 10.100.0.0/30 [110/20] via 10.1.200.1, 00:07:11, GigabitEthernet0/1
O 10.100.0.4/30 [110/30] via 10.1.200.1, 00:07:11, GigabitEthernet0/1
O 10.100.0.8/30 [110/30] via 10.1.200.1, 00:07:11, GigabitEthernet0/1
O 10.100.0.12/30 [110/30] via 10.1.200.1, 00:07:11, GigabitEthernet0/1
O 10.100.255.255/32
[110/21] via 10.1.200.1, 00:07:11, GigabitEthernet0/1
We will now start our configuration of multi-area OSPF. For brevity, in this post we will focus on site #1, specifically the distribution switch and one access switch. The configuration is similar for the rest of the network. Disclaimer: similar changes in a production environment should be planned, coordinated, and performed in a maintenance window that allows for downtime.
site1-dist
site1-dist#show ip int brief | exclude unassigned
 Interface              IP-Address      OK? Method Status            Protocol
 GigabitEthernet0/1     10.100.0.2      YES TFTP   up                    up
 GigabitEthernet0/2     10.1.200.1      YES TFTP   up                    up
 GigabitEthernet0/3     10.1.200.5      YES TFTP   up                    up
 GigabitEthernet1/0     10.1.200.9      YES TFTP   up                    up
 Loopback0              10.1.255.255    YES TFTP   up                    up
 site1-dist#show ip protocols
 Routing Protocol is "ospf 1"
   Outgoing update filter list for all interfaces is not set
   Incoming update filter list for all interfaces is not set
   Router ID 10.1.255.255
   Number of areas in this router is 1. 1 normal 0 stub 0 nssa
   Maximum path: 4
   Routing for Networks:
   Routing on Interfaces Configured Explicitly (Area 0):
     Loopback0
     GigabitEthernet1/0
     GigabitEthernet0/3
     GigabitEthernet0/2
     GigabitEthernet0/1
   Routing Information Sources:
     Gateway         Distance      Last Update
     10.2.255.255         110      22:12:43
     10.3.255.255         110      22:12:16
     10.4.255.255         110      22:12:16
     10.100.255.255       110      22:12:53
     10.4.255.1           110      22:12:16
     10.4.255.3           110      22:12:05
     10.4.255.2           110      22:12:16
     10.3.255.2           110      22:12:16
     10.2.255.3           110      22:12:43
     10.3.255.3           110      22:12:16
     10.2.255.2           110      22:12:43
     10.1.255.1           110      22:12:53
     10.2.255.1           110      22:12:43
     10.1.255.2           110      22:12:53
     10.3.255.1           110      22:12:16
     10.1.255.3           110      22:12:53
   Distance: (default is 110)
 site1-dist#configure terminal
 Enter configuration commands, one per line.  End with CNTL/Z.
 site1-dist(config)#int range gi0/2-3, gi1/0, lo0
 site1-dist(config-if-range)#ip ospf 1 area 1
 site1-dist(config-if-range)#
 *Nov 22 17:17:54.010: %OSPF-5-ADJCHG: Process 1, Nbr 10.1.255.1 on GigabitEthernet0/2 from FULL to DOWN, Neighbor Down: Interface down or detached
 *Nov 22 17:17:54.018: %OSPF-5-ADJCHG: Process 1, Nbr 10.1.255.2 on GigabitEthernet0/3 from FULL to DOWN, Neighbor Down: Interface down or detached
 *Nov 22 17:17:54.026: %OSPF-5-ADJCHG: Process 1, Nbr 10.1.255.3 on GigabitEthernet1/0 from FULL to DOWN, Neighbor Down: Interface down or detached
 site1-dist(config-if-range)#
 *Nov 22 17:17:59.544: %OSPF-4-ERRRCV: Received invalid packet: mismatched area ID from backbone area from 10.1.200.10, GigabitEthernet1/0
In the above output for site1-dist, we can see that the interface connecting to the core (gi0/1) is left in the backbone area (area 0). All other interfaces that can be seen as “local” to the site (including the router’s loopback 0 interface, which is used as the OSPF router ID) are moved into area 1. For site 2, we are using area 2, site 3 is area 3 and site 4 is area 4. You can see that as soon as the interfaces connecting to the access layer switches are moved into, area 1, we lose OSPF neighborship with them on site1-dist because there is now an area ID mismatch in the hello messages between site1-dist and the access layer switches that are still in area 0. This is why in a production environment, that this would need to be done in a communicated maintenance window. We will now configure the necessary interfaces on site1-access1. The same would be configured on the other access layer switches at site 1 as well as the rest of the access layer switches at the other sites in the topology, just with their respective area IDs.
site1-access1
site1-access1#show ip int brief | exclude unassigned
 Interface              IP-Address      OK? Method Status                Protocol
 GigabitEthernet0/1     10.1.200.2      YES TFTP   up                    up
 Loopback0              10.1.255.1      YES TFTP   up                    up
 Loopback11             10.1.11.1       YES TFTP   up                    up
 Loopback12             10.1.12.1       YES TFTP   up                    up
 Loopback13             10.1.13.1       YES TFTP   up                    up
 site1-access1#show ip protocols
 Routing Protocol is "ospf 1"
   Outgoing update filter list for all interfaces is not set
   Incoming update filter list for all interfaces is not set
   Router ID 10.1.255.1
   Number of areas in this router is 1. 1 normal 0 stub 0 nssa
   Maximum path: 4
   Routing for Networks:
   Routing on Interfaces Configured Explicitly (Area 0):
     Loopback0
     Loopback11
     Loopback12
     Loopback13
     GigabitEthernet0/1
   Routing Information Sources:
     Gateway         Distance      Last Update
     10.2.255.255         110      23:43:05
     10.3.255.255         110      23:42:37
     10.1.255.255         110      23:43:16
     10.4.255.255         110      23:42:27
     10.100.255.255       110      23:43:16
     10.4.255.1           110      23:42:27
     10.4.255.3           110      23:42:17
     10.4.255.2           110      23:42:17
     10.3.255.2           110      23:42:37
     10.2.255.3           110      23:43:05
     10.3.255.3           110      23:42:27
     10.2.255.2           110      23:42:55
     10.2.255.1           110      23:43:05
     10.1.255.2           110      23:43:16
     10.3.255.1           110      23:42:27
     10.1.255.3           110      23:43:16
   Distance: (default is 110)
 site1-access1#configure terminal
 Enter configuration commands, one per line.  End with CNTL/Z.
 site1-access1(config)#int range gi0/1, lo0, lo11-13
 site1-access1(config-if-range)#ip ospf 1 area 1
 site1-access1(config-if-range)#
 *Nov 22 18:50:38.694: %OSPF-5-ADJCHG: Process 1, Nbr 10.1.255.255 on GigabitEthernet0/1 from LOADING to FULL, Loading Done
 site1-access1#show ip ospf neighbor
 Neighbor ID     Pri   State           Dead Time   Address         Interface
 10.1.255.255      0   FULL/  -        00:00:36    10.1.200.1      GigabitEthernet0/1
In this simulation, the client subnets are represented as loopback interfaces. In “real life” they would most likely be switch virtual interfaces (SVIs). As stated in the last post, for the lab, I set the client subnet represented loopback interfaces with the “ip ospf network point-to-point” command. This way, OSPF would advertise the entire /24 subnets rather than just the /32 loopback addresses. We can see that all interfaces on site1-access1 are moved into area 1. As soon as interface gi0/1 (connecting to site1-dist) is added into area 1, the OSPF neighborship comes back online. For all router to router connections in this lab we are leveraging “ip ospf network point-to-point”. That is why we do not see any DRs or BDRs in the “show ip ospf neighbor” outputs.
We are now going to fast forward. All routers (Layer 3 switches) in the topology have been configured properly for multi-area OSPF as shown in the diagram at the beginning of this post. Let’s now take a look at some show commands from site1-dist and site1-access1 now the entire topology has been configured.
site1-dist
site1-dist#show ip protocols
 Routing Protocol is "ospf 1"
   Outgoing update filter list for all interfaces is not set
   Incoming update filter list for all interfaces is not set
   Router ID 10.1.255.255
   It is an area border router
   Number of areas in this router is 2. 2 normal 0 stub 0 nssa
   Maximum path: 4
   Routing for Networks:
   Routing on Interfaces Configured Explicitly (Area 0):
     GigabitEthernet0/1
     Routing on Interfaces Configured Explicitly (Area 1):
     Loopback0
     GigabitEthernet1/0
     GigabitEthernet0/3
     GigabitEthernet0/2
   Routing Information Sources:
     Gateway         Distance      Last Update
     10.2.255.255         110      00:04:09
     10.3.255.255         110      00:03:28
     10.4.255.255         110      00:02:53
     10.100.255.255       110      00:17:48
     10.1.255.1           110      00:17:38
     10.1.255.2           110      00:17:48
     10.1.255.3           110      00:17:38
   Distance: (default is 110)
 site1-dist#show ip route ospf
       10.0.0.0/8 is variably subnetted, 73 subnets, 3 masks
 O        10.1.11.0/24 [110/11] via 10.1.200.2, 00:18:11, GigabitEthernet0/2
 O        10.1.12.0/24 [110/11] via 10.1.200.2, 00:18:11, GigabitEthernet0/2
 O        10.1.13.0/24 [110/11] via 10.1.200.2, 00:18:11, GigabitEthernet0/2
 O        10.1.21.0/24 [110/11] via 10.1.200.6, 00:18:21, GigabitEthernet0/3
 O        10.1.22.0/24 [110/11] via 10.1.200.6, 00:18:21, GigabitEthernet0/3
 O        10.1.23.0/24 [110/11] via 10.1.200.6, 00:18:21, GigabitEthernet0/3
 O        10.1.31.0/24 [110/11] via 10.1.200.10, 00:18:11, GigabitEthernet1/0
 O        10.1.32.0/30 [110/11] via 10.1.200.10, 00:18:11, GigabitEthernet1/0
 O        10.1.33.0/30 [110/11] via 10.1.200.10, 00:18:11, GigabitEthernet1/0
 O        10.1.255.1/32 [110/11] via 10.1.200.2, 00:18:11, GigabitEthernet0/2
 O        10.1.255.2/32 [110/11] via 10.1.200.6, 00:18:21, GigabitEthernet0/3
 O        10.1.255.3/32 [110/11] via 10.1.200.10, 00:18:11, GigabitEthernet1/0
 O IA     10.2.11.0/24 [110/31] via 10.100.0.1, 00:18:01, GigabitEthernet0/1
 O IA     10.2.12.0/24 [110/31] via 10.100.0.1, 00:18:01, GigabitEthernet0/1
 O IA     10.2.13.0/24 [110/31] via 10.100.0.1, 00:18:01, GigabitEthernet0/1
 O IA     10.2.21.0/24 [110/31] via 10.100.0.1, 00:18:01, GigabitEthernet0/1
 O IA     10.2.22.0/24 [110/31] via 10.100.0.1, 00:18:01, GigabitEthernet0/1
 O IA     10.2.23.0/24 [110/31] via 10.100.0.1, 00:18:01, GigabitEthernet0/1
 O IA     10.2.31.0/24 [110/31] via 10.100.0.1, 00:17:58, GigabitEthernet0/1
 O IA     10.2.32.0/24 [110/31] via 10.100.0.1, 00:17:58, GigabitEthernet0/1
 O IA     10.2.33.0/24 [110/31] via 10.100.0.1, 00:17:58, GigabitEthernet0/1
 O IA     10.2.200.0/30 [110/30] via 10.100.0.1, 00:18:01, GigabitEthernet0/1
 O IA     10.2.200.4/30 [110/30] via 10.100.0.1, 00:18:01, GigabitEthernet0/1
 O IA     10.2.200.8/30 [110/30] via 10.100.0.1, 00:18:01, GigabitEthernet0/1
 O IA     10.2.255.1/32 [110/31] via 10.100.0.1, 00:18:01, GigabitEthernet0/1
 O IA     10.2.255.2/32 [110/31] via 10.100.0.1, 00:18:01, GigabitEthernet0/1
 O IA     10.2.255.3/32 [110/31] via 10.100.0.1, 00:17:58, GigabitEthernet0/1
 O IA     10.2.255.255/32 [110/21] via 10.100.0.1, 00:04:43, GigabitEthernet0/1
 O IA     10.3.11.0/24 [110/31] via 10.100.0.1, 00:17:30, GigabitEthernet0/1
 O IA     10.3.12.0/24 [110/31] via 10.100.0.1, 00:17:30, GigabitEthernet0/1
 O IA     10.3.13.0/24 [110/31] via 10.100.0.1, 00:17:30, GigabitEthernet0/1
 O IA     10.3.21.0/24 [110/31] via 10.100.0.1, 00:17:40, GigabitEthernet0/1
 O IA     10.3.22.0/24 [110/31] via 10.100.0.1, 00:17:40, GigabitEthernet0/1
 O IA     10.3.23.0/24 [110/31] via 10.100.0.1, 00:17:40, GigabitEthernet0/1
 O IA     10.3.31.0/24 [110/31] via 10.100.0.1, 00:17:30, GigabitEthernet0/1
 O IA     10.3.32.0/24 [110/31] via 10.100.0.1, 00:17:30, GigabitEthernet0/1
 O IA     10.3.33.0/24 [110/31] via 10.100.0.1, 00:17:30, GigabitEthernet0/1
 O IA     10.3.200.0/30 [110/30] via 10.100.0.1, 00:17:40, GigabitEthernet0/1
 O IA     10.3.200.4/30 [110/30] via 10.100.0.1, 00:17:40, GigabitEthernet0/1
 O IA     10.3.200.8/30 [110/30] via 10.100.0.1, 00:17:40, GigabitEthernet0/1
 O IA     10.3.255.1/32 [110/31] via 10.100.0.1, 00:17:30, GigabitEthernet0/1
 O IA     10.3.255.2/32 [110/31] via 10.100.0.1, 00:17:40, GigabitEthernet0/1
 O IA     10.3.255.3/32 [110/31] via 10.100.0.1, 00:17:30, GigabitEthernet0/1
 O IA     10.3.255.255/32 [110/21] via 10.100.0.1, 00:04:01, GigabitEthernet0/1
 O IA     10.4.11.0/24 [110/31] via 10.100.0.1, 00:17:29, GigabitEthernet0/1
 O IA     10.4.12.0/24 [110/31] via 10.100.0.1, 00:17:29, GigabitEthernet0/1
 O IA     10.4.13.0/24 [110/31] via 10.100.0.1, 00:17:29, GigabitEthernet0/1
 O IA     10.4.21.0/24 [110/31] via 10.100.0.1, 00:17:30, GigabitEthernet0/1
 O IA     10.4.22.0/24 [110/31] via 10.100.0.1, 00:17:30, GigabitEthernet0/1
 O IA     10.4.23.0/24 [110/31] via 10.100.0.1, 00:17:30, GigabitEthernet0/1
 O IA     10.4.31.0/24 [110/31] via 10.100.0.1, 00:17:29, GigabitEthernet0/1
 O IA     10.4.32.0/24 [110/31] via 10.100.0.1, 00:17:29, GigabitEthernet0/1
 O IA     10.4.33.0/24 [110/31] via 10.100.0.1, 00:17:29, GigabitEthernet0/1
 O IA     10.4.200.0/30 [110/30] via 10.100.0.1, 00:17:30, GigabitEthernet0/1
 O IA     10.4.200.4/30 [110/30] via 10.100.0.1, 00:17:30, GigabitEthernet0/1
 O IA     10.4.200.8/30 [110/30] via 10.100.0.1, 00:17:30, GigabitEthernet0/1
 O IA     10.4.255.1/32 [110/31] via 10.100.0.1, 00:17:29, GigabitEthernet0/1
 O IA     10.4.255.2/32 [110/31] via 10.100.0.1, 00:17:30, GigabitEthernet0/1
 O IA     10.4.255.3/32 [110/31] via 10.100.0.1, 00:17:29, GigabitEthernet0/1
 O IA     10.4.255.255/32 [110/21] via 10.100.0.1, 00:03:27, GigabitEthernet0/1
 O        10.100.0.4/30 [110/20] via 10.100.0.1, 00:18:21, GigabitEthernet0/1
 O        10.100.0.8/30 [110/20] via 10.100.0.1, 00:18:21, GigabitEthernet0/1
 O        10.100.0.12/30 [110/20] via 10.100.0.1, 00:18:21, GigabitEthernet0/1
 O        10.100.255.255/32
            [110/11] via 10.100.0.1, 00:18:21, GigabitEthernet0/1
site1-access1
site1-access1#show ip protocols
 Routing Protocol is "ospf 1"
   Outgoing update filter list for all interfaces is not set
   Incoming update filter list for all interfaces is not set
   Router ID 10.1.255.1
   Number of areas in this router is 1. 1 normal 0 stub 0 nssa
   Maximum path: 4
   Routing for Networks:
   Routing on Interfaces Configured Explicitly (Area 1):
     Loopback0
     Loopback11
     Loopback12
     Loopback13
     GigabitEthernet0/1
   Routing Information Sources:
     Gateway         Distance      Last Update
     10.1.255.255         110      00:06:19
     10.1.255.2           110      00:22:56
     10.1.255.3           110      00:22:56
   Distance: (default is 110)
 site1-access1#show ip route ospf
       10.0.0.0/8 is variably subnetted, 73 subnets, 3 masks
 O        10.1.21.0/24 [110/21] via 10.1.200.1, 00:23:58, GigabitEthernet0/1
 O        10.1.22.0/24 [110/21] via 10.1.200.1, 00:23:58, GigabitEthernet0/1
 O        10.1.23.0/24 [110/21] via 10.1.200.1, 00:23:58, GigabitEthernet0/1
 O        10.1.31.0/24 [110/21] via 10.1.200.1, 00:23:58, GigabitEthernet0/1
 O        10.1.32.0/30 [110/21] via 10.1.200.1, 00:23:58, GigabitEthernet0/1
 O        10.1.33.0/30 [110/21] via 10.1.200.1, 00:23:58, GigabitEthernet0/1
 O        10.1.200.4/30 [110/20] via 10.1.200.1, 00:23:58, GigabitEthernet0/1
 O        10.1.200.8/30 [110/20] via 10.1.200.1, 00:23:58, GigabitEthernet0/1
 O        10.1.255.2/32 [110/21] via 10.1.200.1, 00:23:58, GigabitEthernet0/1
 O        10.1.255.3/32 [110/21] via 10.1.200.1, 00:23:58, GigabitEthernet0/1
 O        10.1.255.255/32 [110/11] via 10.1.200.1, 00:09:02, GigabitEthernet0/1
 O IA     10.2.11.0/24 [110/41] via 10.1.200.1, 00:23:41, GigabitEthernet0/1
 O IA     10.2.12.0/24 [110/41] via 10.1.200.1, 00:23:41, GigabitEthernet0/1
 O IA     10.2.13.0/24 [110/41] via 10.1.200.1, 00:23:41, GigabitEthernet0/1
 O IA     10.2.21.0/24 [110/41] via 10.1.200.1, 00:23:41, GigabitEthernet0/1
 O IA     10.2.22.0/24 [110/41] via 10.1.200.1, 00:23:41, GigabitEthernet0/1
 O IA     10.2.23.0/24 [110/41] via 10.1.200.1, 00:23:41, GigabitEthernet0/1
 O IA     10.2.31.0/24 [110/41] via 10.1.200.1, 00:23:34, GigabitEthernet0/1
 O IA     10.2.32.0/24 [110/41] via 10.1.200.1, 00:23:34, GigabitEthernet0/1
 O IA     10.2.33.0/24 [110/41] via 10.1.200.1, 00:23:34, GigabitEthernet0/1
 O IA     10.2.200.0/30 [110/40] via 10.1.200.1, 00:23:41, GigabitEthernet0/1
 O IA     10.2.200.4/30 [110/40] via 10.1.200.1, 00:23:41, GigabitEthernet0/1
 O IA     10.2.200.8/30 [110/40] via 10.1.200.1, 00:23:41, GigabitEthernet0/1
 O IA     10.2.255.1/32 [110/41] via 10.1.200.1, 00:23:41, GigabitEthernet0/1
 O IA     10.2.255.2/32 [110/41] via 10.1.200.1, 00:23:41, GigabitEthernet0/1
 O IA     10.2.255.3/32 [110/41] via 10.1.200.1, 00:23:34, GigabitEthernet0/1
 O IA     10.2.255.255/32 [110/31] via 10.1.200.1, 00:08:44, GigabitEthernet0/1
 O IA     10.3.11.0/24 [110/41] via 10.1.200.1, 00:22:47, GigabitEthernet0/1
 O IA     10.3.12.0/24 [110/41] via 10.1.200.1, 00:22:47, GigabitEthernet0/1
 O IA     10.3.13.0/24 [110/41] via 10.1.200.1, 00:22:47, GigabitEthernet0/1
 O IA     10.3.21.0/24 [110/41] via 10.1.200.1, 00:23:03, GigabitEthernet0/1
 O IA     10.3.22.0/24 [110/41] via 10.1.200.1, 00:23:03, GigabitEthernet0/1
 O IA     10.3.23.0/24 [110/41] via 10.1.200.1, 00:23:03, GigabitEthernet0/1
 O IA     10.3.31.0/24 [110/41] via 10.1.200.1, 00:22:47, GigabitEthernet0/1
 O IA     10.3.32.0/24 [110/41] via 10.1.200.1, 00:22:47, GigabitEthernet0/1
 O IA     10.3.33.0/24 [110/41] via 10.1.200.1, 00:22:47, GigabitEthernet0/1
 O IA     10.3.200.0/30 [110/40] via 10.1.200.1, 00:23:03, GigabitEthernet0/1
 O IA     10.3.200.4/30 [110/40] via 10.1.200.1, 00:23:03, GigabitEthernet0/1
 O IA     10.3.200.8/30 [110/40] via 10.1.200.1, 00:23:03, GigabitEthernet0/1
 O IA     10.3.255.1/32 [110/41] via 10.1.200.1, 00:22:47, GigabitEthernet0/1
 O IA     10.3.255.2/32 [110/41] via 10.1.200.1, 00:23:03, GigabitEthernet0/1
 O IA     10.3.255.3/32 [110/41] via 10.1.200.1, 00:22:47, GigabitEthernet0/1
 O IA     10.3.255.255/32 [110/31] via 10.1.200.1, 00:07:59, GigabitEthernet0/1
 O IA     10.4.11.0/24 [110/41] via 10.1.200.1, 00:22:45, GigabitEthernet0/1
 O IA     10.4.12.0/24 [110/41] via 10.1.200.1, 00:22:45, GigabitEthernet0/1
 O IA     10.4.13.0/24 [110/41] via 10.1.200.1, 00:22:45, GigabitEthernet0/1
 O IA     10.4.21.0/24 [110/41] via 10.1.200.1, 00:22:47, GigabitEthernet0/1
 O IA     10.4.22.0/24 [110/41] via 10.1.200.1, 00:22:47, GigabitEthernet0/1
 O IA     10.4.23.0/24 [110/41] via 10.1.200.1, 00:22:47, GigabitEthernet0/1
 O IA     10.4.31.0/24 [110/41] via 10.1.200.1, 00:22:45, GigabitEthernet0/1
 O IA     10.4.32.0/24 [110/41] via 10.1.200.1, 00:22:45, GigabitEthernet0/1
 O IA     10.4.33.0/24 [110/41] via 10.1.200.1, 00:22:45, GigabitEthernet0/1
 O IA     10.4.200.0/30 [110/40] via 10.1.200.1, 00:22:47, GigabitEthernet0/1
 O IA     10.4.200.4/30 [110/40] via 10.1.200.1, 00:22:47, GigabitEthernet0/1
 O IA     10.4.200.8/30 [110/40] via 10.1.200.1, 00:22:47, GigabitEthernet0/1
 O IA     10.4.255.1/32 [110/41] via 10.1.200.1, 00:22:45, GigabitEthernet0/1
 O IA     10.4.255.2/32 [110/41] via 10.1.200.1, 00:22:47, GigabitEthernet0/1
 O IA     10.4.255.3/32 [110/41] via 10.1.200.1, 00:22:45, GigabitEthernet0/1
 O IA     10.4.255.255/32 [110/31] via 10.1.200.1, 00:07:21, GigabitEthernet0/1
 O IA     10.100.0.0/30 [110/20] via 10.1.200.1, 00:23:58, GigabitEthernet0/1
 O IA     10.100.0.4/30 [110/30] via 10.1.200.1, 00:23:58, GigabitEthernet0/1
 O IA     10.100.0.8/30 [110/30] via 10.1.200.1, 00:23:58, GigabitEthernet0/1
 O IA     10.100.0.12/30 [110/30] via 10.1.200.1, 00:23:58, GigabitEthernet0/1
 O IA     10.100.255.255/32
            [110/21] via 10.1.200.1, 00:23:58, GigabitEthernet0/1
In conclusion of this post, let’s go over some key takeaways from the perspectives of site1-dist and site1-access1 now that multi-area OSPF has been configured throughout the topology.
site1-dist
In the output of “show ip protocols”, the list of routing information sources has decreased to the following. The reason for this is because site1-dist now has interfaces in area 1 as well as area 0. Routing information will only be seen as sourced from routers within area 1 and area 0.
10.2.255.255 (site2-dist)
10.3.255.255 (site3-dist)
10.4.255.255 (site4-dist)
10.100.255.255 (core)
10.1.255.1 (site1-access1)
10.1.255.2 (site1-access2)
10.1.255.3 (site1-access3)
In the routing table, any route outside of 10.1.x.x (area 1) and 10.100.x.x (area 0) is seen as an inter-area (IA) route.
site1-access
In the output of “show ip protocols”, the list of routing sources has decreased to the following. The reason for this is because site1-access1 now only has interfaces in area 1. Routing information will only be seen as sourced from routers within area 1.
10.1.255.255 (site1-dist)
10.1.255.2 (site1-access2)
10.1.255.3 (site1-access3)
In the routing table, any route outside of 10.1.x.x (area 1) is seen as an inter-area (IA) route.
Alright, we have multi-area OSPF set up across the topology, but our routing tables still look pretty heavy and cluttered. Well, the base multi-area OSPF configuration just set the stage for the next tool in our OSPF toolbox, which is route summarization. Join me in the next post, and we will leverage route summarization in our area border routers (the dist switch at each site) and shrink the size of our routing tables.
In this second post of the OSPF Route Optimization series, we take a look at our sample topology network configured with a single OSPF area. We will see that while we have global IP reachability throughout the network, the routing tables are not very efficient, and this design may not scale well. Here is another look at our topology, this time showing that the routers in the entire network are all members of the backbone area, OSPF area 0 (zero).
In the following “show” output, we will take a look at the OSPF related configuration for site1-dist and one of the site1-access switches. Remember that in this topology, we are working with a routed access design, so the virtual routers for the client subnets live on the access-layer switches. Rather than using SVIs at the access layer, for this demonstration, we are leveraging loopback interfaces to simulate client routers (each access-layer switch has three client subnets). By default, the loopback OSPF network type will only advertise a /32 host route, so for this demonstration, the OSPF network type on the loopback interfaces has been changed to “point-to-point”. By doing this, although they are loopback interfaces, the full /24 subnets will be advertised.
site1-dist
site1-dist#show ip route connected
Codes: L - local, C - connected, S - static, R - RIP, M - mobile, B - BGP
D - EIGRP, EX - EIGRP external, O - OSPF, IA - OSPF inter area
N1 - OSPF NSSA external type 1, N2 - OSPF NSSA external type 2
E1 - OSPF external type 1, E2 - OSPF external type 2
i - IS-IS, su - IS-IS summary, L1 - IS-IS level-1, L2 - IS-IS level-2
ia - IS-IS inter area, * - candidate default, U - per-user static route
o - ODR, P - periodic downloaded static route, H - NHRP, l - LISP
a - application route
+ - replicated route, % - next hop override, p - overrides from PfR
Gateway of last resort is not set
10.0.0.0/8 is variably subnetted, 57 subnets, 3 masks
C 10.1.200.0/30 is directly connected, GigabitEthernet0/2
C 10.1.200.4/30 is directly connected, GigabitEthernet0/3
C 10.1.200.8/30 is directly connected, GigabitEthernet1/0
C 10.1.255.255/32 is directly connected, Loopback0
C 10.100.0.0/30 is directly connected, GigabitEthernet0/1

site1-dist#show ip protocols
Routing Protocol is "ospf 1"
Outgoing update filter list for all interfaces is not set
Incoming update filter list for all interfaces is not set
Router ID 10.1.255.255
Number of areas in this router is 1. 1 normal 0 stub 0 nssa
Maximum path: 4
Routing for Networks:
Routing on Interfaces Configured Explicitly (Area 0):
Loopback0
GigabitEthernet1/0
GigabitEthernet0/3
GigabitEthernet0/2
GigabitEthernet0/1
site1-access-1
site1-access1#show ip route connected
Codes: L - local, C - connected, S - static, R - RIP, M - mobile, B - BGP
D - EIGRP, EX - EIGRP external, O - OSPF, IA - OSPF inter area
N1 - OSPF NSSA external type 1, N2 - OSPF NSSA external type 2
E1 - OSPF external type 1, E2 - OSPF external type 2
i - IS-IS, su - IS-IS summary, L1 - IS-IS level-1, L2 - IS-IS level-2
ia - IS-IS inter area, * - candidate default, U - per-user static route
o - ODR, P - periodic downloaded static route, H - NHRP, l - LISP
a - application route
+ - replicated route, % - next hop override, p - overrides from PfR
Gateway of last resort is not set
10.0.0.0/8 is variably subnetted, 73 subnets, 3 masks
C 10.1.11.0/24 is directly connected, Loopback11
C 10.1.12.0/24 is directly connected, Loopback12
C 10.1.13.0/24 is directly connected, Loopback13
C 10.1.200.0/30 is directly connected, GigabitEthernet0/1
C 10.1.255.1/32 is directly connected, Loopback0

site1-access1#show ip protocols
*** IP Routing is NSF aware ***
Routing Protocol is "application"
Sending updates every 0 seconds
Invalid after 0 seconds, hold down 0, flushed after 0
Outgoing update filter list for all interfaces is not set
Incoming update filter list for all interfaces is not set
Maximum path: 32
Routing for Networks:
Routing Information Sources:
Gateway Distance Last Update
Distance: (default is 4)
Routing Protocol is "ospf 1"
Outgoing update filter list for all interfaces is not set
Incoming update filter list for all interfaces is not set
Router ID 10.1.255.1
Number of areas in this router is 1. 1 normal 0 stub 0 nssa
Maximum path: 4
Routing for Networks:
Routing on Interfaces Configured Explicitly (Area 0):
Loopback0
Loopback11
Loopback12
Loopback13
GigabitEthernet0/1

site1-access1#show ip route ospf
Codes: L - local, C - connected, S - static, R - RIP, M - mobile, B - BGP
D - EIGRP, EX - EIGRP external, O - OSPF, IA - OSPF inter area
N1 - OSPF NSSA external type 1, N2 - OSPF NSSA external type 2
E1 - OSPF external type 1, E2 - OSPF external type 2
i - IS-IS, su - IS-IS summary, L1 - IS-IS level-1, L2 - IS-IS level-2
ia - IS-IS inter area, * - candidate default, U - per-user static route
o - ODR, P - periodic downloaded static route, H - NHRP, l - LISP
a - application route
+ - replicated route, % - next hop override, p - overrides from PfR
Gateway of last resort is not set
10.0.0.0/8 is variably subnetted, 73 subnets, 3 masks
O 10.1.21.0/24 [110/21] via 10.1.200.1, 00:07:01, GigabitEthernet0/1
O 10.1.22.0/24 [110/21] via 10.1.200.1, 00:07:01, GigabitEthernet0/1
O 10.1.23.0/24 [110/21] via 10.1.200.1, 00:07:01, GigabitEthernet0/1
O 10.1.31.0/24 [110/21] via 10.1.200.1, 00:07:11, GigabitEthernet0/1
O 10.1.32.0/30 [110/21] via 10.1.200.1, 00:07:11, GigabitEthernet0/1
O 10.1.33.0/30 [110/21] via 10.1.200.1, 00:07:11, GigabitEthernet0/1
O 10.1.200.4/30 [110/20] via 10.1.200.1, 00:07:11, GigabitEthernet0/1
O 10.1.200.8/30 [110/20] via 10.1.200.1, 00:07:11, GigabitEthernet0/1
O 10.1.255.2/32 [110/21] via 10.1.200.1, 00:07:01, GigabitEthernet0/1
O 10.1.255.3/32 [110/21] via 10.1.200.1, 00:07:11, GigabitEthernet0/1
O 10.1.255.255/32 [110/11] via 10.1.200.1, 00:07:11, GigabitEthernet0/1
O 10.2.11.0/24 [110/41] via 10.1.200.1, 00:06:37, GigabitEthernet0/1
O 10.2.12.0/24 [110/41] via 10.1.200.1, 00:06:37, GigabitEthernet0/1
O 10.2.13.0/24 [110/41] via 10.1.200.1, 00:06:37, GigabitEthernet0/1
O 10.2.21.0/24 [110/41] via 10.1.200.1, 00:06:27, GigabitEthernet0/1
O 10.2.22.0/24 [110/41] via 10.1.200.1, 00:06:27, GigabitEthernet0/1
O 10.2.23.0/24 [110/41] via 10.1.200.1, 00:06:27, GigabitEthernet0/1
O 10.2.31.0/24 [110/41] via 10.1.200.1, 00:06:37, GigabitEthernet0/1
O 10.2.32.0/24 [110/41] via 10.1.200.1, 00:06:37, GigabitEthernet0/1
O 10.2.33.0/24 [110/41] via 10.1.200.1, 00:06:37, GigabitEthernet0/1
O 10.2.200.0/30 [110/40] via 10.1.200.1, 00:06:37, GigabitEthernet0/1
O 10.2.200.4/30 [110/40] via 10.1.200.1, 00:06:37, GigabitEthernet0/1
O 10.2.200.8/30 [110/40] via 10.1.200.1, 00:06:37, GigabitEthernet0/1
O 10.2.255.1/32 [110/41] via 10.1.200.1, 00:06:37, GigabitEthernet0/1
O 10.2.255.2/32 [110/41] via 10.1.200.1, 00:06:27, GigabitEthernet0/1
O 10.2.255.3/32 [110/41] via 10.1.200.1, 00:06:37, GigabitEthernet0/1
O 10.2.255.255/32 [110/31] via 10.1.200.1, 00:06:37, GigabitEthernet0/1
O 10.3.11.0/24 [110/41] via 10.1.200.1, 00:06:16, GigabitEthernet0/1
O 10.3.12.0/24 [110/41] via 10.1.200.1, 00:06:16, GigabitEthernet0/1
O 10.3.13.0/24 [110/41] via 10.1.200.1, 00:06:16, GigabitEthernet0/1
O 10.3.21.0/24 [110/41] via 10.1.200.1, 00:06:06, GigabitEthernet0/1
O 10.3.22.0/24 [110/41] via 10.1.200.1, 00:06:06, GigabitEthernet0/1
O 10.3.23.0/24 [110/41] via 10.1.200.1, 00:06:06, GigabitEthernet0/1
O 10.3.31.0/24 [110/41] via 10.1.200.1, 00:06:06, GigabitEthernet0/1
O 10.3.32.0/24 [110/41] via 10.1.200.1, 00:06:06, GigabitEthernet0/1
O 10.3.33.0/24 [110/41] via 10.1.200.1, 00:06:06, GigabitEthernet0/1
O 10.3.200.0/30 [110/40] via 10.1.200.1, 00:06:16, GigabitEthernet0/1
O 10.3.200.4/30 [110/40] via 10.1.200.1, 00:06:16, GigabitEthernet0/1
O 10.3.200.8/30 [110/40] via 10.1.200.1, 00:06:16, GigabitEthernet0/1
O 10.3.255.1/32 [110/41] via 10.1.200.1, 00:06:16, GigabitEthernet0/1
O 10.3.255.2/32 [110/41] via 10.1.200.1, 00:06:06, GigabitEthernet0/1
O 10.3.255.3/32 [110/41] via 10.1.200.1, 00:06:06, GigabitEthernet0/1
O 10.3.255.255/32 [110/31] via 10.1.200.1, 00:06:16, GigabitEthernet0/1
O 10.4.11.0/24 [110/41] via 10.1.200.1, 00:05:38, GigabitEthernet0/1
O 10.4.12.0/24 [110/41] via 10.1.200.1, 00:05:38, GigabitEthernet0/1
O 10.4.13.0/24 [110/41] via 10.1.200.1, 00:05:38, GigabitEthernet0/1
O 10.4.21.0/24 [110/41] via 10.1.200.1, 00:05:38, GigabitEthernet0/1
O 10.4.22.0/24 [110/41] via 10.1.200.1, 00:05:38, GigabitEthernet0/1
O 10.4.23.0/24 [110/41] via 10.1.200.1, 00:05:38, GigabitEthernet0/1
O 10.4.31.0/24 [110/41] via 10.1.200.1, 00:05:38, GigabitEthernet0/1
O 10.4.32.0/24 [110/41] via 10.1.200.1, 00:05:38, GigabitEthernet0/1
O 10.4.33.0/24 [110/41] via 10.1.200.1, 00:05:38, GigabitEthernet0/1
O 10.4.200.0/30 [110/40] via 10.1.200.1, 00:05:48, GigabitEthernet0/1
O 10.4.200.4/30 [110/40] via 10.1.200.1, 00:05:48, GigabitEthernet0/1
O 10.4.200.8/30 [110/40] via 10.1.200.1, 00:05:48, GigabitEthernet0/1
O 10.4.255.1/32 [110/41] via 10.1.200.1, 00:05:38, GigabitEthernet0/1
O 10.4.255.2/32 [110/41] via 10.1.200.1, 00:05:38, GigabitEthernet0/1
O 10.4.255.3/32 [110/41] via 10.1.200.1, 00:05:38, GigabitEthernet0/1
O 10.4.255.255/32 [110/31] via 10.1.200.1, 00:05:48, GigabitEthernet0/1
O 10.100.0.0/30 [110/20] via 10.1.200.1, 00:07:11, GigabitEthernet0/1
O 10.100.0.4/30 [110/30] via 10.1.200.1, 00:07:11, GigabitEthernet0/1
O 10.100.0.8/30 [110/30] via 10.1.200.1, 00:07:11, GigabitEthernet0/1
O 10.100.0.12/30 [110/30] via 10.1.200.1, 00:07:11, GigabitEthernet0/1
O 10.100.255.255/32
[110/21] via 10.1.200.1, 00:07:11, GigabitEthernet0/1
You can see the large size of the access-switch routing table in the “show ip route ospf” output at the end. OSPF, like other routing protocols will provide you global reachability, but when left to default settings, it can quickly become cumbersome. In the next post, we will bring out the first tool in our OSPF optimization toolbox, which is leveraging multiple areas.
When it comes to global reachability within an organization, dynamic routing is a beautiful thing. There are multiple internal gateway protocols (IGPs) out there, but in this series of posts, we are going to focus on OSPF. Taking this focus a step further, we will go through IP/subnet design and routing table optimization.
As with any task in network infrastructure, you need to understand your requirements before you can develop and present a design. With dynamic routing implementation, once you understand your requirements, then comes the fun part of design. To me, it’s not just picking a protocol and off you go. You will want a routing domain that is simple, efficient, and scalable. The foundation for these pillars is IP address/subnet design.
Simplicity – Being able to quickly understand a network from a Layer 3 perspective is important when it comes to operations, troubleshooting, and future design. Having a well thought out IP scheme is essential.
Efficiency – Proper IP design allows for route summarization, which leads to smaller routing tables. This is good for both the routers and the network staff. The routers can perform lookups efficiently and the administrators/engineers can more easily understand the routing table. A happy engineer equals a happy network, right?
Scalability – This feeds off of efficiency. Summarization and smaller routing tables can scale well with the organization.
In this series of posts, we will go through an OSPF design example progressing from single area to multi-area OSPF to optimize routing tables throughout the OSPF domain. The topology itself is a simple hub and spoke design with a core at the “hub” connects to multiple outlying sites as the “spokes”. Each spoke has a distribution layer switch with three access layer switches connected to it. This is a routed access design with IP routing all the way to the edge (access layer). This means that we do not have VLANs trunked between the distribution and access layer. In “traditional” routed networks, a strong, well thought out IP address design is incredibly important for efficiency and scalability. I put “traditional” in quotes because software defined networks with overlay technologies are really changing the game when it comes to routing and IP address design. Throughout this series, we will be thinking in terms of a traditional network exclusively.
With IP address design in mind, I decided to set up each site with its own /16 IP network. Each access layer switch has three subnets of the respective /16s attached, that are participating in OSPF. The reason behind this is for summarization and routing table efficiency and scalability. This will be seen and explained throughout this series. In the next post, we will see this topology built out as a single OSPF area to see that improvements can be made to support efficiency and scale.
As a refresher for this series, here is a list of OSPF LSA types:
                     aSPY//YASa
             apyyyyCY//////////YCa       |
            sY//////YSpcs  scpCY//Pp     | Welcome to Scapy
 ayp ayyyyyyySCP//Pp           syY//C    | Version 2.4.3
 AYAsAYYYYYYYY///Ps              cY//S   |
         pCCCCY//p          cSSps y//Y   | https://github.com/secdev/scapy
         SPPPP///a          pP///AC//Y   |
              A//A            cyP////C   | Have fun!
              p///Ac            sC///a   |
              P////YCpc           A//A   | Craft me if you can.
       scccccp///pSP///p          p//Y   |                   -- IPv6 layer
      sY/////////y  caa           S//P   |
       cayCyayP//Ya              pY/Ya
        sY/PsY////YCc          aC//Yp
         sc  sccaCY//PCypaapyCP//YSs
                  spCPY//////YPSps
                       ccaacs
                                       using IPython 7.11.0
I came across a pretty cool tool during the first part of section 3 of my SANS503 course: Scapy. Using this tool you can do many things, for example, read in packets, edit packets and create entirely new packets just to name a few.
The easiest way to get started it to just type out ‘scapy’ from your Linux cmd prompt and it’ll drop you into a what looks like an interactive python interpreter.
>>>
From here, you can begin to craft your packet[s]. To do this, you’ll create your packet by specifying values layer by layer. For example, you’ll give arguments for your Ethernet layer, IP layer and application layer. I like to use the built in functions to see what’s possible within a specific layer and view the specific syntax i’ll need:
Not that we need to put values in this field as scapy is smart enough to use our own IP stack to fill in the layer two values, with that being said, if we are going to create a packet we still need Ethernet headers. For the sake of this post, lets put some values in there cause it’s fun! Here’s how we do that:
>>> e = Ether(src="11:22:33:44:55:66", dst="77:88:99:AA:BB:CC")
Since we used the ls(Ether) function we know the exact syntax to use when creating our ‘e’ variable, specifically ‘src’ and ‘dst’ in this case. We can simply type our new variable ‘e’ to see it’s contents:
>>> e
<Ether  dst=77:88:99:AA:BB:CC src=11:22:33:44:55:66 |>
Next up, let’s build our IP header, again, the easist way to get started and make sure you know the correct syntax is to use the call the ls(IP) function:
Now we know the syntax for each part of the IP packet when we create our new variable. Let’s just specify the ‘src’ and ‘dst’ and leave every other value the scapy default.
>>> i = IP(src="10.0.0.1", dst="192.168.0.1")
>>> e
<Ether  dst=77:88:99:AA:BB:CC src=11:22:33:44:55:66 |>
>>> i
<IP  src=10.0.0.1 dst=192.168.0.1 |>
>>>
Alright, now we can go up one layer and decide whether we want our packet to have a TCP or UDP header. Feeling inspired by a David Bombal tweet asking a question about traceroute, let’s go the UDP route. Checking out the Cisco documentation it looks like a traceroute is sent via UDP port 33434. If you’ve followed the post this far you should know the drill, let’s ls(UDP) to see what our options are and syntax to use when creating our variable for this header:
A couple of things to note at this point. First off, scapy will compute a correct checksum when we end up creating our packet if we don’t specify a value. Secondly, isn’t this fun?! Let’s create a UDP header with the variable ‘u’ and specify simply the destination port in accordance with traceroute documentation and leave everything else the scapy default:
>>> u = UDP(dport=33434)
>>> u
<UDP  dport=33434 |>
Last but not least we need an ICMP header to complete our crafted traceroute packet. I’m just going to create the header with scapy defaults throughout.
>>> icmp = ICMP()
>>> icmp
<ICMP  |>
I just remembered, if we are going to be ‘crafting’ a traceroute packet we will want to specify the TTL of 1 to start off, we don’t want to keep the default TTL. In order to do this we have to know which header specifies this value. It’s questions like these that I think crafting random packets really shines. We are getting to hammer down on layering, what’s in each header and soon we will be putting all those layers together. Before I get too happy let me go in and change the TTL in the IP header:
>>> i.ttl=1
>>> i
<IP  ttl=1 src=10.0.0.1 dst=192.168.0.1 |>
Before we put it all together let’s take a look at everything we’ve done to this point in the order we will soon specify when we create our packet.
>>> e
<Ether  dst=77:88:99:AA:BB:CC src=11:22:33:44:55:66 |>
>>> i
<IP  ttl=1 src=10.0.0.1 dst=192.168.0.1 |>
>>> u
<UDP  dport=33434 |>
>>> icmp
<ICMP  |>
Remember that the order is important because we can tell scapy to smash these together however we want, but if we do that, devices won’t understand our packet. To put all our headers together we will use the variable ‘packet’ and ‘/’ between each variable.
One last thing, to close this post out, let’s export the viable ‘packet’ as a pcap file and then read in that file with tcpdump. If you need an intro on tcpdump I wrote a quick intro as my first attempt at a ‘technical’ type post a few weeks ago. We write our packet to a file using the wrpcap function:
We can see our source and destination MAC addresses have been inserted and it looks like my source IP got changed but the destination IP with the correct source port of 33434 like we specified are there and we can also see that the ttl is 1 like we specified. Hope you enjoyed this little walk through and are excited enough to dig into some reference docs and see all the things you can do with this application. Till next time!
The third section of my SANS503 course has a huge section, the second biggest of the entire course, dealing with some 110+ slides on snort. I’m not here to give you the history of snort, IDS/IPS placement within your enterprise or any of that, instead I just want to introduce you to the basic structure of a basic snort rule. The most important thing to takeaway from snort rules is that there is no concept of ‘or’ within a rule. It either matches and does the action or it doesn’t.
First things first, if you’re going to create your own custom rules you’ll specify the location of this file in your overall snort configuration file [snort.conf] which is by default ‘local.rules’. At this point you will have to decide upon which text editor you will use to create and edit your new rules. This can become a contentious conversation for some. For me:
vim local.rules
A rule consists of two main parts, a header and a body. The header is mandatory and the body is not. There are seven mandatory options in the snort rule header:
Action | Protocol | SourceIP | SourcePort | Direction | DestIP | DestPort
-------|----------|----------|------------|-----------|--------|----------
alert  | ip       | any      | any        | ->        | same as| any
pass   | tcp      | IP       | #          | <>        | Source | #
log    | udp      | IP/CIDR  |            |           | IP     |
drop   | icmp     | !IP      |            |           | options|
sdrop  |          | $Variable|            |           |        |
reject |          |          |            |           |        |
The above chart doesn’t outline every option within each category but it should give you a pretty good overview of what’s possible within each spot. Most importantly, I’ll explicitly state that you can define vars in your snort.conf file and use those vars in your snort rule instead of hard coding them in the rule itself.
Here is an example of a header, including calling a variable:
alert TCP $HOME_NET ANY -> ANY $HTTP_PORTS
Now let’s dig into the body a bit and go over some common options you may find in a rule body. The first thing we need to do is to start the body, and to do this we use a ‘(‘ after the header. Then notice how the keyword and argument are separated by ‘:’ , ended by a ‘;’ and the body is ultimately closed by ‘)’.
alert IP any any <> any any ( \
     keyword:argument; \
     keyword:argument_1,argument_2; )
Below is an example of some keywords and arguments in an actual rule:
alert TCP $HOME_NET ANY -> ANY $HTTP_PORTS ( \
     msg:"I LOVE SNORT"; \
     sid:1000001; rev:1; \
     content:"big_poop"; \
     content:"SmellsBad", nocase; )
I’m pretty new at writing rules myself, but this is the format I like to use. After starting the body, I like to begin the body on a new line by using ‘\’ and having each keyword and it’s associated arguments having it’s own line. I find this much easier to see what’s going on if you have your rules written like this rather than all on one line. The ‘msg’ keyword will display in the log if this rule matches traffic so make sure you make it useful. Custom rules begin with a ‘sid’ of above 1 million and instead of making a new rule or ‘sid’ when you change something you can increment the ‘rev’ to keep track of the revision number. It’s also good practice to store your old rules, perhaps in a folder called rules.old so that you can rollback to a previous configuration of the rule if needed.
Content is probably the most common keyword to use within a snort rule. It will search for the content within the packets payload. The ‘nocase’ keyword simply tells snort that you don’t care about case and will match any case that matches your ‘content’ argument. You can further optimize the rule by telling snort where to look for the content by using the offset and depth keywords. Offset tells snort where to start looking, with offset 0 being the very beginning of the payload and depth tells snort how many bytes to look in.
alert TCP $HOME_NET ANY -> ANY $HTTP_PORTS ( \
     msg:"I LOVE SNORT"; \
     sid:1000001; rev:1; \
     content:"big_poop"; offset:4; depth:20; \
     content:"SmellsBad", nocase; )
Beyond offset and depth, there are two relative pointers you can use. Distance will tell snort where to start looking for the content relative to where snort left off in your previous content argument. The within keyword is designed to be used with distance to instruct snort how many bytes to examine after it determines the starting point to search.
alert TCP $HOME_NET ANY -> ANY $HTTP_PORTS ( \
     msg:"I LOVE SNORT"; \
     sid:1000001; rev:1; \
     content:"big_poop"; offset:4; depth:20; \
     content:"SmellsBad", nocase; distance:20; within:10)
Now I know there are a bunch more ways to further optimize or specify your rule but this is only an intro to snort rules in general, not a masters thesis. With that said one fun thing to do when adding on to your rule or creating your rule for the first time is to run it against some traffic. If you have a pcap, look at the details of a packet and try to create a rule that will match that traffic.
You can run snort on a pcap by using the ‘-r <filename>’ option and then point to your snort conf file with the ‘-c <filename>’ option. Furthermore you can specify a filename for your log using the ‘-l <filename>’ option:
One last tip, when creating your rule it’s a good idea to create it line by line. After you add a line, specifying your rule further, test it against the traffic it’s designed to alert and make sure it’s still working they way you want before moving on. This makes troubleshooting your rule easier than if you go all out creating a multiple line rule and then realizing your rule isn’t catching traffic.
If you have further tips, feel free to leave a comment to let me know. I’m just starting myself and understand this is the best time to start building good habits 🙂 Till next time!
As many network professionals know, Type 0 (cleartext) passwords are a big no-no. With that said, Cisco introduced Type 7 and 5 passwords in the early 90s to protect stored passwords.
However, after more than 25 years, the Type 7 password type no longer serves its original purpose of keeping the password secret. That said, it is best practice to avoid it as much as possible.
Nowadays, the majority of network professionals know and use Type 5 passwords. While Type 5 is still sufficient with a strong password, did you know that it seems Cisco has deprecated it in favor of the new hashing algorithms?
Find out more about the new hashing algorithm here. In this article, I also demonstrated how to launch a dictionary attack on the hashing algorithm.
Bitcoin continues to be pioneering as the currency continues to hit all-time high every new season, particularly in 2020.. As at the time this article was written. It currently trades at $26,765. But one of Crypto’s interesting applications is not that individuals trade it to become richer. It’s about solving big challenges that make money for you. It’s about turning capitalist greed (the burden of making payment across countries) into unselfish open-source software.
Crypto doesn’t really have the best rep in the tech world, just about the same thing that happened when the internet started. But Crypto is just a slice of the cake. People often don’t talk about the technology in which Crypto is built upon, that is called “Blockchain.”
The term “Blockchain” always comes to my mind when I hear or read the word ” Cryptocurrency.” But the media frequently correlates “Cryptocurrency” with “illegal transactions.”
In this article, we will briefly examine how valuable the implementation of blockchain technology is being developed, as well as how this offers an enormous opportunity for individuals who study Network Engineering.
With Blockchain What Can You Achieve?
Beyond cryptocurrency, there are interesting things you can achieve with a blockchain:
A Data Which Does Not Change: A company like Twitter is a privately owned social media company. This means that the data can be changed at any time by anyone who has access to the company’s admin database. Unlike a company like Twitter and other Web 2.0 companies, a blockchain is owned by no one, meaning that no single owner can serve as a single source of information for other users.
Digital Scarcity: In a blockchain network, data may be owned by other users, but cannot be copied and distributed to other users. This gives value to an asset the user owns.
Payments: Since cryptocurrency has been integrated into the blockchain, sending valuable assets in the form of tokens such as Bitcoin, Ethereum, etc. has been made possible and smooth.
User Identification & Data Privacy: This one marvels me a lot because this is what Web 3.0 (Blockchain Web) is built upon. With user identification, a user is given a single blockchain address to sign into all web pages/web applications on the web. We will talk more about this on the next section. With data privacy, a user can control who has access to their information. For instance, if a user logs off a site, the site owners can no longer access their data directly. Unlike Web 2.0 in which the site owners have user credentials stored in their database.
Web 2.0 vs Web 3.0
With Web 2.0 a user has multiple means of identification on the internet. They can also have multiple identification to the same website. One user can have a G-mail, iCloud, or an outlook user identification.
Figure 1: A User with Multiple Identities
But with Web 3.0 which leverages blockchain, the case is different.
On Web 3.0, different blockchain have their network, their community participants and a software which acts as a wallet & form of identification for accessing this network. The most popular blockchain network at the moment is the Ethereum network and it is powered by a popular software called Metamask. This means that on an Ethereum network, they are several websites inside the network. And to log into each of these websites, users only need a single Ethereum blockchain address.
Figure 2: A User with A Single Identity Accessing Multiple Platforms
Figure 3: A User (Me) Accessing a Platform on Web 3.0 With a Blockchain Address
Payments on eCommerce websites are also made with the cryptocurrency of the blockchain network.
Figure 4: A User (Me) Trying to Purchase an Artwork from an E-commerce Website on Web 3.0 Using My Blockchain Address
Users can even build their network, with its own cryptocurrency. That is why you see new cryptocurrencies every day.
Okay, if you are non-IT reader who just wants to know what the future web you might be using soon will look like, you can stop here. One interesting value I feel blockchain is bringing in the telecommunication industry is a proof of location protocol.
FOAM Proof of Location Protocol
Okay, when I say FOAM, I don’t mean the comfy soft material used in making beds. FOAM is a startup who is providing value for people who think that they deserve to have control over who get access to their locations at all time.
For satellites to get the location of a device who has a GPS installed, the GPS sends a signal to the satellite 🛰️, then the satellite calculates the difference in time of arrival, and distance of this signal.
Figure 5: A Satellite Determining the Location of a Device
The FOAM protocol also applies this approach of using four objects (called Zone Anchors) with specialized IoT hardware so they can synchronize themselves over the radio signal they are receiving from the device which came into the area.
Figure 6: Zone Anchors Determining the Location of a Device
Figure 7: Specialized FOAM Zone Anchors Being Installed in Brooklyn, New York
In case you are wondering, why does the satellite or the Zone Anchors have to be four to locate an image?
As each data from one satellite places you in a bubble around the satellite, you need four satellites. You can narrow the possibilities to one single point by evaluating the intersections.
Figure 8: How a Satellite locate an Object
Drawbacks with Depending on GPS
It has a single point of failure, which are satellites. The New York stock exchanges use GPS to automate trades, ATM and card transactions require location data, all transportation machines use GPS, etc. So, having redundancy is extremely important.
It’s susceptible to signal jamming
A GPS received can be deceived with a wrong GPS signal
How Does FOAM Blockchain Provide Opportunity for Network Engineers
This location-based protocol implementation using blockchain proves that a time where all things will be connected securely with 5G is bright and approaching rapidly. And it provides countless opportunities for people who will study network engineering because these engineers will be the one configuring and maintaining these devices.
The first step to starting this journey, is by taking the Cisco Certified Network Associate (CCNA) exam. This is because this certification has a low barrier to entry, it provides a positive force in the society (IoT, Blockchain, etc.), and lastly it has a global impact.
Another reason is that this implementation proves that blockchain technology is promising, and blockchain uses distributed system technology which will sky rocket with 5G, meaning that a lot of automation will be achieved. Network engineers have begun taking on automation, by studying the Cisco Development Network Associate (DEVASC) you have the opportunity to be skilled enough to take on this new opportunity.
When learning, I often try to do as my teacher. For example, when I went through Kirk Byers free network automation course he used Vim exclusively which meant I got to get pretty comfortable with it myself. Now that I’m on to day 2 materials of my SANS SEC503 course I find myself getting deep into tcpdump. In day 1 a lot of things could either be done with Wireshark or tcpdump but in day 2 there is a bigger emphasis in getting the most out of tcpdump. The instructor seems to really fancy utilizing tcpdump filters over looking things over in Wireshark so I might as well buckle down and do as my instructor once more! Furthermore, as I’ve experienced in person and discussed in this class, attempting to open a very large pcap in Wireshark is most likely not to go well. Instead, we should be able to narrow our search and extract a smaller subset of data in tcpdump before we open it up in Wireshark. What better way to grasp the material than attempt to explain it! Strap in!
To get to where we need to I will need to introduce a few things before we get our hands dirty using filters in tcpdump. To start, let’s explore one of the most famous interview questions, at least at the junior positions in tech, the tcp 3-way handshake. Below is Figure 7 from RFC 793, Transmission Control Protocol.
      TCP A                                                TCP B

  1.  CLOSED                                               LISTEN

  2.  SYN-SENT    --> <SEQ=100><CTL=SYN>               --> SYN-RECEIVED

  3.  ESTABLISHED <-- <SEQ=300><ACK=101><CTL=SYN,ACK>  <-- SYN-RECEIVED

  4.  ESTABLISHED --> <SEQ=101><ACK=301><CTL=ACK>       --> ESTABLISHED

  5.  ESTABLISHED --> <SEQ=101><ACK=301><CTL=ACK><DATA> --> ESTABLISHED

          Basic 3-Way Handshake for Connection Synchronization
We can see 2 flags being sent along with sequence and acknowledgement numbers to establish the connection, namely, SYN and ACK.
SYN – Session init request by client SYN/ACK – Server response to SYN, reflecting a listening port ACK – Acknowledge data, flag should be set on every packet afer the init SYN
Now let us look at the TCP Header to examine where these flags exist, also taken from RFC 793.
To understand what we are looking at in the header we must first understand how it is broken down. Each number across the top numbering 1 – 8 represents 1 bit. 4 bits = 1 nibble and 2 nibbles = 1 byte. For example, the first field titled ‘source port’ is 2 bytes/4 nibbles/16 bits long.
The next thing we need to understand before we dive into tcpdump is offset numbers. When looking at the tcp header diagram above, starting in the top left corner, every byte will be one offset starting with 0. Thus, if we look at ‘source port’ it’s contents take up both offset 0 and 1. Offset 0 would by the high order byte and offset 1 would be the low order byte for the ‘source port’ part of the TCP header.
Explaining high order vs low order could be a post of it’s own i suppose, but for our purposes here i’ll try to summarize it into two sentences. If a number is on the left it is usually of more importance in that it effects the overall number more than a number on the right. If you change a number in the tens place [left] you cause more overall change than if you change a number in the ones place [right].
To get back to the TCP handshake, we can see all the flags are located in offset 13. Again simply count each byte starting at 0 from the top left to find out your offset number.
Besides SYN and ACK we find the following additional flags:
PUSH – Send data URG – Signal for out-of-band data FIN – Graceful termination RST – Immediate termination ECE, CWR – Explicit congestion notification related
Alright, now that we have a bit of background taken care of let us get to our first problem to solve. Use tcpdump commands to find TCP establishment attempts from clients to servers. From this filter we will be able to derive things such as what server ports did the clients attempt to establish a connection with.
First part of the question, find TCP establishment attempts, this would require the SYN bit be set to be turned on. In the following i’ll show you what this will look like in offset 13. First in binary and then converting to hex which we will need for our tcpdump filter.
Thus, our first tcpdump command and filter will be a variation of:
tcpdump -r <file.pcap> -nt 'tcp[13] = 0x02'
The ’13’ is the offset within the tcp header we are matching and ‘= 0x02’ means that we are only matching to the SYN packet being set which I think is easy to visualize when looking at the binary conversion we did above. The tcpdump option of ‘-r’ is simply reading the file that follows meanwhile ‘-n’ suppresses hostname lookups and the -t option hides the timestamps in the output.
Sample output from a single matched packet:
IP 192.168.10.59.55796 > 192.168.10.7.25: Flags [S], seq 2766660809, win 29200, options [mss 1460,sackOK,TS val 86960251 ecr 0,nop,wscale 7], length 0
In this request, we can see that the client attempts to connect via port 25
Let’s say we to run through the entire pcap file, pull out the port numbers and only display the unique ones we could run the following:
The cut tool is a fast way to parse text in linux. The -f option specifies which fields you want to capture while the -d option specifies what separates the fields. I created the above command by cutting up the first 20 packets till I got what I was looking for and then ran my filter on the entire file. To limit the amount of packets in the file you can use either the -c [number] option on tcpdump or | head.
To solidify our understanding let’s try to see the servers response or in other words, the classic SYN ACK.
To visualize what we need to do in our tcpdump filter let’s break it down to what that would look like in offset 13:
Above, we’ve turned on the ACK and SYN bits in accordance with the tcp header diagram. Translating both nibbles into hex we end up with 0x12 and thus our filter would look like ‘tcp[13] = 0x12’
In tcpdump a SYN ACK will be displayed as ‘[S.]’ in the flags section. If you wanted to cut out the specific ports you can use the -c of tcpdump of the first 10 entries until you get your cut filter displaying what you want like we did in the first example but I won’t demonstrate that again here.
Did you know we can use a mask with our search filter in tcpdump?! Amazing right! This is what actually prompted me to write a blog about tcpdump filters in the first place. As you can see it took a bit of work to make it to this point but here is where things get fun.
Let’s say you wanted to create a filter that will display all packets that has either a FIN or RST flag set. In other words, we want to look at all the termination packets.
To do this, we want to have a mask that will ignore all of the bits except for what we care about, namely, RST and FIN. In the following I’m going to write out the same visualization I did when we came up with the mask above except I’m going to put an ‘x’ instead of a ‘1’ on our important bits.
‘!=’ simply means not equal to. In this specific case we are saying if either of the bits we care about are turned on or both of them are turned on, we want to see them. In the tcpdumps flag section a termination will show either [F.] or [R.]
For our final act let’s write a filter to match on TCP connecting on port 25 with both PUSH and ACK flags set and any other flags maybe set. You can tell hopefully just by reading this that we will need to use a mask since we see a ‘maybe’ in our problem statement.
Since we want both flags to be set, not either, we won’t use ‘!= 0’ instead we will make it ‘= 0x18’
tcpdump -r <filename.pcap> -tn 'tcp dst port 25 and tcp[13] & 0x18 = 0x18'
reading from file <filename.pcap>
IP 192.168.10.61.59756 > 192.168.10.7.25: Flags [P.], seq 15:108, ack 118, win 229, options [nop,nop,TS val 86920654 ecr 85610820], length 93: SMTP: MAIL FROM:<andre@bigpoop.net> SIZE=424
‘tcp dst port 25’ is a macro, meaning it can be run it as is instead of writing out which specifc bit in a offset needs to be on or off to work, someone wrote out a macro to make it easier. One other thing to notice in the filter above is that we used ‘and’ to connect the macro with our other search parameter and mask. So you can connect two search parameters with ‘and’ and you connect your search parameter with your mask with ‘&’
Let’s say you didn’t know the macro existed, you could look at the TCP header and see which offset the destination port is. Go ahead, go and count from the top left, each byte and see if you can get the correct offset numbers. Did you get it? Destination port numbers are set in offsets 2 and 3 and to get up to 25 like the original question asked above we only need the low order byte, offset 3.
So instead of writing ‘tcp[13]’ like in all of our previous examples remember that we are in offsets 2 and 3 here. The following is the logical equivilant to ‘tcp dst port 25 and tcp[13] & 0x18 = 0x18’ The purpose of this section is just to specify what is happening under the hood so to speak when you write out ‘tcp dst port 25’
'tcp[2] = 0x00 and tcp[3] = 0x19 and tcp[13] & 0x18 = 0x18'
Also, as is the case in many different aspects of IT, there is more than one way to accomplish the same task. In this case, instead of using ‘tcp[3] = 0x19 and tcp[2] = 0x00’ we can shorten this up as ‘tcp[2:2] = 0x0019’ which means we are starting at the 2nd offset and matching the next 2 offsets.
It’s been pretty fun learning about packet headers, hex and binary conversion, creating filters to include masks as a tcpdump filter option. The best part about learning about packet headers is that you can do so pretty easily. Tcpdump and Wireshark can be installed simply and support is everywhere. You can start capturing your home lab within a few minutes! Also, networking instructors like Nick Russo have made pcaps highlighting certain types of traffic publicly available. I’m planning on updating my progress as it relates to filters as I dive deeper into SEC503. I hope you’ll join me 🙂
We are about to wrap up a year where the word “unprecedented” has been heard and read by each one of us dozens of times. You’ll hear it once more from me. Many of the plans we made last year were derailed. Families and jobs have been affected. The world has been in turmoil. Even though so much has happened, we have adjusted. We’ve found ways to continue moving forward and that is where we have found our strength, in the adjustment. As people working in IT, we know more than anyone that things can change at the last second. Even when projects seem to be going right on track, a last-minute call can take the team in a different direction. I just wanted to write about two ways IT has adjusted during this unprecedented year. There is value in being able to measure, adjust, and make the change.
BasementVue
Over the years I’ve taken certification tests and they have all been in a quiet controlled environment. I expect to show up, jam my personal belongings into a small locker, and do my best not to make eye contact as I walk to my isolated test center PC. If you’ve taken a certification test, that has most likely been your experience. However, if you have recently taken a test it has probably been in a makeshift test center you created at home. This year I took my Palo Alto Certified Network Security Engineer (PCNSE) exam at home. I could hear the water coming down the pipes above me as the kids took their shower. It was…different. I taped a paper on the basement door that said “Do Not Open – Taking Test!!!” As instructed by the test engine instructions I took pictures of my entire area, submitted them, and waited for the test to begin. I am not sure how many minutes went by, but it felt like the test would never start. I am not sure if that was just me, but I tried not to click on anything just in case. The entire time my mind kept racing “What do I do if my internet starts having issues?” “What if the kids think dad is playing hide-and-seek?” It did not happen though. No fiber cuts and my wife kept the children entertained upstairs. I passed the test. It was different than driving in to the nearby college test center, but it was comfortable. I’d do it again even as things continue to normalize. Or until the fiber cut happens. As you continue to study for your certs, know that taking a test at home is a perfect way to add a win. Depending on your situation, you might not be able to sit at home and take a test.
Short Commute
As the pandemic continued to impact the world, businesses sent their workforce home. Schools were forced to jump into the world of distance learning. Church services were now video-only. For many, it was like an unexpected bucket of cold water being dumped on them. Everyone was scrambling to figure out how to keep things going remotely. IT teams all over the world were at the center of that change. I found myself looking at redundancy and security. While we were not fully remote prior to the pandemic, the framework was already there and being used. Once our offices were told to stay remote, we began to make sure our services were redundant between data centers. A single failure could disconnect our users. We had to ensure the services people used on-prem were available to all. It led to many meetings, change requests, and work. In the end it made the business stronger. These are the opportunities where IT needs to take to come up with solutions that the business can latch on to. How can you help the business adjust? 2020 has opened the eyes of many business globally. Remote work was something that many businesses did not subscribe to or did not know how. Today we are finding out that we can run at the same pace if not faster remotely. As a network engineer, unless I need to physically touch something, I can do my work from anywhere in the world. Being remote has not only extended our network’s reach, it has also placed our focus on security. With people not centralized in offices behind firewalls and other protections, teams have had to figure out how to secure those users while they are at home. A user sitting at home might be a bit more comfortable and let their guard down. Security training, endpoint protection, multi-factor authentication and DNS security existed, but now they really needed to be paid attention to. Things might eventually go back to normal or they might not. No matter what your business decides to do, be prepared to adjust and provide those needed solutions.
Your guess is as good as mine for what next year will bring. 2020 has been one for the books. One that none of us will easily forget. However, no matter what happens next year always be prepared to adjust. Things can change in minutes and how you react matters. There is value in adjustment.
Standing at the bottom of the mountain looking up is where I find myself yet again.
I joined the Air National Guard full-time in the summer of 2018, 36 years old and beginning what is my 4th, 5th or 6th career or life stage so to speak. Getting back into IT wasn’t something I planned on, instead, I found myself at a pretty ‘OK’ job with benefits going into my mid 30s but not really gaining any transferable skills if I were to lose said job.
Starting as a 3d1x1, or in regular type talk, I was a generalist help-desk person. If you can’t get your email to load, send or save you called my office. If a certain website isn’t loading to your liking, you call my office. If you can’t access a certain file, you contact my office. Basically, if anything doesn’t work to what you’d expect my office would be the first to hear about it. This was my introduction back into IT, and to be quite honest, it was a nice way to be eased back in. I got to see and diagnose a wide variety of issues and learned who did what beyond my scope of responsibilities.
Before long, I started studying networking during my off time. It all started by attending a Cisco CCNA Security Cohort training. This training also came with an ICND1 and CCNA Security exam voucher. I was once CCNA certified way back in 2002 so a lot of old neurons began reconnecting and I was able to make gains rather quickly. In 2019, I cleared CCNA Security, Cloud and Routing & Switching. I moved to Junos and cleared JNCIA Junos, DevOps, Design and Cloud. I did a bunch of other training but nothing that lead to clearing any more certifications yet most importantly, my confidence was starting to grow.
A job opportunity opened up in my organizations infrastructure shop as a 3d1x2 in late 2019 and after a short interview process I was added to the team. Due to being short staffed I worked in both my previous position and my new position for months before being allowed to fully relocate. I got to do a whole bunch of new things, such as, racking and stacking equipment, running cables and on-box troubleshooting/configuration. This was a very fun and welcomed change of pace and yet another opportunity presented itself, a position on my organizations Mission Defense Team. I started on this team, albeit remotely for the most part, about 10 weeks ago.
It is here where I find myself in what feels like the bottom of the mountain again. The Mission Defense Team is a new type of position/shop being developed within the Air Force providing everything a ‘Security Operations Center’ would do. I’m to stand up this shop with five other individuals, of which, most have never been security analysts up to this point. So the task is a large one. We have our equipment but have a lot to learn to truly harness our equipments capabilities.
Where to Start?
There is soooooooo much more to learn to feel like i’m even at the ground level of where I need to be. I read one post that laid out a four year learning plan. Since starting, another thought that continually enters my head is: How does someone jump straight into security. I know security is a ‘hot job’ and what not so a lot of people are going after that money but I can’t for the life of me understand how some ‘starts’ with security. There is so much ground work to be done. In short, it seems like to be proficient, you have to be pretty good at all the things.
Since I’ve been somewhat tied to learning a lot of Cisco due to being on their e-learning platform, I went through their CyberOps Associate training. I found this training to be a great introduction to a Security Operations Center and thought the labs shined as they were the best part and key to learning the basic principles presented.
– I’ve made it through the first 2 chapters and I really love this book. A lot of the first two chapters was review but the way it was presented with just the slight bits of humer was delightful.
– I made it to chapter 6 of this book and it was at this point I switched to reading the book just previously discussed. The fact that I switched books doesn’t mean this book is ‘bad’ and I will come back to tackle this one! This book is a bit more advanced and you can really just take your time going through a good three paragraphs as you go on and read all the linked to references.
Where to Go?
This is quite possibly the most important question. I’m always tinkering with my ‘study plan’ and how I should go about sharpening my toolset. My work is going to put me through a SANS course, specifically SEC503 which should take up most of my time.
Besides that, I’ve started trying to follow and locate different ‘InfoSec’ people on the InterWebs. Most notably, I’ve started watching a few YouTube video’s on the Cyber Mentor’s page.
What I’d really like to know, and the purpose of this post, is to ask you, the reader, what do you think I NEED to study/do as a person just getting into this security domain? If you have any suggestions, feel free to hit me up on the twitter and let me know. I plan to keep posting along this journey and let you know what mile posts are in the rearview. Till next time!
We are super excited to announce that we’ve been named a finalist in the 2020 Cisco IT Blog Awards, for the category Best Podcast or Video Series!
So what happens now? We need your help to vote for your favorite video series or podcast! To vote go here: https://www.ciscofeedback.vovici.com/se/705E3ECD2A8D7180 and vote for your favorites! If you love what we’re doing we would really appreciate your vote!
Winners will be announced in early 2021!
We are so honored for this nomination! In our inaugural year to recieve this kind of recognition is truly amazing! We’ve only been doing this for 6 months! In that 6 months we’ve interviewed some truly amazing people in our industry, we’ve achieved more 26,000 downloads of our podcast, and obtained a listenership of 1000+ clearly devoted subscribers of our podcast. Thank you so much for following, listening, and showing your love for us on social media. All the comments and emails keep us motivated to create new episodes and keep the content coming!
In other categories you’ll find some people you recognize. For the category of Best Cert Journey you’ll find our very own creator/co-host A.J. Murray’s blog, NoBlinkyBlinky! Along side him in that category is recent AONE guest, YouTuber, and CBT Nuggets Trainer – Knox Hutchinson!
In the category of Most Inspirational you’ll find AONE guest author, blogger, Faces of the Journey member David Alicea!
Also featured in the category of Best New Comer – IAATJ Discord staffer, DevNet celebrity, and everybody’s favorite Butcher turned Network Engineer – Chris Dedman-Rollet!
So, as you can see the competition is fierce, and there’s a lot of faces we recognize on this ballot. Please do your part and vote for your favorites today!
“Faces of the Journey” is a series that highlights individuals in the network engineering community. The journey is the path we take through our careers, and it can be very different for each of us. While the destination is important, it’s all about the journey!
Carl F. Zellers IV (NO_DTP) was featured on Episode 18 of the Art of Network Engineering podcast. If you follow Carl on Twitter, or interact with him in the It’s All About the Journey Discord community, you would probably think that he has been a network engineer since before he learned to walk. However, IT/network engineering was not Carl’s first career path. After high school, he pursued general education and vocational studies at a local community college. Carl started to feel like a career student, and ended up finishing with an associate’s degree in construction management. He also completed several certificate programs in the same general field of study. While in school, Carl was working for FedEx Express, experiencing corporate structure and many other real-world realities. He felt comfortable with the long term promise he had with the company, but ultimately felt the need for a bachelor’s degree to round it all out. While Carl didn’t feel the bachelor’s degree was necessarily required, it was part of his personal plan. Then, in 2011, a good friend was finishing up a computer science degree and got Carl interested in IT. So naturally, he headed back to school to investigate the opportunities. Three years later, with his AS degree in hand, he found himself leaving a significant opportunity on the table at FedEx to take an entry level managed security services role. This was a very scary move for multiple reasons, but he knew it was the right move, and has never looked back. Then, in 2017, Carl finished up his BS degree. Through his first six years in IT, he has rarely (if ever) said “no” to an opportunity or shied away from something that he knew he could learn from. Carl is now a Senior Solutions Engineer and really enjoys his work and pace of life and study. He gets to be involved in new and emerging technologies as well as work on a wide portfolio of products and platforms. He is a self-proclaimed “lifelong learner” and embraces that as a self-fulfilling (and never-ending) goal.
What did you want to be when you “grew up”? Age 9 – A pirate. Age 16 – Totally unsure. Age 18 – Still not sure, but I was aware of how I would approach my future, and that was simply “hard work”. That was the plan no matter the application. Age 23 – Career FedEx employee. Age 26 – In “IT”. I was beginning my journey into IT and didn’t know the job landscape > titles, roles, responsibilities, specializations, etc.
What advice do you have for aspiring IT professionals? Don’t neglect the soft skills. You’re a human being and as such be fluid, flexible, and know how to effectively deliver information to a diverse set of people. You can add so much value to your junior team members, colleagues, seniors, managers and beyond simply by building your ‘best self’. Timely/effective communications, willingness to accept/admit faults, and common courtesies are all a massive part of who you aim to become personally and professionally.
How did you figure out that information technology was the best career path for you? I spent a good deal of time, effort and energy applying my strengths to various disciplines. I’ve always been very good with ‘how things work’. I decided that once I thought IT would be a good fit for me, I enrolled in some courses at my local community college and happened to fall into a networking centric program. In taking these classes, I realized very early on that I really liked networking and was the perfect “work smarter, not harder” type scenario.
What is your strongest “on the job” skill? Critical thinking. Although not specific to IT, it’s my opinion that critical thinking is of the utmost importance, especially in IT. It might translate to the most efficient way to go about a process, or a calculated approach to troubleshooting. The ability to think critically in a myriad of situations is generally what I would attribute most of my successes to both personally and professionally. A great tool/methodology that ultimately, I use as a loose framework for how I approach a situation or absorb advise, just to name a few examples.
What motivates you on a daily basis? I got into IT “late” (at 29 years old). The reason for that is prior to getting into IT, I still wasn’t 100% sure what I wanted to do career wise. Because I was essentially starting my career over at a “later” age, I always felt I needed to keep a pretty aggressive pace in my development. Looking back, I’m glad I did, however that feeling of wanting to continue to learn and experience new challenges has never left me. I value and embrace all that I have learned so far and humbly accept the vast expanse of what is yet to come. I really love learning and contributing which keeps me on a steady trajectory of growth, and in doing inevitably exposes new opportunities!
Bert’s Brief
Carl has quickly become an absolute legend in the network engineering community. His drive for continuous learning and development is truly inspiring. Very often, when scrolling through the Twitter feed, I see Carl answering quiz questions from people around networking topics. As stated in the bio above, he doesn’t shy away from challenges and has a skill for either knowing or being able to figure out how things work, which are incredible qualities for a network engineer to possess. Not only is Carl dedicated to his career and constant education, he is also dedicated to the community. He is often providing insight and assistance in the It’s All About the Journey Discord channels. I remember shortly after I joined the community on Discord, one of the members had questions around a scenario they were facing. Carl got involved by asking questions and providing suggestions and advice immediately. In fact, the conversation went back and forth, on and off, for the better part of a day and Carl stayed engaged with it. I thought that was so cool to see and is a prototypical example of “community”, and the value that Carl provides. His episode on the AONE podcast is one of my favorites to date. Before listening to that episode, in my head, Carl was this network engineering machine that just never turned “it” off and was always in a book or a lab environment outside of work. That’s really not him, though. Yes he is dedicated, yes he works hard, but is also a proponent of the fact that we are all human and need to find the best habits that work for us. We don’t have to be “go, go, go” all of the time to be successful. I really needed to hear that episode. Anyway, if you haven’t already, get to know Carl F. Zellers IV. You will not regret it.
I imagine if you’re here you just got done with a hellacious week of updating 100’s of switches, 1000’s of config directives, or your fingers are bleeding from hammering away all week. However, you may just very well be more proactive than I was. Automation for me was born out of necessity. Without automation, I think I would have burned out. It’s simple, automation makes my job easier, more rewarding, and manageable. If you’ve decided automation is something you want to learn then this article is for you. I wish this article was the first one I read when I started my journey into DevOps, and subsequently NetDevOps.
First Steps
The first thing I would be deciding on is what is the problem to solve? Next, you need to decide on, what outcome you’d like. For me, it was helping to manage a VMware environment and the array of VM’s within it. It could be as simple as you want to set up a web server in your home lab and that’s alright. Once you start understanding the concepts of automation you’ll see 100’s opportunities to use it.
Now it’s time for you to sink your teeth into the tech, my favorite part. The first three things I would focus on is YAML( YAML Ain’t Markup Language ), Jinja, and Ansible. The first two are large components of Ansible. Therefore will be needed in almost any Ansible Project. YAML is what you’ll use to tell Ansible what to do. However, don’t fear this does not require any software development experience. Here is a brief example of YAML in an ansible-playbook.
- name: Install the latest version of Apache
  yum:
    name: httpd
    state: latest
As you can figure out from the name, this will install the latest version of Apache. It really is that simple, you’re now automating.
Now continuing the example of installing Apache, the next step is configuration. Similarly, we have another tool that can help, Jinja2. With Jinja2 we have a powerful templating engine. In addition here is an example of Jinja for configuring the Apache configuration.
NameVirtualHost *:80
{% for vhost in apache_vhost %}
<VirtualHost *:80>
ServerName {{ vhost.servername }}
DocumentRoot {{ vhost.documentroot }}
{% if vhost.serveradmin is defined %}
ServerAdmin {{ vhost.serveradmin }}
{% endif %}
<Directory "{{ vhost.documentroot }}">
AllowOverride All
Order allow,deny
Allow from all
</Directory>
</VirtualHost>
{% endfor %}
Contained within the double curly brackets {{ }} is the name of a variable. Ansible passes these variables to the Jinja engine and then spits out our completed configuration file for us. As you can see this is not software development and something you can learn.
To help you grasp these concepts I recommend you setup a small lab. I found having an ansible host and 2 nodes under its control was useful. You can create these on Centos 7 hosts using your preferred virtualization platform. In my case, I set up a load balancer with 2 web servers behind it using Ansible only.
Running with it
Once you’re comfortable with the basics you could start implementing this at work. If you’re a network engineer you can start with small things such as updating NTP, DNS, even changing a VLAN on a switchport. Eventually, you can move up to more advanced configurations, generating BGP and OSPF configuration with Jinga and using Netbox as your source of truth for configuration data.
A hurdle you may face when bringing these new found skills to work is buy-in from co-workers/managers. Take these situations in stride. I recommend showing them the small things you’ve automated. In addition, show them the time it’s saved. Explain to them how you learned to do it, and why you think they should.
After tackling some of the simpler things in your network it’s time to move on to some more advanced projects. A task I was highly motivated to automate was the provisioning of resources, in my case VMs, and assigning network resources to it ( vlans, addresses, hostname). This required a bit more than Ansible, enter Terraform. However that is beyond the scope of this article, I did create a Git repo showing a simple version of this you can check out. You may also find you like the concepts of NetDevOps so much that you’ll want to implement IaC ( infrastructure as code) to manage your entire network. This offers many benefits beyond simply automation. It allows you to implement development and QA environments for testing changes.
Final Thoughts
I’d like to leave you with some of the final tips, tools, and general advice I’ve gained. Here is a very non-comprehensive list of tools and resources I’ve found that I use quite often if not daily.
Validyaml – A CLI tool for validating your YAML files
Jinja2-CLI – A CLI tool for validating your Jinja templates and checking the outcome is as expected.
Ansible Template Tester – Similar to Jinja2-CLI, just in the browser, sometimes easier to see formatting errors on output.
Ansible Docs – Self-explanatory, but this tab is almost always open in my browser.
One of the most important tips I can provide is to find a good community to ask questions. Getting feedback from how others are doing things is important especially with tools such as Ansible. It is a community-driven project that means there are some really smart people willing to help. Most importantly is enjoy the journey, it takes time, it will be frustrating, but you’ll get there. Enjoy the benefits when you do!
Recently I saw a post where different network engineers I really respect gave advice for new network engineers and it got me thinking. What would my own rules be, if I were trying to hand down some wisdom (as if I were wise) to someone starting in the field?
Credibility is the most important thing you possess.
More important than knowledge, connections, recognition and fame. Knowledge, connections, recognition and fame can be gained, lost, and regained. Credibility is a one-use item. Once lost, it is gone forever.
Own every mistake, no matter how stupid, no matter how large.
Even if it means getting fired. The truth always comes out, somewhere things are logged, evidence can be correlated, etc. A mistake is a mistake and can be forgiven or at least understood. Hiding it, covering it up, and denying it will damage your career far more than a human error ever would. This industry is smaller than you think, you don’t want that reputation to follow you.
Trust but verify.
If the sysadmin says the DHCP server is ‘having issues’, if the DBA says the database replication is ‘running slow’, if the infosec guy says there are strange traffic patterns, trust their expertise as you expect them to trust yours. Don’t be in such a hurry to push them away so you can get back to your own work. Be methodical. Take the extra time. If you give a noncommittal ‘No one else is having problems’ all you’ve done is ensure that person will be back with potentially useless evidence in five minutes, or worse, a critical incident is opened and it might be the network after all. Tell them what you need to further investigate, help them help you prove it’s not the network.
When there’s a fire, be the firefighter, not the police.
In places with very punitive leadership, often a critical incident is less about restoring services than it is about clearing yourself as a suspect. If the hot potato is yours, there’s no point trying to hand it off, so don’t waste time. Similarly, when another team is desperately trying to blame you to save themselves, don’t panic. The root cause is the root cause already, it’s not going to change. Get services restored. Investigation comes later. By the time you are working on a critical incident it’s too late to panic about whether or not it’s the network. Above all, remember Rule #1 and Rule #2.
Wireshark doesn’t lie.
No matter what strange things are happening, no matter how much it seems to be the network causing a problem, get a packet capture. I once implemented DHCP snooping and the next day DHCP was failing everywhere. After a Wireshark capture, it was proven to be an infosec security scanning application that locked the DHCP database on a Windows server so no new leases could be recorded. Wireshark showed the NACKs from the DHCP server rescinding the leases because it was unable to record the lease in the database. Critical incident root cause determined, not the network even though all the ‘evidence’ pointed that way. Get a packet capture.
When you are proven right, don’t be a jerk about it.
Everybody gets to ride the Right and Wrong carousel from time to time. Your coworkers will appreciate the humility and understanding, and you’ll strengthen bonds instead of cutting them. There’s rarely a prize for being right, but there’s always one for being a jerk about it. Hint: It’s not a prize you want.
When you are proven wrong, don’t be a jerk about it.
Don’t make up excuses for it. Don’t blame others (even if you believe others are to blame). It’s not a good look. If someone throws you under the bus, that will come out later when they do it to another. Guard your credibility. Everyone is wrong eventually, but how you act when wrong is how people will remember you.
There’s no such thing as being irreplaceable.
Don’t hoard knowledge and don’t try to become Brent from the Phoenix Project. If Brent had been a cantankerous ass who refused to train anyone, he would have been a liability, not irreplaceable. In short: Job security is in sharing what you know and helping the team succeed, not in being the only one with the keys to the kingdom. Someone like that is a threat to an organization, not an asset, and they will be dealt with eventually.
Automation isn’t the cure for human error.
It can minimize the occurrence, but make the blast radius global. Say it once more, with feeling. Automation allows you to screw up at scale. As the industry embraces network automation, remember that without understanding networking, how can you trust what you are automating?
Expertise is the result of experience.
All experience is useful. I’ve learned a lot from labs, from production, consulting, reading, watching videos. I’ve learned more from failure than success. Those who shortcut expertise doom themselves to a career of chicanery. Yes, I’m talking about cheating. Stop a moment and consider the end result of passing a test without the expertise associated. What is the next step, exactly? Will your next job have a dump of their network for you? The sad fate of these people is they tend to bounce from job to job quickly, as their lack of expertise is uncovered. Don’t doom yourself to a career of jumping around as you get discovered as a fraud. It’s far easier to just learn expertise than to fake it.
So, I came up with ten. I could have done far more but that was the idea, 10 essential rules. I’ll present them here, and I’m curious how you feel about them. So curious that I’m actually updating my blog.
“Faces of the Journey” is a series that highlights individuals in the network engineering community. The journey is the path we take through our careers, and it can be very different for each of us. While the destination is important, it’s all about the journey!
Meet Charles!
Charles Uneze (network_charles) is from Nigeria, currently working as a freelance copywriter for an ISP in the western part of the country, in the city of Lagos. Back in 2013, Charles entered university to study agricultural engineering. He had applied for electrical/electronics engineering, but didn’t quite meet the marks for entry. The agricultural engineering program did not feel like a good fit for Charles, but it’s not always often for students who apply for public university to get admitted, so he took the opportunity. Private university can be easier to get into, but the cost was much more than Charles was willing to deal with. After running into some issues, in 2015, Charles made the decision to leave the agricultural engineering program to pursue something he really loved. By then he knew he had a passion for IT, reapplied for that program, and was admitted in 2016. The draw to network engineering came in the form of an IP addressing and subnetting class one semester in university. The interest only grew as Charles found like minded people on social media. He even found a Cisco Netacad instructor in the same city as him! Charles is striving to become a network automation engineer.
What advice do you have for aspiring IT professionals? IT is an intricate field where sub-fields are complicated, mixed up, and shiny. I will recommend they visit www.cybrary.it and watch a free course titled “Introduction to IT & Cybersecurity.” The course speaks about fields like System Administration, Network Engineering, Penetration Testing, etc. After they have found the field which suits their personality, it may feel like suffering when they see the books to read because they are stepping into a strong current. I want them to understand that no heart suffers when it goes in search of its dreams, because every second of the search is a second’s encounter with God and eternity. COURAGE IS ESSENTIAL.
What is something you enjoy to do outside of work? I watch a lot of movies. I’m currently watching a new drama series called “We Are Who We Are”. Everyone in the series is still figuring out who they are by testing boundaries. Aside from movies, I enjoy playing board games like Scrabble or strolling to clear my head at the beach.
Charles and his sister.
What is the next big thing that you are working toward? The next big thing I am working towards is improving my Python, Linux, and Git skills. Currently, the big thing I am working on is understanding Computer Networking Technology via the CCNA certification. If I combine that knowledge with Python, Linux, and Git, my Infrastructure as a Code skill will be ripe to dive into certifications like Cisco DevNet without stress.
When learning something new, what methods work best for you? First, I make a list of things to be done, to avoid being misled/distracted by another shiny task. Next, I read a chapter and make highlights of new things I have learned. Then, I buy a full 60 leaves notebook where I write down summaries of highlighted texts from the book. Lastly, I lab it up, over and over again until I am comfortable with the concept. Often, I also blog about the extremely difficult topics which stress me. Blogging about it also feels like a second note taking to me, because I refine again how I have previously written the concept.
What motivates you on a daily basis? I don’t want to be imprisoned in my immediate world and get stuck with a daily routine of having the same kind of conversations with friends around me. I want to expand my mind and nurture this gift God has given to me. Also as the first son of my family, I have to carry others along and provide for their needs when it is required. So I must work hard and smart.
Bert’s Brief
It’s always a fun conversation with Charles. He is very active in the “It’s All About the Journey” community and often joins the weekly happy hour chats in the Discord channel as well. I absolutely love the curiosity and enthusiasm from Charles. It’s almost like he comes to conversations prepared with questions to ask and thoughts to share. How he uses blogging as a method of studying and retaining knowledge is creative and incredibly smart. He is a very driven person who is constantly chasing his passion. If you ever get a chance to have a conversation with Charles, I strongly recommend it. I cannot wait to hear what is next for Charles!
The Art of Network Engineering
We tell the stories behind network engineering so every engineer feels seen, supported, and inspired to grow in a rapidly changing industry.